The main goal of choosing an Authentication Protocol is to avoid the heavy lifting on development side and to make it easy on the API users with regards to consuming APIs. With OAuth2, the user authenticates as a virtual user with the same credentials they normally use to access the web app. Many developers will find that with OAuth2, their application security will be strengthened and their workload lightened.
In this tutorial, I'm going to explain how to apply OAuth2 policy (using external provider) for managing clients in Anypoint Platform. OAuth2 is the industry-standard protocol for authorization. It enables applications to get limited access to resources on an HTTP service, such as Facebook, GitHub, Twitter, etc. The framework describes a number of grants for a client application to acquire an access token, which can be used to authenticate a request to an API endpoint.
OAuth2 specification describes five grants for acquiring an access token:
- Authorization code grant
- Implicit grant
- Resource owner credentials grant
- Client credentials grant
- Refresh token grant
For more details, please check the link: https://oauth.net/2/
Before We Start
Mule supports various security policies such as Client ID enforcement, HTTP Basic authentication, Spring Authentication, LDAP security manager, etc. to name a few. Most importantly, it supports OAuth2.
As per Mule documentation, it supports two providers out-of-the box. They are:
- OpenAM versions 11 or 12
- PingFederate
These providers can be configured in the Access Management section of Anypoint Platform. Alternatively, one can use the OAuth 2.0 Access Token Enforcement using External Provider policy to secure an API in Anypoint Platform.
In this article, I am going to describe how to create an OAuth2 External Module with grant type Client credentials and apply the module against a simple API.
Let's Get Our Hands Dirty
Mule documentation provides an example of how to use External OAuth Provider for client authentication; however, the documentation does not fully explain the internal workings of what goes on under the hood. Therefore, in this article, I will try to explain some internal processes as well as mount an External OAuth2 Provider.
The article will be divided into the following parts:
-
-Creating a simple API in API Manager
-
-Implementation of the API and publishing it to Cloudhub
-
-Creating an External OAuth2 Provider
-
-Creating Proxy and Portal for the API as well as applying Security Policy
-
-Testing OAuth2
Creating a Simple API in API Manager
I have created a very simple API named employee (version v1) in the API Manager. The code snippet is as shown below:

Implementing the API and Publishing it to Cloudhub
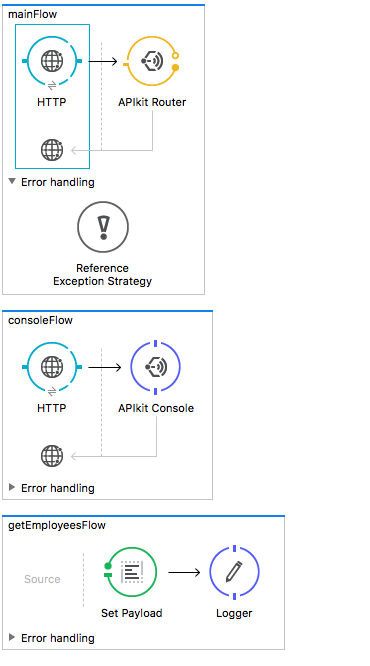
Now, implement the API in a project. I am using the simplest implementation for this article because it's not our main concern. Here is the simple implementation of the API:
As per the implementation, if we hit http://localhost:8081/api/employees we should receive the result in local. Let's suppose that after deploying it to Cloudhub the service is available at: http://employees-service.cloudhub.io/api/employees
Creating the External OAuth2 Provider
This is the most exciting part! Here is the complete source code. The code is extremely simple, but needs some explanation.
How Does Your Application Connect to the API Manager?
Try running any Mule project, and you should observe this log output:
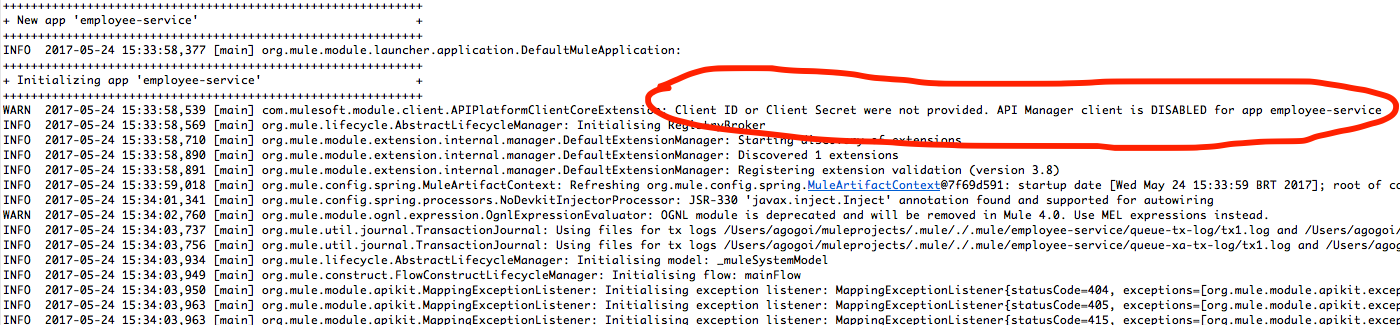
Internally, there is an agent class APIPlatformClientCoreExtension that looks for two property values (client_id and client_secret) to connect to the Anypoint API Manager. So, what are client_id and client_secret? These are simply the credentials of your Anypoint Platfrom.
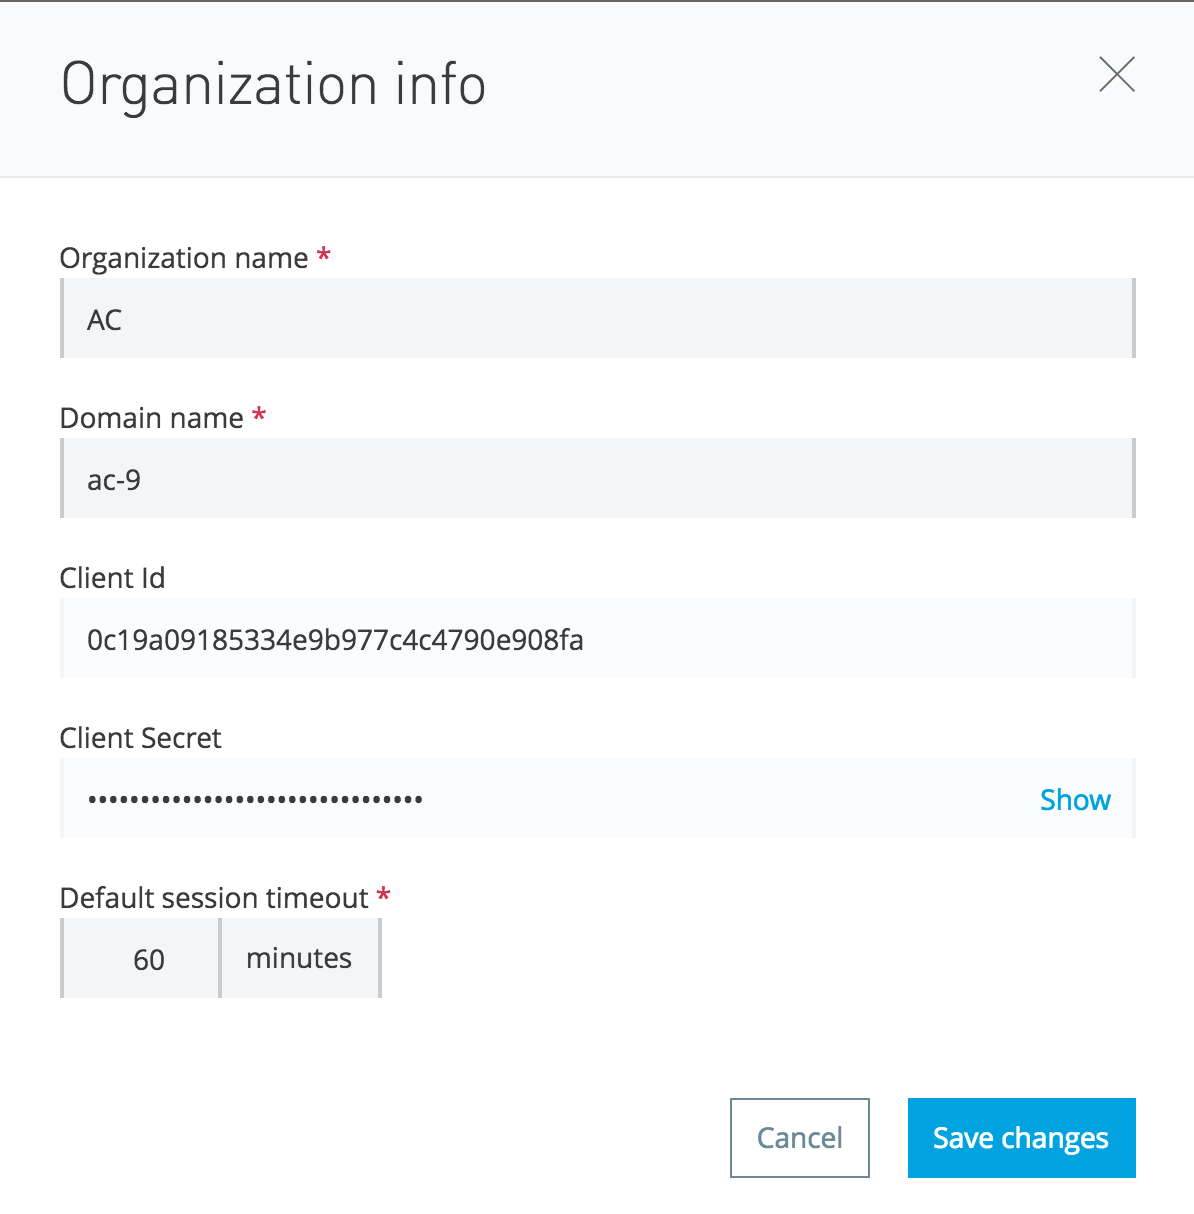
Just browse to the organization link of your Anypoint Platform account, and you should see this infomation:
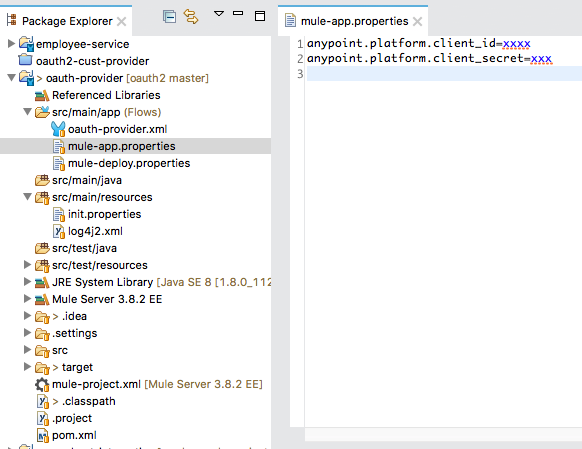
You can provide these credentials in the mule-app.properties of your project as shown below:
That's it! Now run the project and you should see the following logs:

This means that now your application can connect directly to the API Manager. Awesome, right?
How to Create the External OAuth2 Provider
To create an OAuth2 provider, you must have the Enterprise Security module installed in your Anypoint Studio. Please read the first part of this article about how to install the security module and create a maven project in order to use its security components.
The OAuth2 provider that I have created is very simple, as shown below:

The most important part is the configuration of the OAuth provider module:
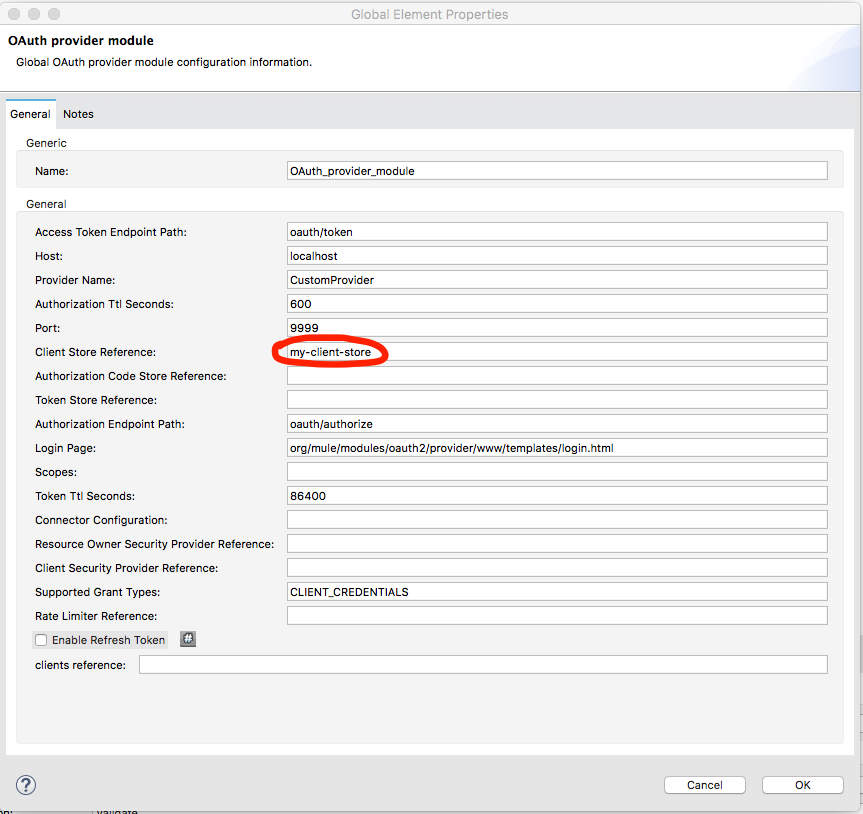
From the diagram, it's clear that the Access token url is oauth/token and Authorization url is oauth/authorize, but is that enough? Of course not! So, what's the complete url for the Access token then? Let's dig into this.
Let's look at the xml configuration:

In the oauth2-provider:config element, we have defined listenerConfig-ref so that it refers to the HTTP listener which is localhost and with the port 8081. So, our Access token url will be:
http://localhost:8081/oauth/token?<params>
(We will go to the params soon!)
You can see that the clientStore-ref element of the oauth2-provider configuration is pointing to:
That's it. It's the simplest External OAuth2 provider.
Test the OAuth2 Provider
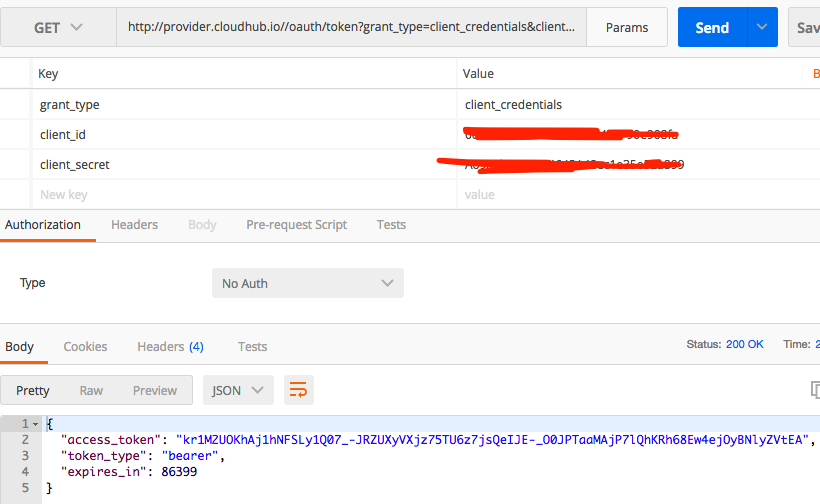
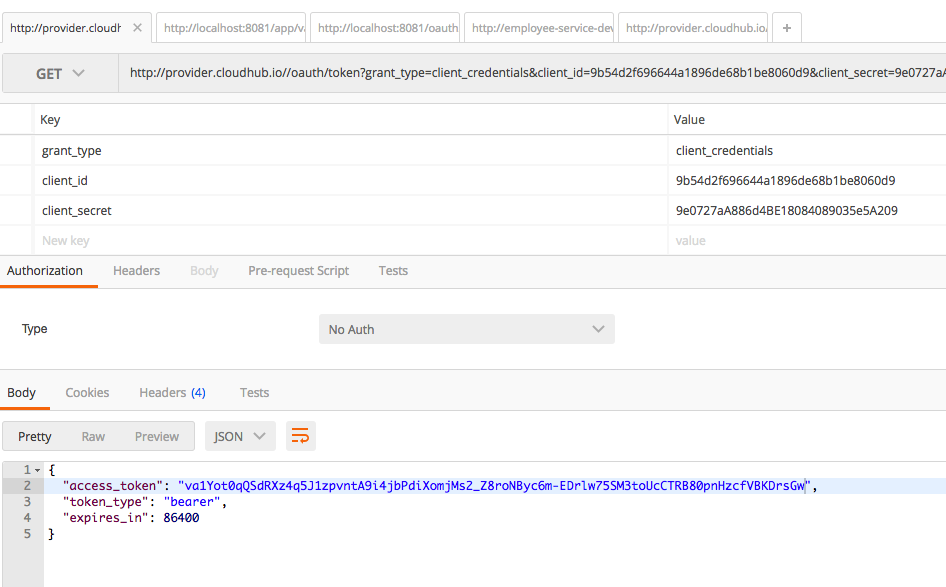
Now let's test our OAuth2 provider. Run the project and in Postman, fire the request with the following request params to http://localhost:8081/oauth/token:
grant_type=client_credentials
client_id=any client_id registered in your Anypoint platform. We simply send our Anypoint Platform client_id.
client_secret=client_secret, related to the client_id, registered in your Anypoint platform. We simply send our Anypoint Platform client_secret.
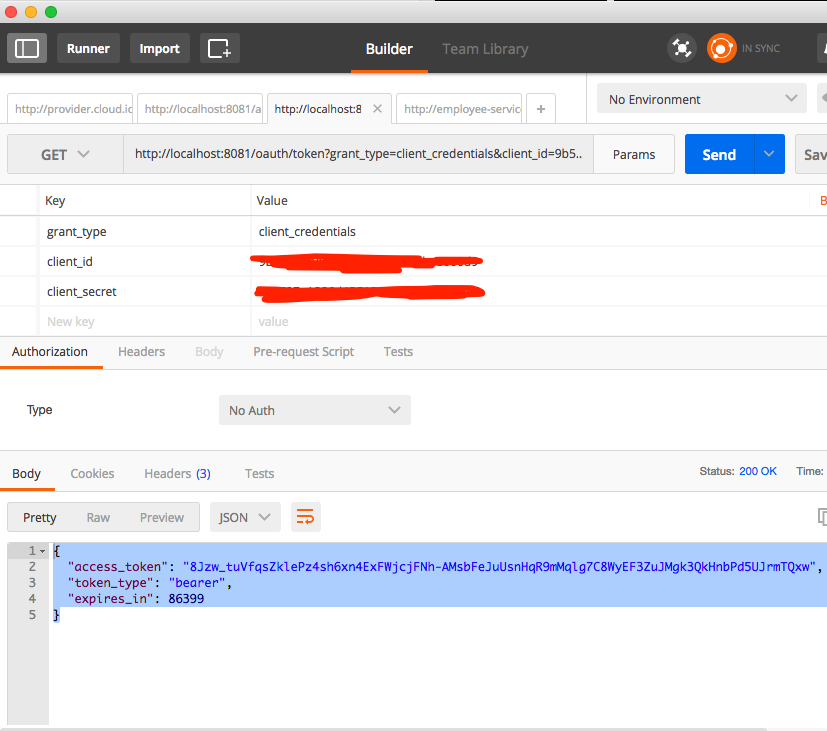
And in return you get the access token. Awesome!
Validate the Access Token
Now let's look into the code again:
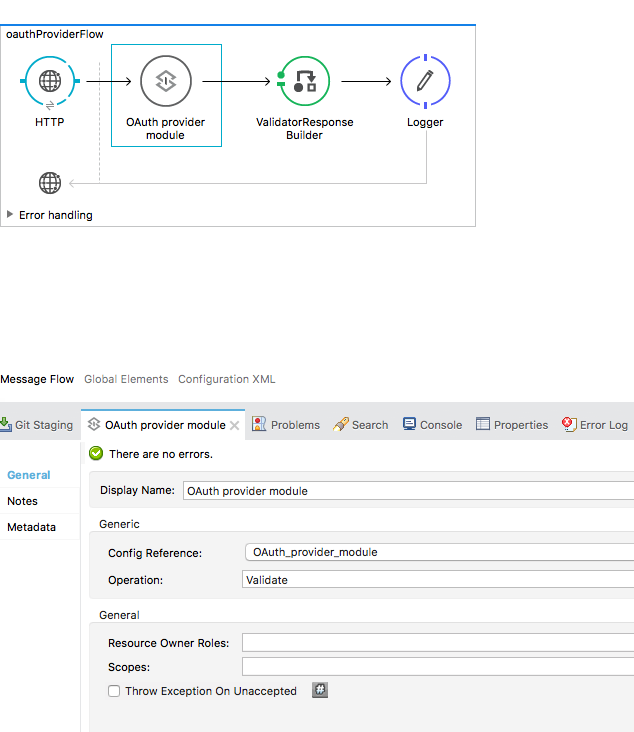
If you look into the Operation of the OAuth2 provider, you can see that we have defined it as Validate. Now, look into the HTTP Listener path:
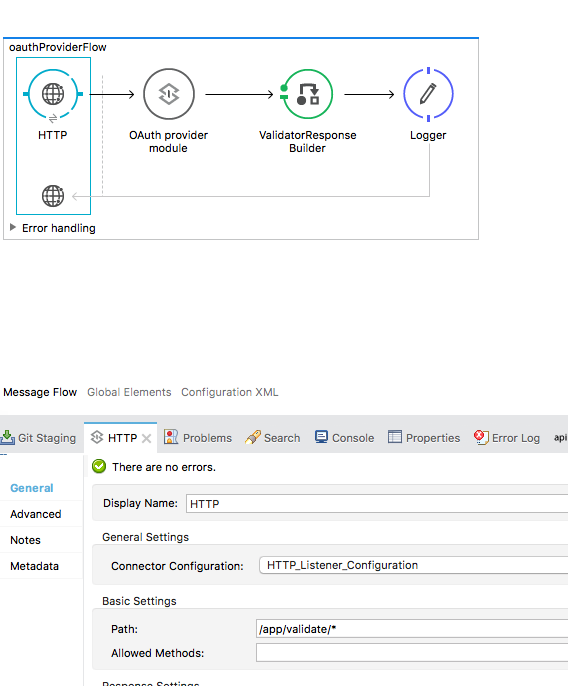
So, to validate the access token retrieved in the previous section we must make a request to:
http://localhost:8081/app/validate?access_token=<access token received>
Here is the response:
This means that our token is valid.
Deploy the Provider in Cloudhub
Now, let's deploy the provider in Cloudhub:
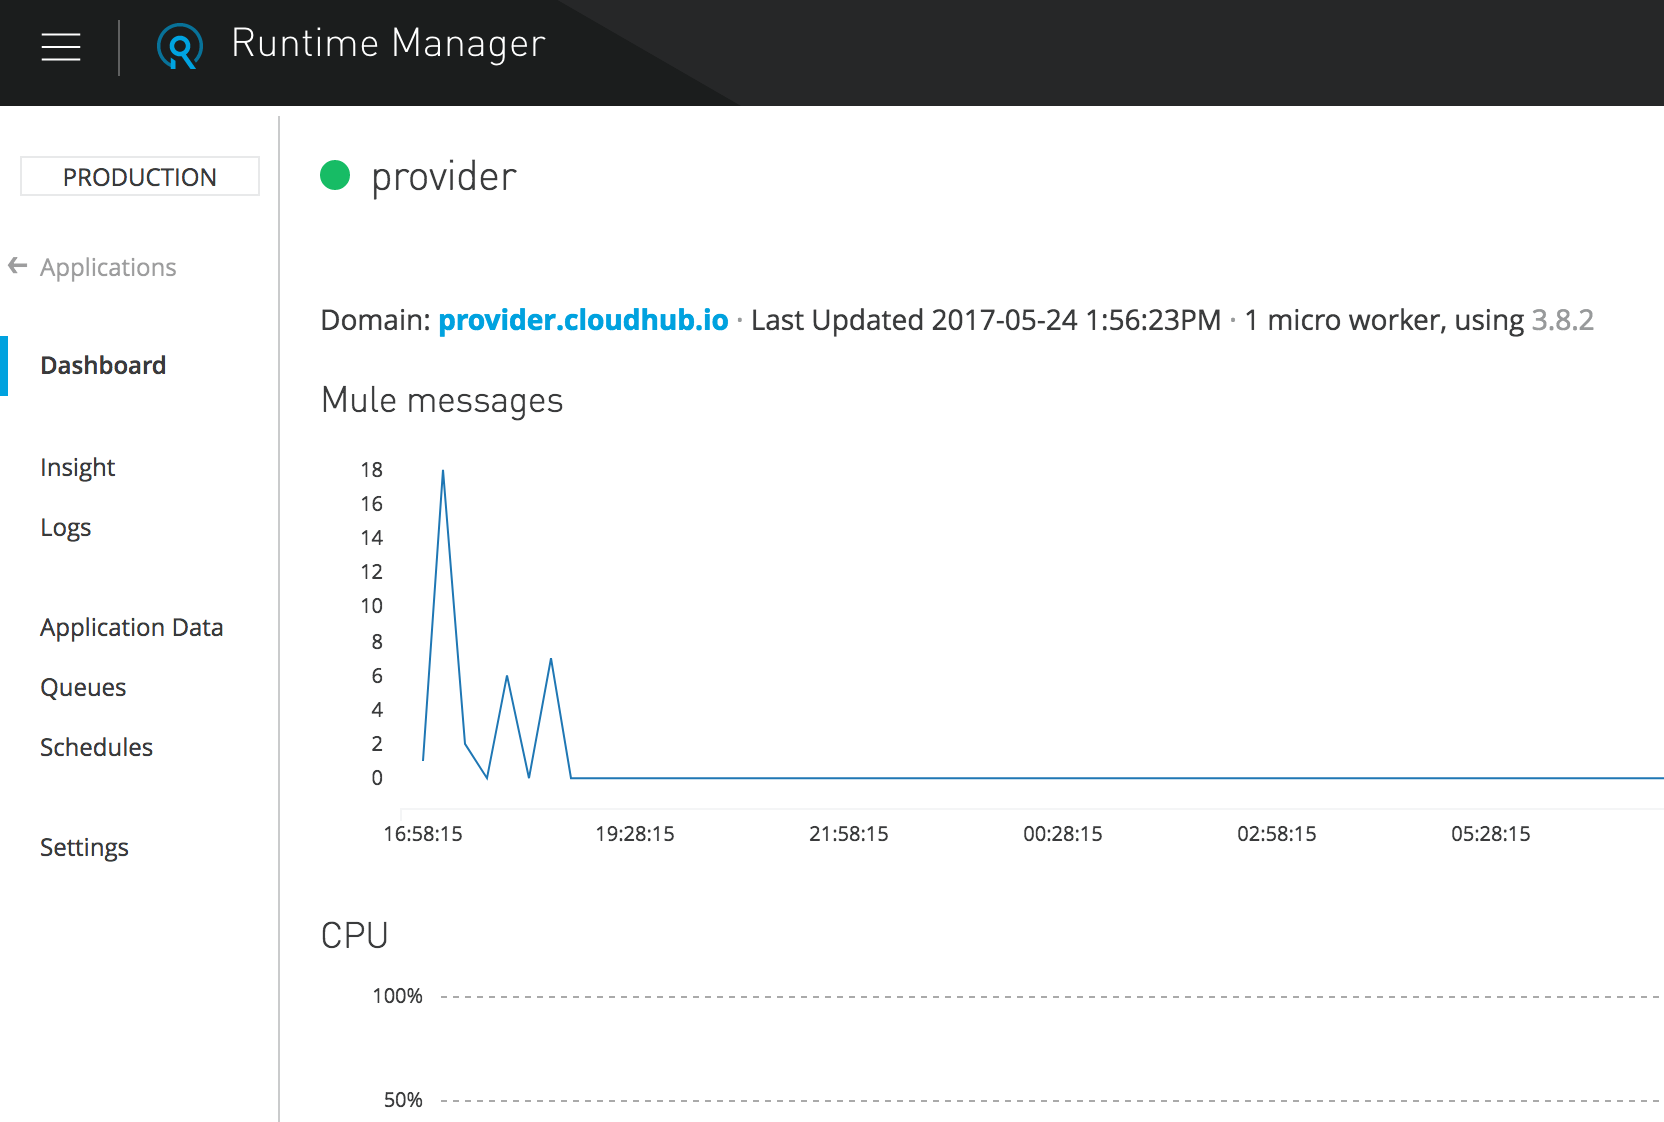
Now, let's fire the same thing to the following url:
That's it! Our Provider is working perfectly, so let's validate the token and fire the request to:
http://provider.cloudhub.io/app/validate?access_token=<obtained in the previous step>
You should get a positive response.
Creating Proxy and Portal for the API and Applying Security Policy
Create Proxy
Once our API definition and implementation are in hand, we can create proxy for the API. Now what is API Proxy ? In short, API Proxy is a layer that sits above our API implementation. It serves as kind of shield to protect our API implementation. Through API Proxy, one can govern the APIs by applying various security policies, SLA tiers, etc. Here's how you can create the API Proxy:
Click your API and its version (employee, v1) so you can see the API Status block. Then, click the configure endpoint link and configure the proxy.
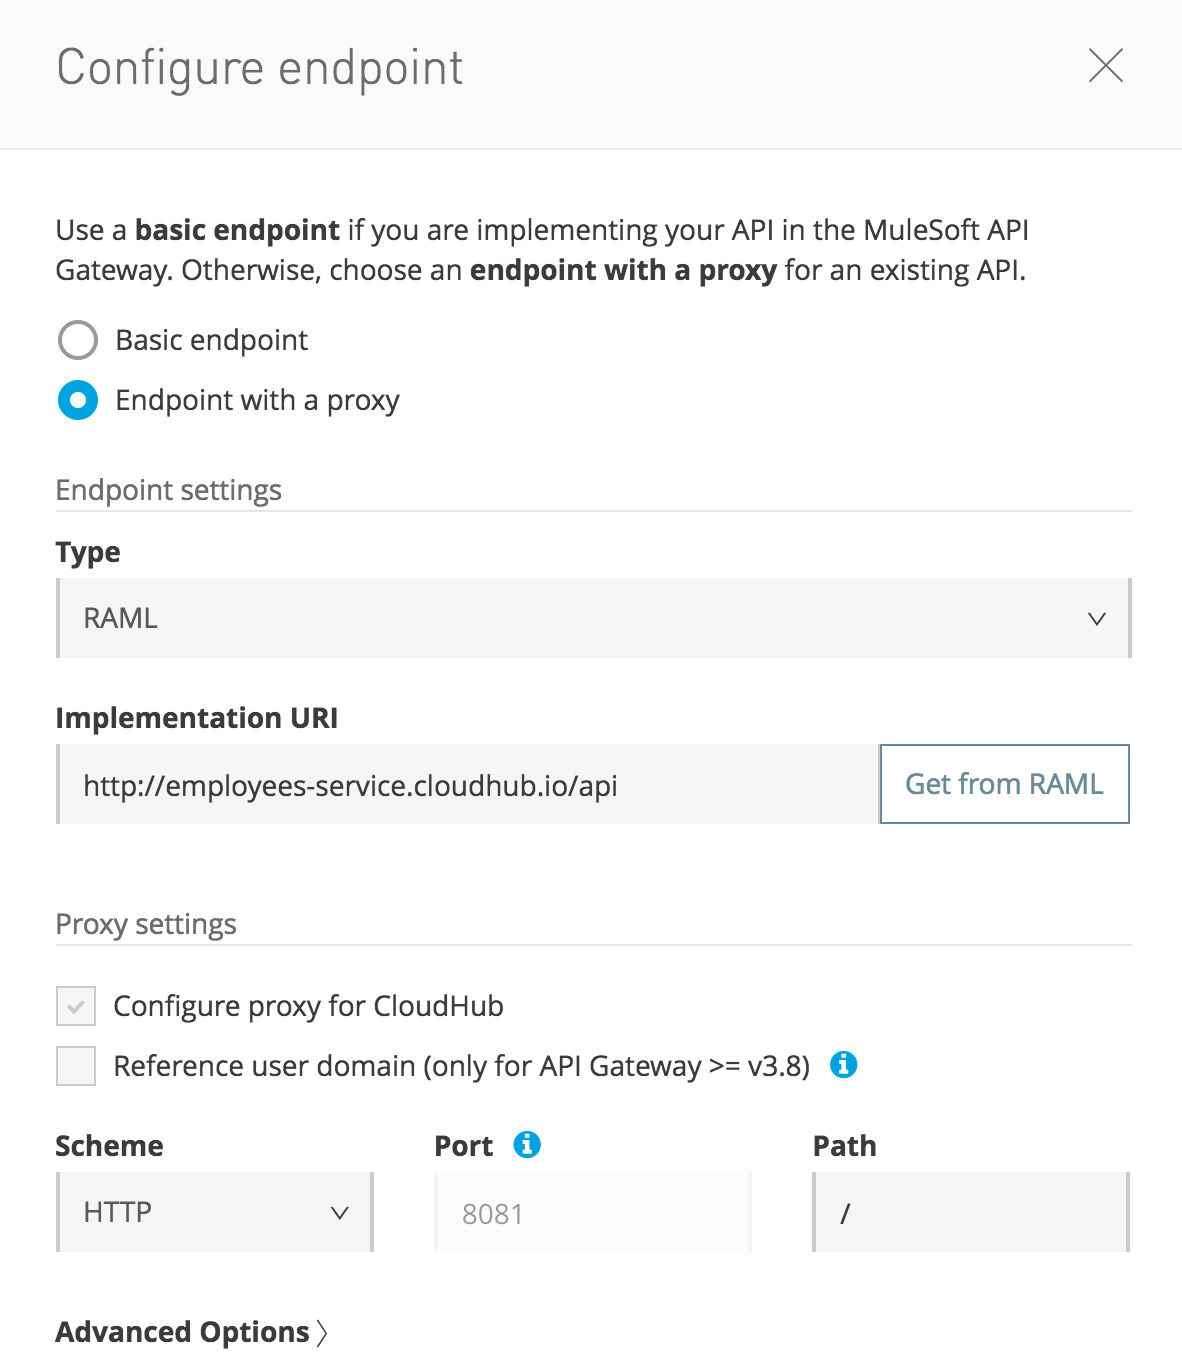
Here, the most important thing is the Implementation URI that you point towards the actual implementation of the API. In our case, it will be http://employees-service.cloudhub.io/api, which we have implemented and deployed in Cloudhub as described in the previous section.
Then configure the proxy:
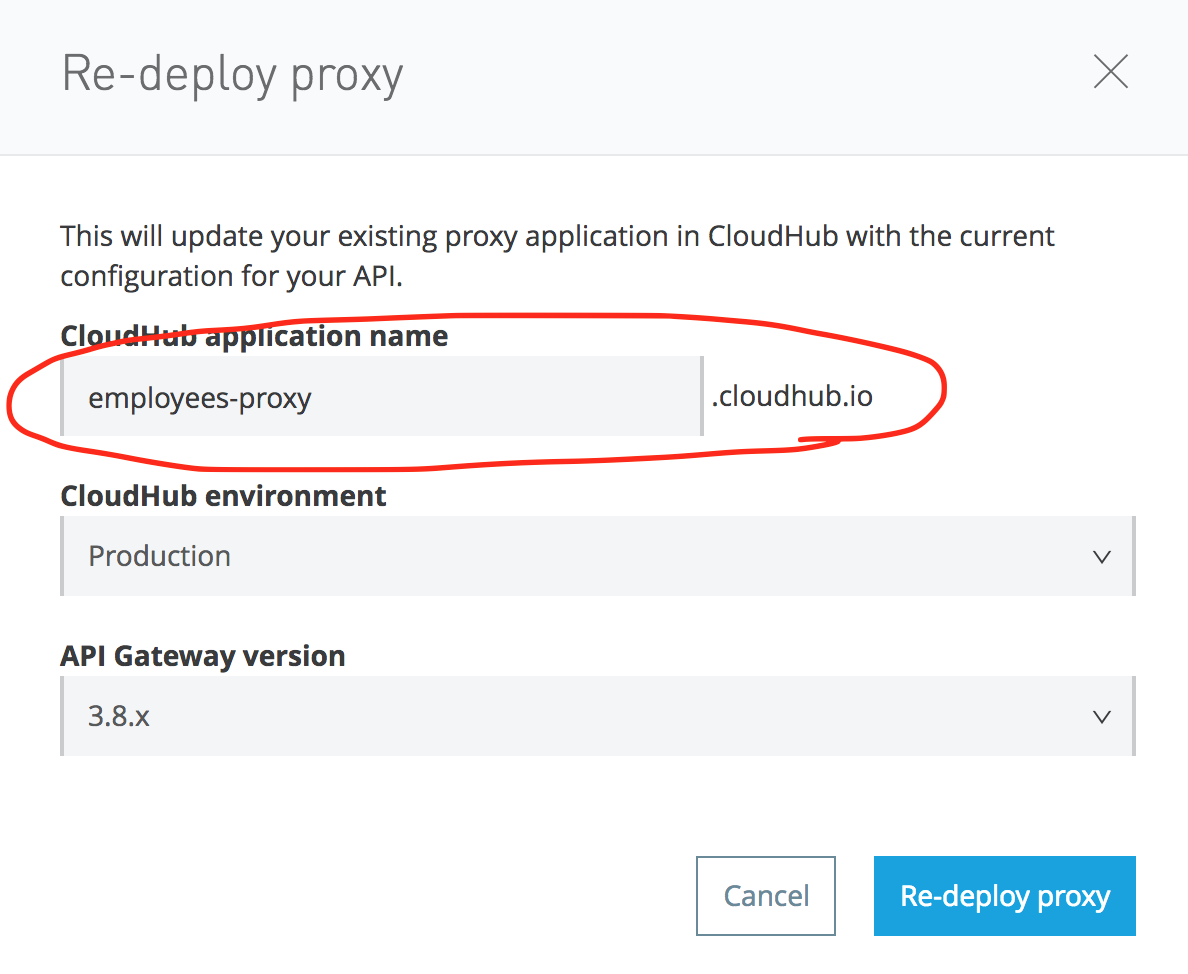
The proxy url will be made public for the users. In our case it is: http://employee-proxy.cloudhub.io/employees.
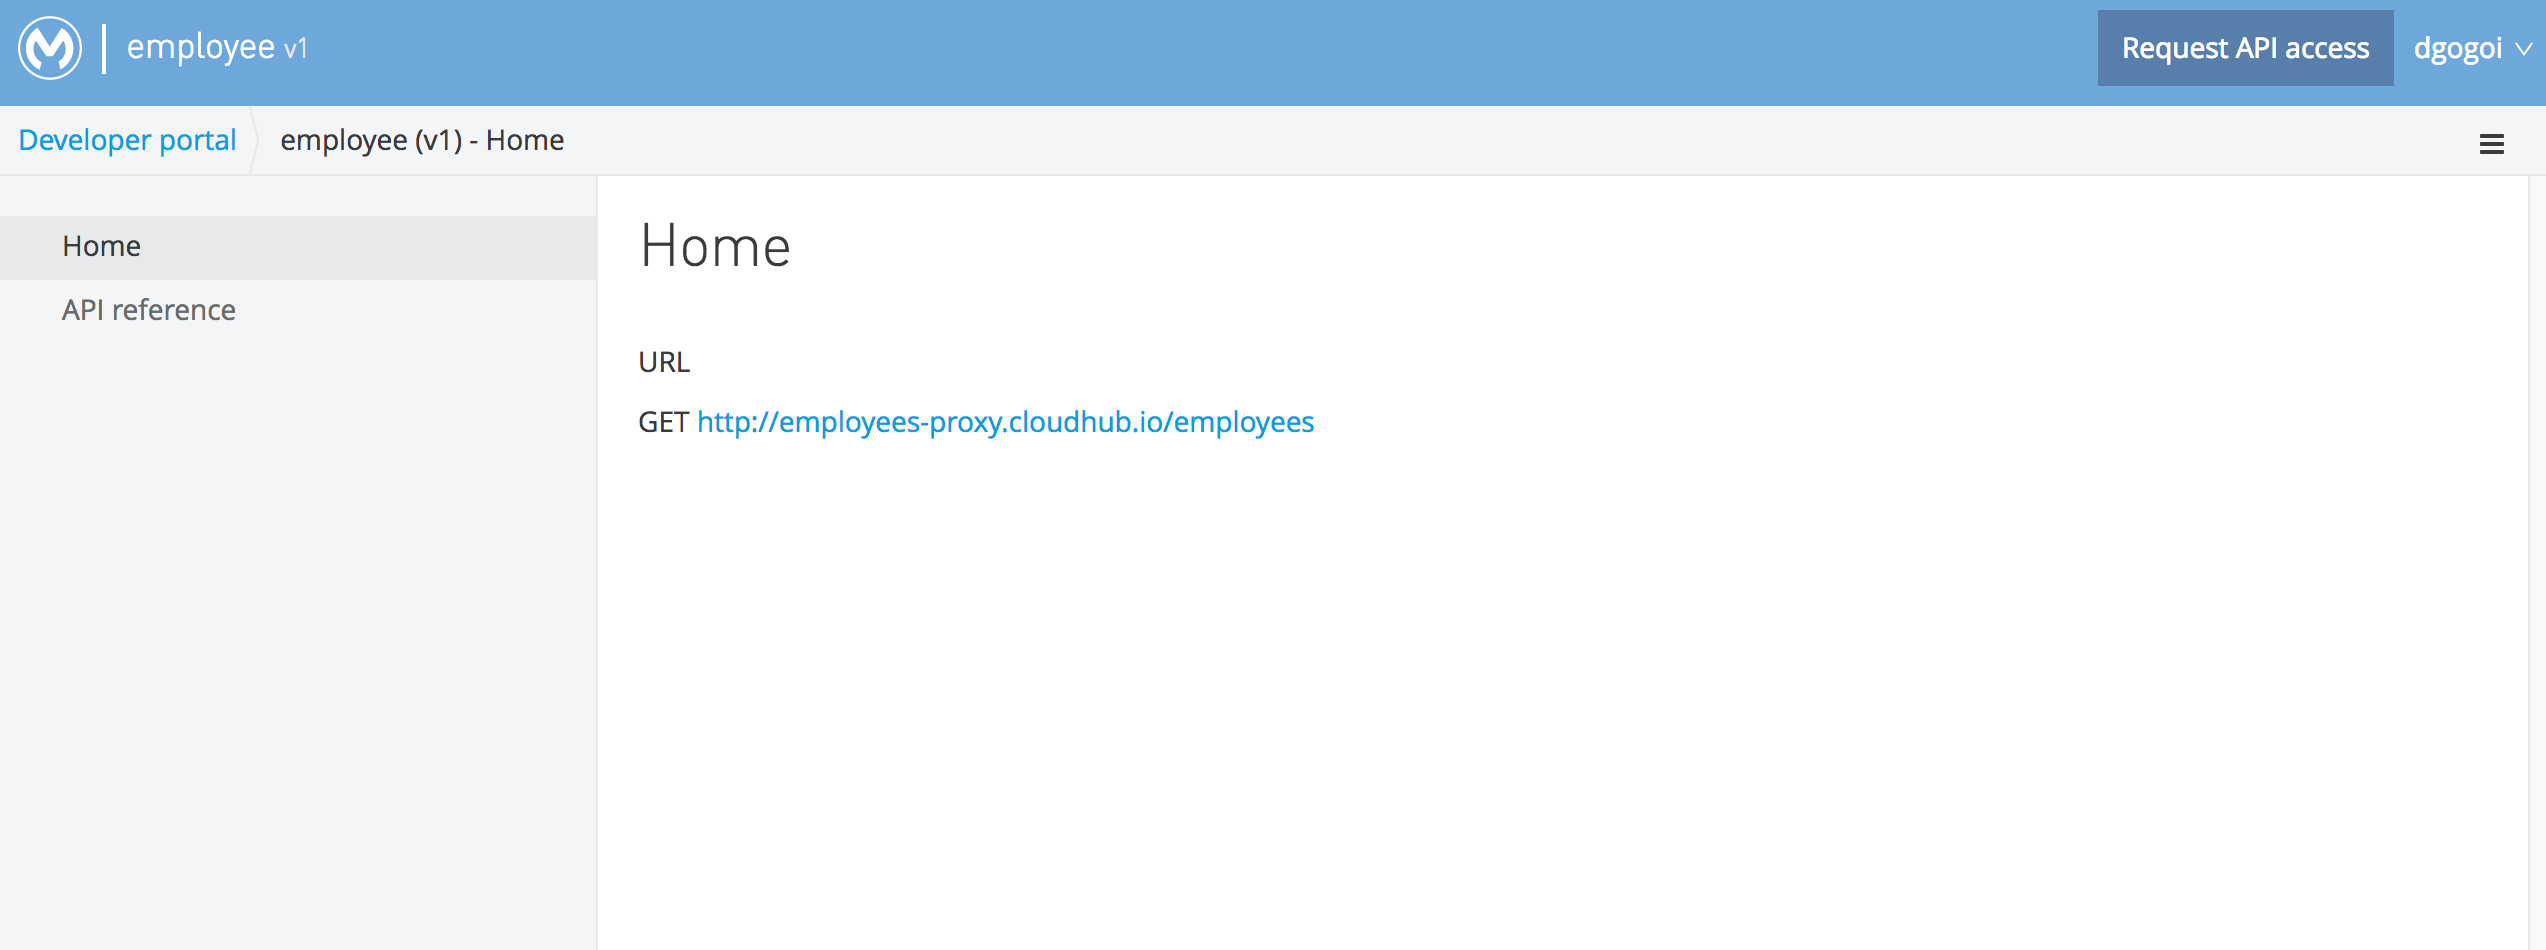
Create Portal
After defining the proxy, let's create a portal for our API. Browse the API, click its version, and create a basic portal. Here is a snapshot of my portal:
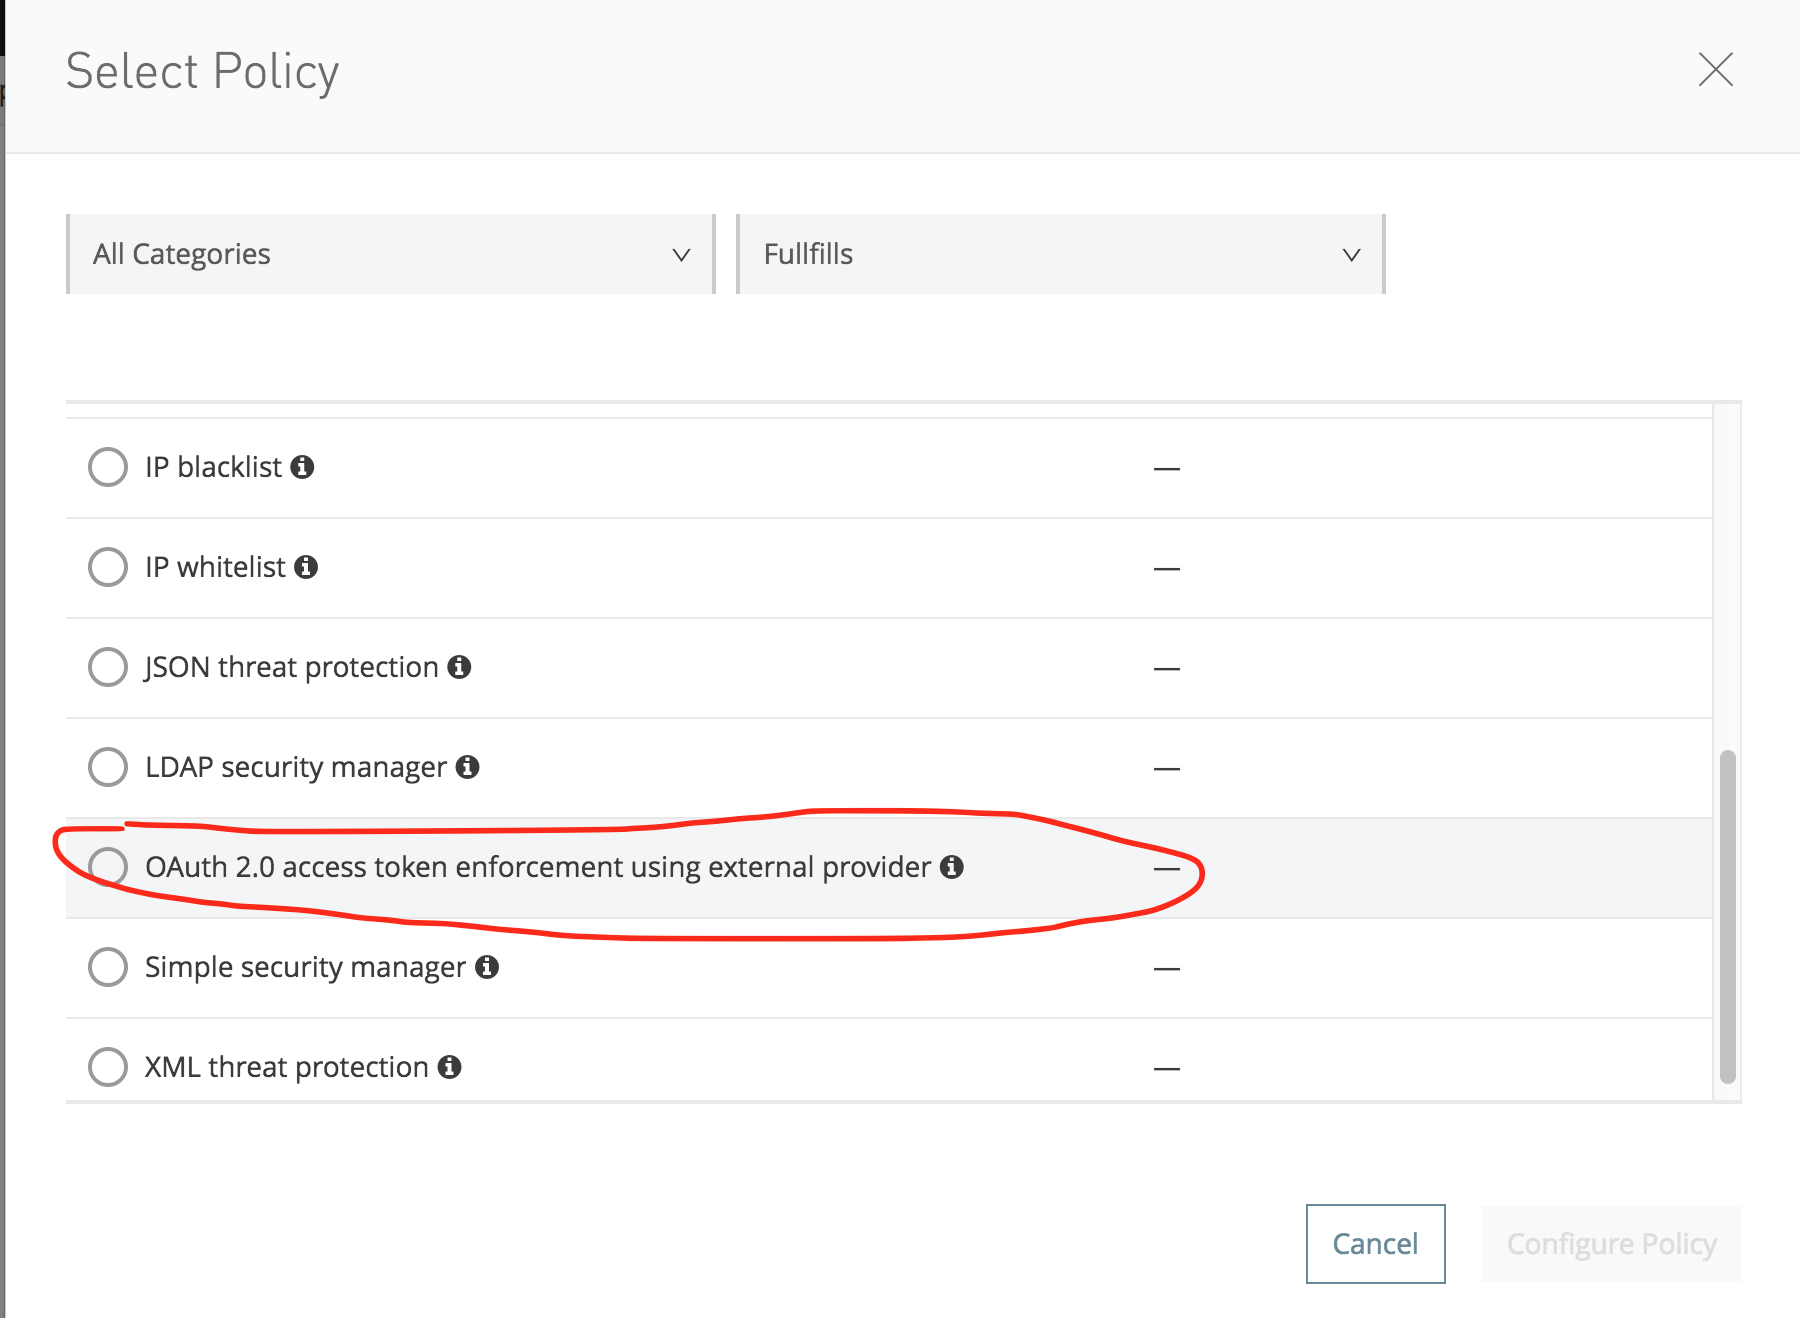
Apply Security Policy
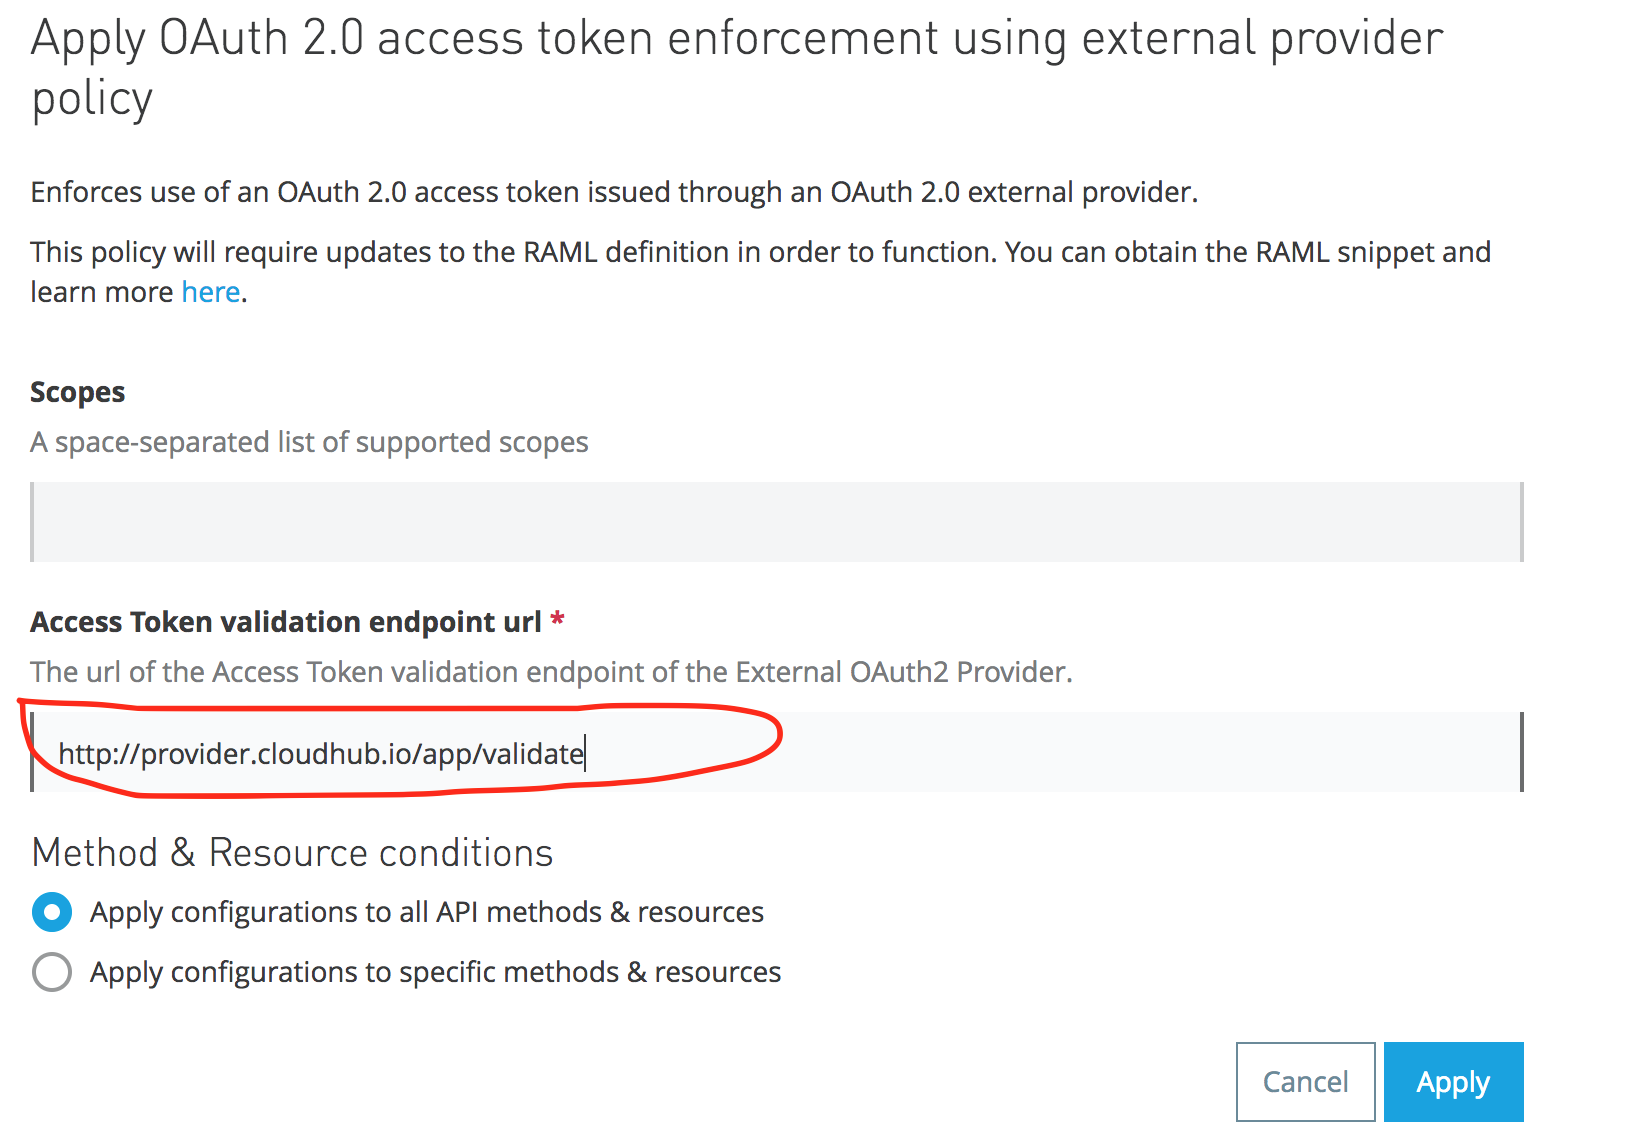
Browse the API and its version, and click it. In the left hand side pane, click the Policies link and apply the External OAuth2 policy, as shown below:
In the Access token validation ur,l please enter: http://provider.cloudhub.io/app/validate
Testing OAuth2
Now, let's try to access: http://employees-proxy.cloudhub.io/employees
You shoud get this response:
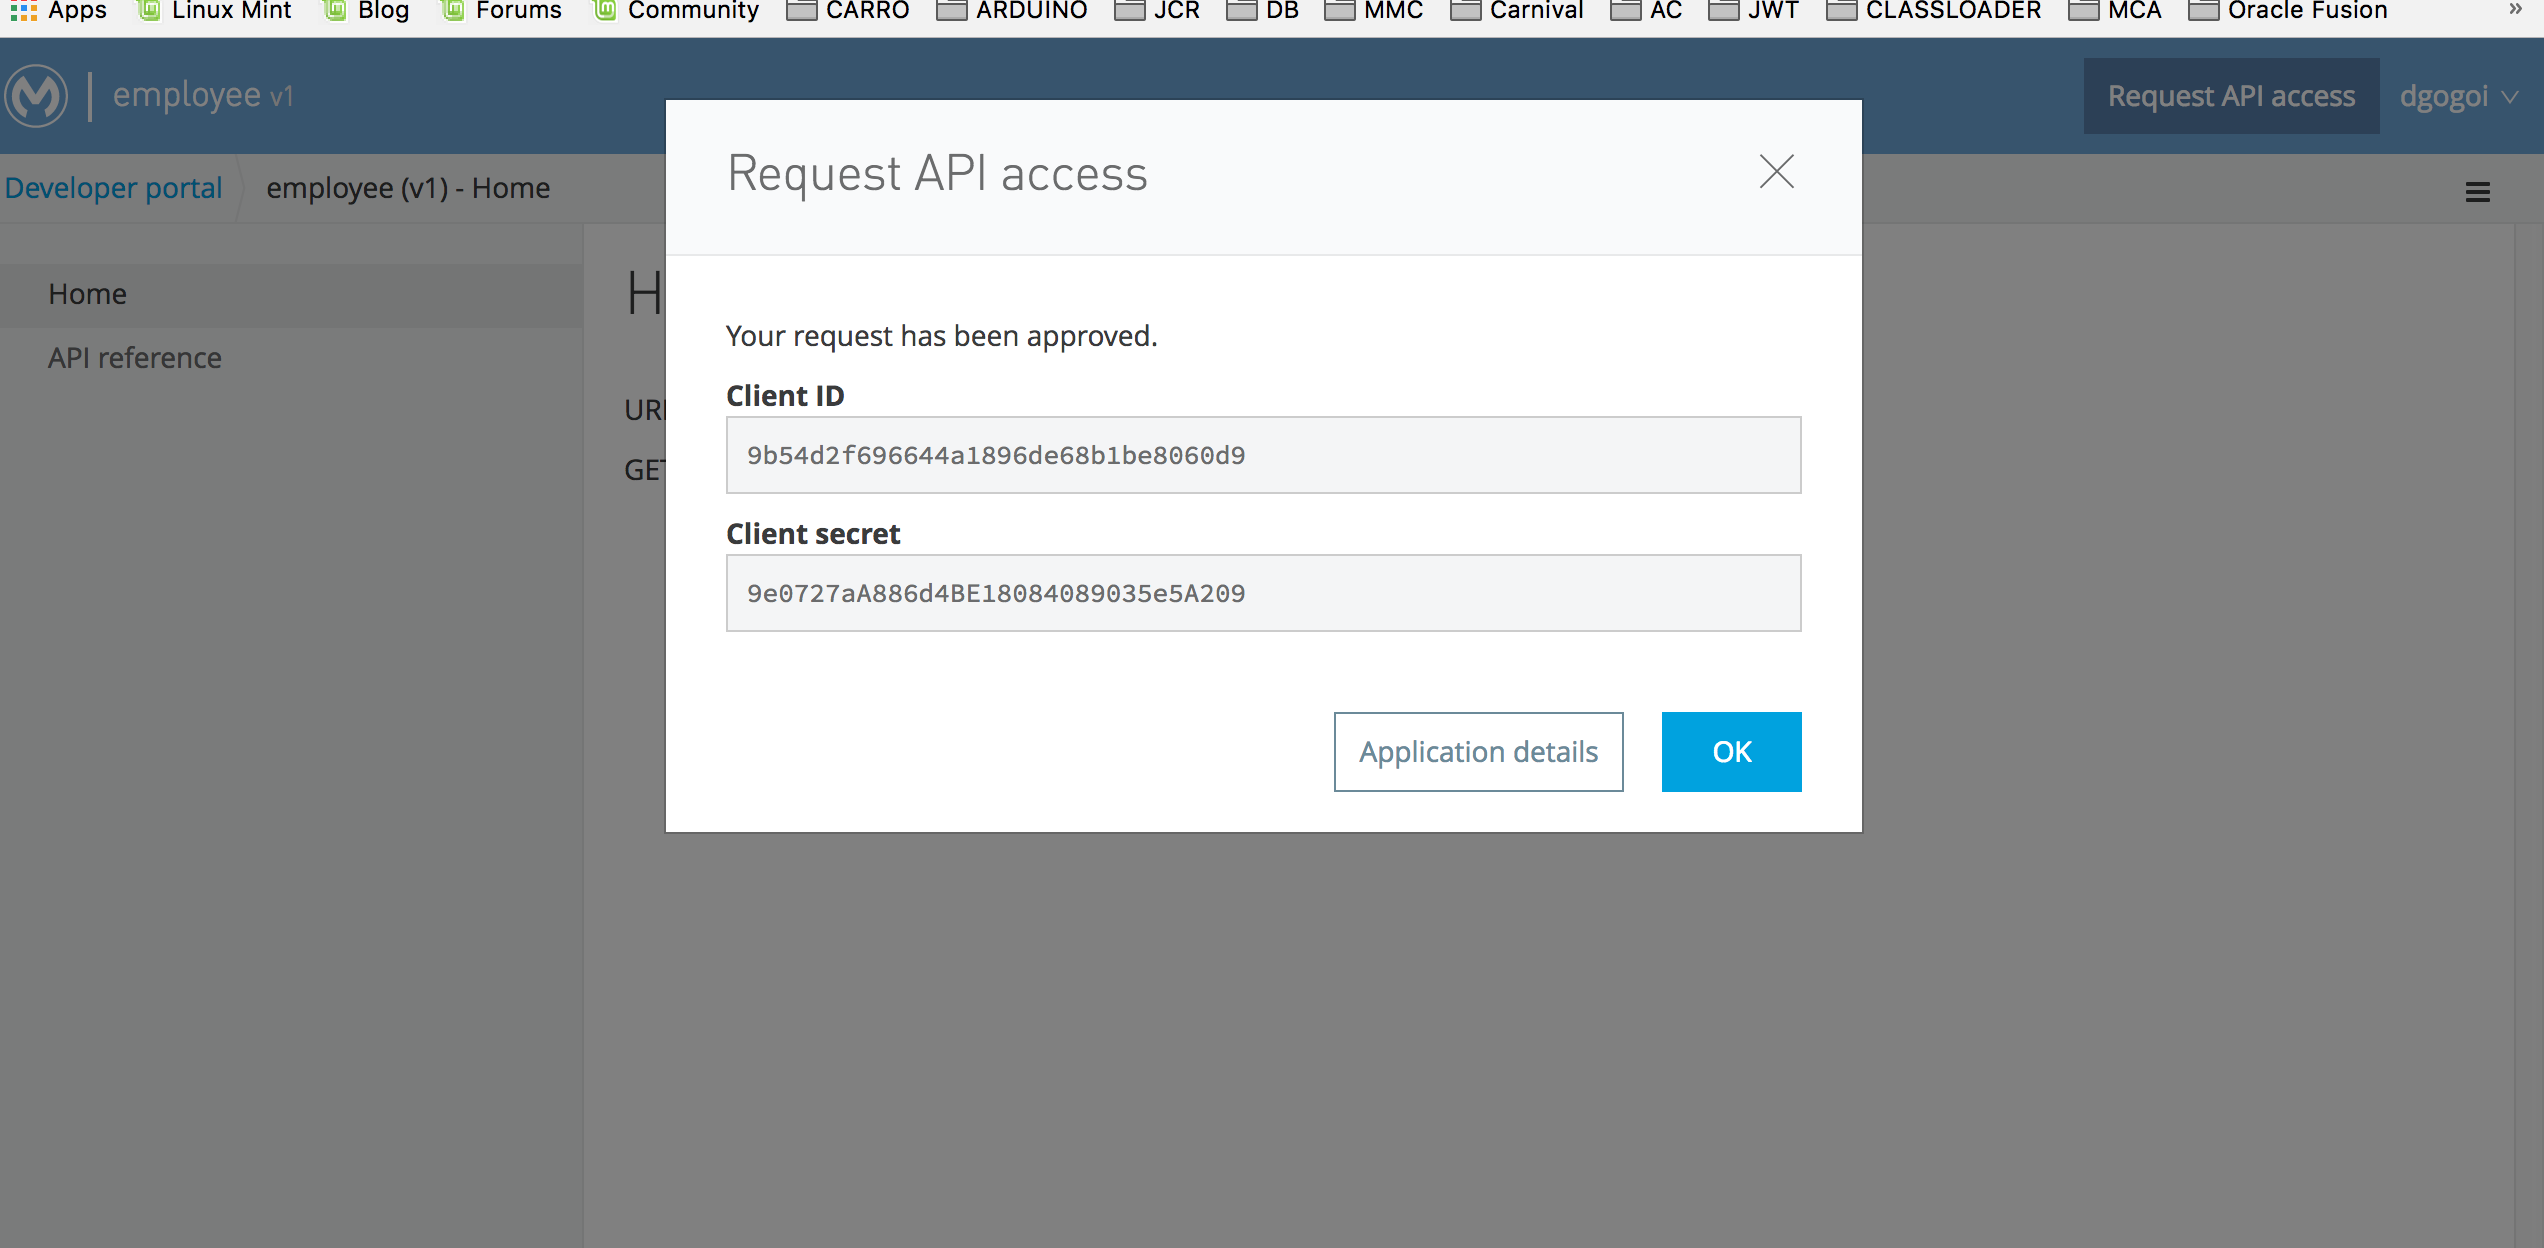
With the client_id and client_secret received, you can now get the access token:
Finally, let's access our employees' service:
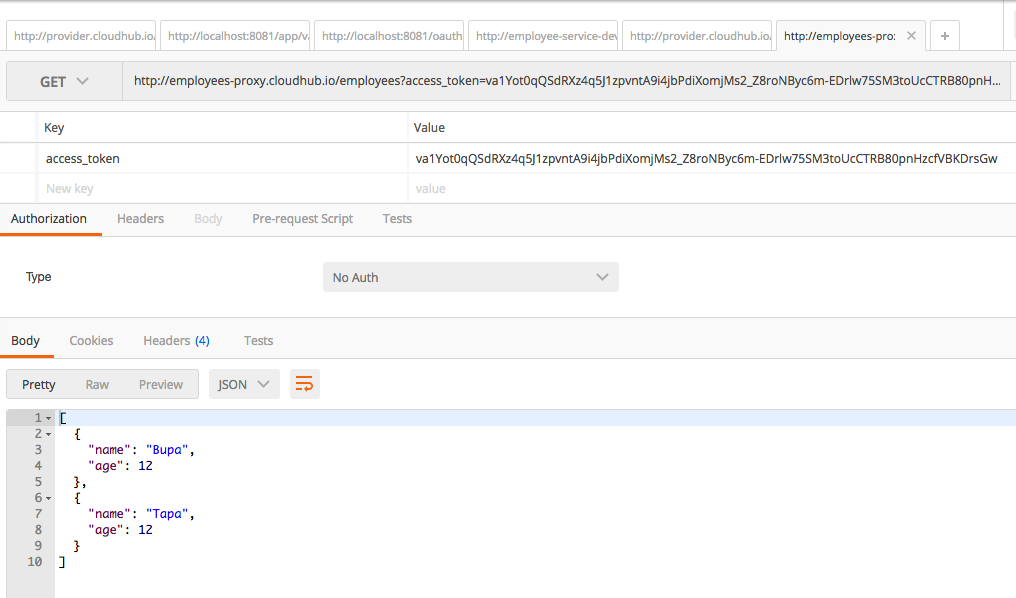
You can now successfully access the service using the OAuth token!
Conclusion
In this tutorial, I have shown how to apply OAuth2 to manage the Clients using an External Provider. If you encounter problems while configuring the OAuth2 provider, set the http.port=8081 in the init.properties file and if you want to know more about our MuleSoft solutions, don't hesitate to contact us and learn why leading enterprise organizations are turning to Avenue Code as the preferred systems integrator for MuleSoft Anypoint Platform.