During the Wordwide Developers Conference (WWDC) 2014, Apple brought to the world something every iOS developer was expecting: A new language named Swift, that was presented as the solution for the already old-fashioned Objective-C. The promise was that Swift would be modern, and would bring more safety and power for apps. But the new language was so good, that webdevelopers decided to try it to create webapps.
The problem for the webdevelopers was that, after realizing the potential of the new language they had created, Apple decided that Swift was good enough to be restricted to iOS and Mac apps only. Not until an entire year had passed, during the WWDC 2015, did Apple make the leap to Open Source with Swift.
With its change to Open Source, it didn’t take long before a slew of new technologies based on Swift began popping up all over the place, especially for the web. Today, the most frequently used web framework for Swift is Vapor, and it is widely considered a good choice for web development because it is fast, secure, extensible and also has integration with XCode.
In this Tutorial, we will learn the basics of how to build an webapp using Swift. To do so, we will develop a simple app that allows users to register their pets and also include the next date their pets need to go to the vet.
In this first part we will learn how to setup the environment using the Vapor Framework, create the project and configure our database.
So, let’s get started!
This tutorial was created using Swift 3.0 and Vapor 2.0. Newer versions of the framework might not be compatible to the tools used.
Setting Up The Environment With Vapor Framework
Requirements
- XCode 8 - Available at Mac App Store.
- Vapor Toolkit - To install Vapor Toolkit, open Terminal and type:
curl -sL toolbox.vapor.sh | bash - MySQL - You can learn here how to install and configure it.
Creating the Project
Creating a new Vapor project is pretty straightforward. Go back to Terminal and execute the command:
vapor new MyPetAppTaDam! Our Project has been created!
If you are so excited about Vapor that you can't wait to see it run, you can execute the following commands:
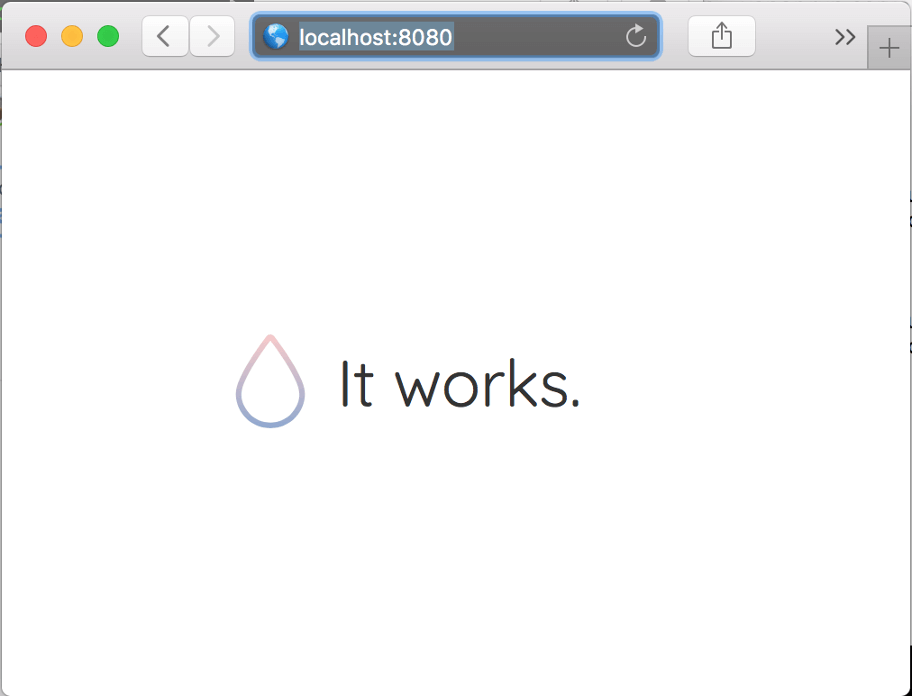
vapor build- Downloads all dependencies, builds, and links your code.vapor run serve- Puts your app on! If you open your browser and navigate tolocalhost:8080you will see the Welcome to Vapor page.

Before moving on to the next Section, let's create our Xcode project. After all, what's the advantage to building a Swift project without XCode? Let's run one more command, vapor xcode, on Terminal. Now, in the folder you created the project in, you will find an XCode project.
Registering Routes In Your WebApp
Now with XCode open, go to the file Source/App/Main.swift. There you will find a instance of Droplet.
The Droplet is a service container that gives you access to many of Vapor's facilities. It is responsible for registering routes, starting the server, appending middleware, and more.
But, what is a Route? A route is a declaration of a path that is mapped to a handler.
You will note that we already have a route declared. This route points to the root directory and loads a default welcome page created by Vapor:
let drop = Droplet()drop.get { req inreturn try drop.view.make("welcome", ["message": drop.localization[req.lang, "welcome", "title"]])}drop.resource("posts", PostController())drop.run()
For now, we will simply remove the default route and create our own first route:
import Vaporlet drop = Droplet()drop.get("pets") {_ inreturn "He we will show all our pets";}drop.resource("posts", PostController())drop.run()
Now, in your browser, you can go to localhost:8080/pets and see that our page is created.
Need help to build your Web & Mobile Apps? Avenue Code can help you!
Persisting Information
One of the most essential capabilities of an App is persisting information. Vapor supports some of the best persistence technologies - like MySQL, PostgreSQL, MongoDB, SQLite and Redis - through the use of providers.
The Provider protocol creates a simple and predictable way to add functionality and third party packages to your Vapor project.
In this project, we will utilize MySQL, but feel free to use any other technology you may be more comfortable with.
Configuring our MySQL Database
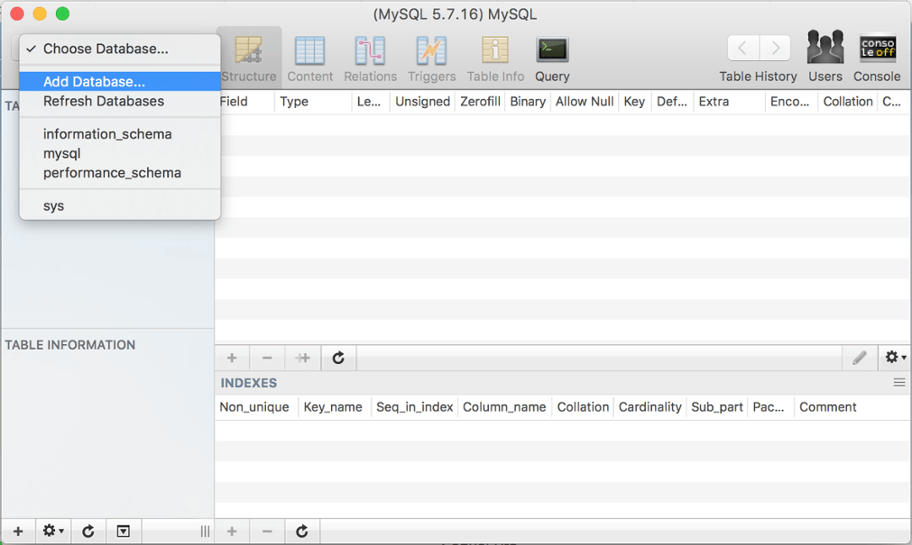
We will use Sequel Pro to create our MySQL database. First, you will need to connect to MySQL. Choose Standard connection, enter 127.0.0.1 for host. Default username for a new MySQL installation is root, with a blank password, in case you have not set up your own MySQL username and password. To create a new database you just need to select the option Add Database as in the image below, and type the database name - in our case, "PetDB".

Now go to Terminal and type vapor build to link your project with MySQL.
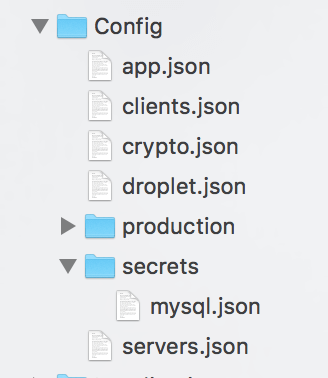
So far so good, but now let's configure the database on our Vapor project. First, we need to include the provider for MySQL in our dependency file. To do so, open /Package.swift and include the following line .Package(url: "https://github.com/vapor/mysql-provider.git", majorVersion: 1, minor: 0) on the dependencies array, and don't forget to add a comma between the objects inside the array. Now, let's update the project, ensuring all dependencies will be downloaded and included. Go to Terminal and run vapor clean and then vapor xcode. Now, back to Xcode, and open the /Config folder. There, create a new folder named /secrets, and a file named mysql.json. Your project navigator should looks like this:

Inside mysql.json, you will enter a JSON with your database information. In our example, the JSON will look like this:
{ "host": "localhost","user": "root","password": "","database": "PetDB"}
Let's open /Source/App/main.swift and include import VaporMySQL, and also update our Droplet instance to include the new provider: let drop = Droplet(providers:[VaporMySQL.Provider.self]).
Our MySQL configuration is pretty much done. We can check if everything went well provisionally by adding the new route:
drop.get("version") { request inif let db = drop.database?.driver as? MySQLDriver {let version = try db.raw("SELECT version()")return try JSON(node: version)} else {return "Failing during DB connection"}}
and accessing localhost:8080/version through your browser. MySQL current version number will be printed.

Alright! We've come a long way. But we still have a lot to learn. In this first tutorial, we learned how to install and configure our environment and our database. In Part 2, we will learn how to make the Create our Pet Model, and create our CRUD operations. And it will be way more fun, because we will finally start to do what we like most: code!
Author
Lucio Fonseca
Lucas Fonseca is an iOS Developer at Avenue Code, a Wanderlust professional at Planet Earth, and an enthusiast in Self-Driving Cars. He is also a lover of nature, technology, wine and country music.


