
Hey! I believe you're here to learn about Animated from React Native. In this article, we'll discuss how to use it in a project to improve the usability of a swipe component. Before we get there, I'd like to introduce you to the idea of animations. If you're already familiar with this topic, feel free to jump to the “Animations in React Native” section.
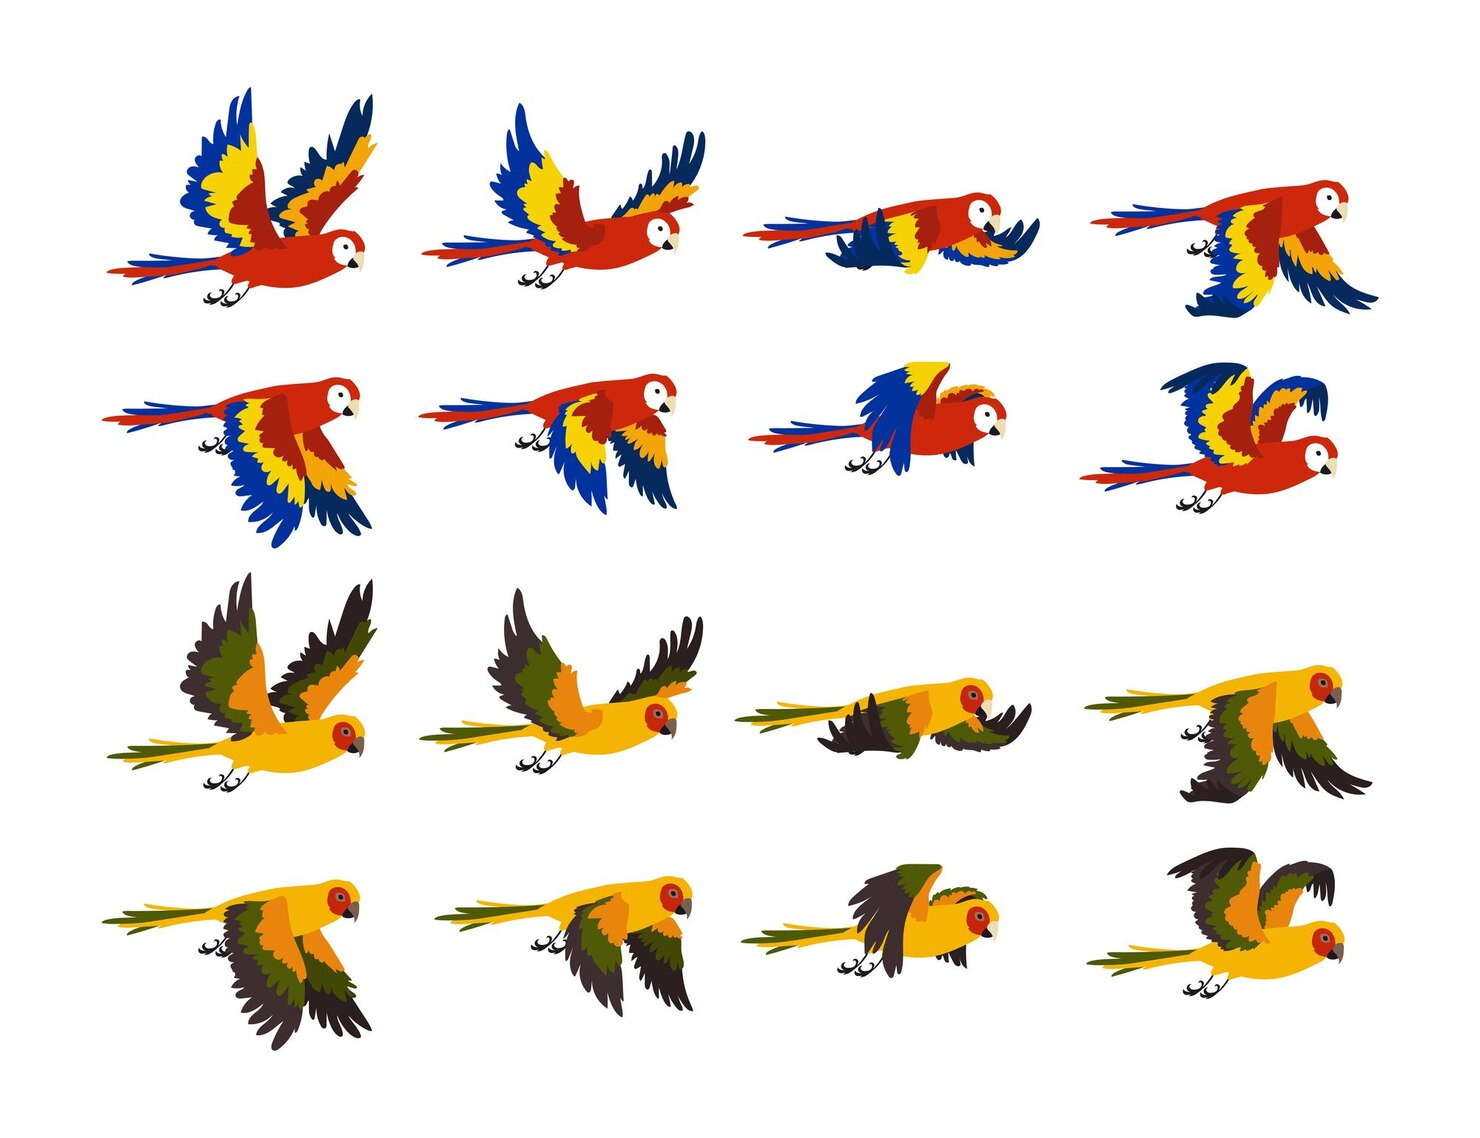
The idea of animation involves a sequence of states, which can be images or attributes like the position of an element on the XYZ axis. These states are called keyframes. In the example below, we have eight keyframes. When applied in sequence, they create an animation.
Sometimes, we can see animations without changing the drawing. For example, we might see an element moving along the XYZ axis or changing its opacity. At this moment, we are updating the values of these states, similar to a keyframe.
Animation created frame by frame using the frame rate to update is called frame-based animation. In this type of animation, the frame rate determines the speed of the movement.
Time-based animation involves using the elapsed time since the last frame to calculate the necessary updates for the current frame. Here, the frame rate affects the quality of the movement, but the speed remains similar across different frame rates.
Animations in React Native
React Native provides two animation systems by default to help create and manipulate animations in projects. You can use the Animated library to handle specific cases and values in a component, or the LayoutAnimation library for global configuration to animate all views in the render/layout cycle. This tutorial will focus on the Animated library.
The Animated API
The Animated library helps create animations in mobile applications using React Native. It allows easy animation of components and values using Animated.Value or Animated.ValueXY. Essentially, it works with input and output values, controlled by start and stop methods.
For performance optimization, you shouldn't modify the Animated value directly. Instead, create a reference using the useRef hook to make a mutable reference object. This lets you update the property and persist values throughout the component lifecycle.
This library exports six component types: View, Text, Image, ScrollView, FlatList, and SectionList, but you can create others using the createAnimatedComponent() method.
Initial project
The main goal of this article is to talk about animations using Animated. I won't spend too much time explaining how to create a To-Do List in React Native (you can follow this repository and check the full project or in many videos/tutorials on the web).
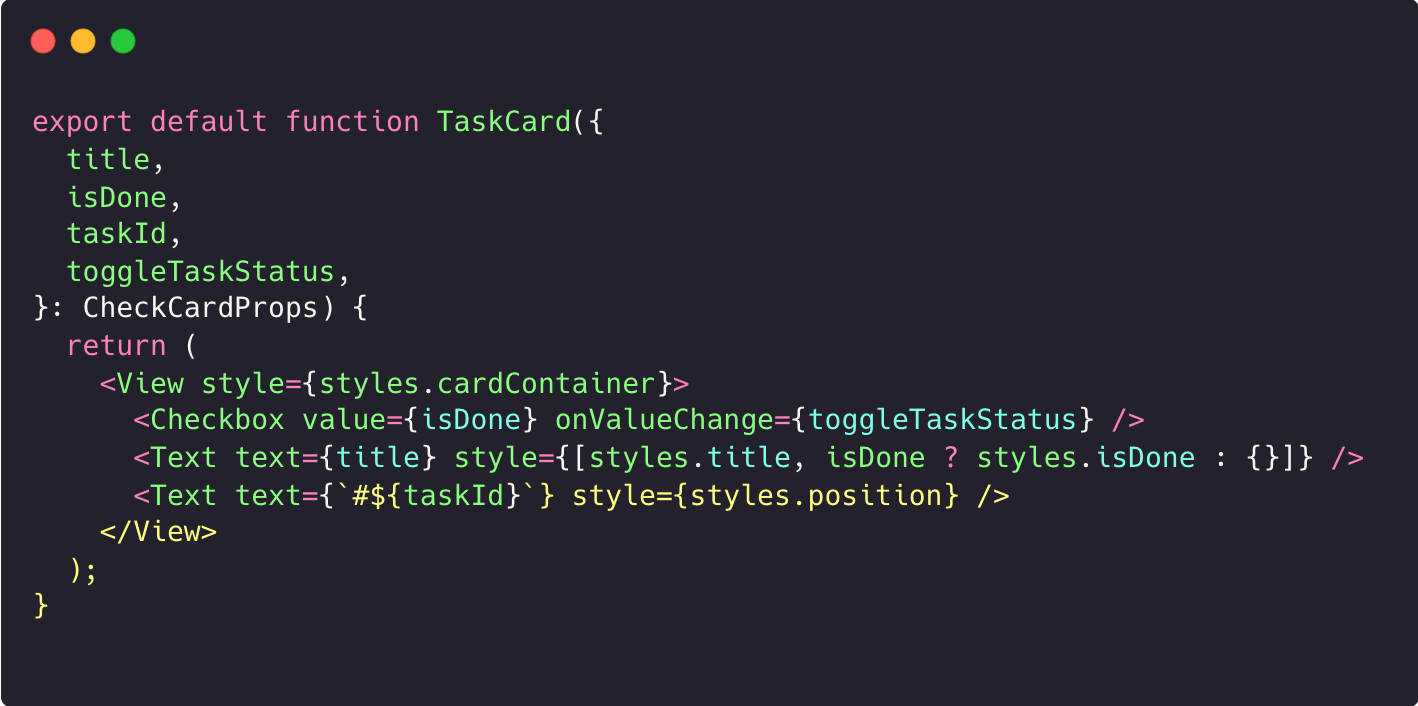
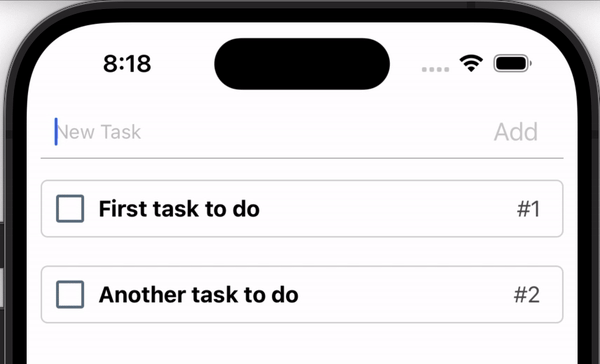
So, to make the layout, we will create an input text field, a button to add the task, a flat list, and a component to display the task content and its state which we'll refer to as the TaskCard component. This component will display the task content, like the layout below:
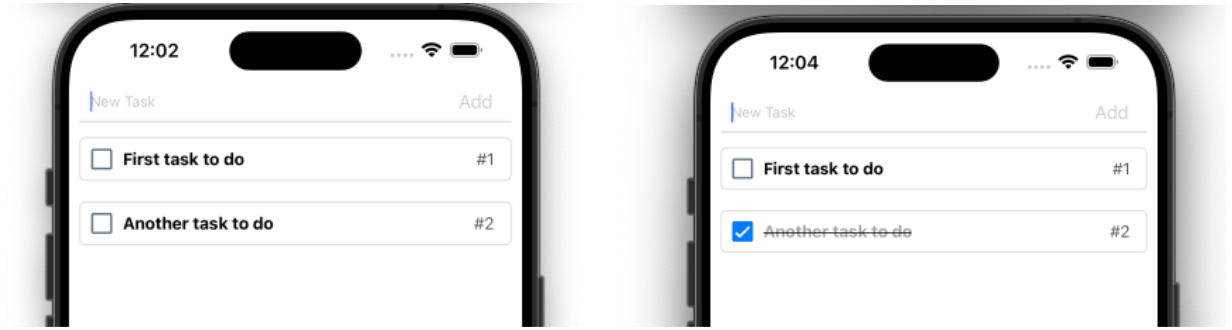
Each TaskCard has a checkbox to check if the task is done, a title, and an identifier number.
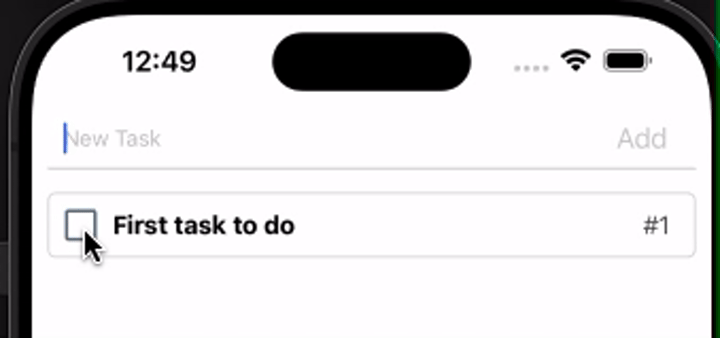
In our application without animation, the interaction with the trigger to mark as done will be using the onPress to trigger the state (clicking on the box to mark the task as done).
Creating an AnimationSwipe Component using Animated Library
The base structure of the component
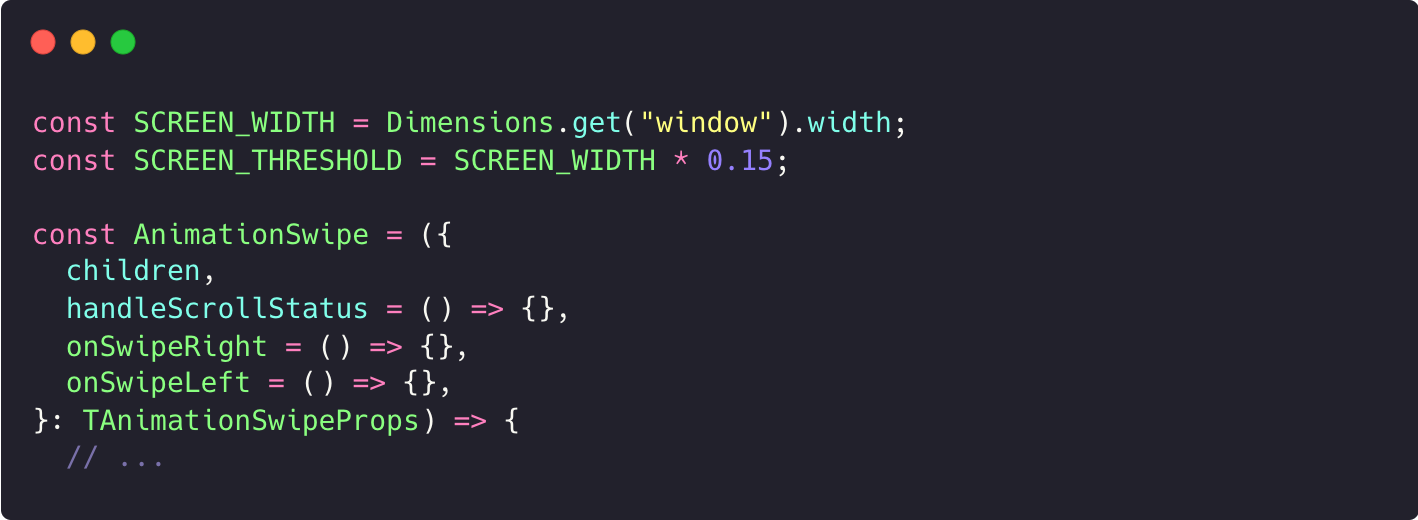
To improve readability and make it easier to use in different situations, let's create a component called AnimationSwipe. We will use this component to wrap the component we would like to animate.
The main behavior of this component is to enable swiping of child components on the screen, sliding them to the left or right. This component will have four initial props:
- Children: the content that is wrapped.
- A handler function called handleScrollStatus() to manage when the slide should be disabled or not.
- Two functions called onSwipeRight() and onSwipeLeft() are to be called after sliding.
We will create a few constants to help with action management:
- SCREEN_WIDTH and SCREEN_THRESHOLD: using the Dimensions from the react-native package, which determine half the screen size and the screen limit.
- SWIPE_OUT_DURATION: an integer to determine the duration of the animation.
Persisting from the component lifecycle
To apply an animation of swipe, we should create two refs: one for the Animated to work with ValueXY called swipeAnim to work with 2D animations, and another to handle the gesture called panResponder, which will listen to the touch gestures.
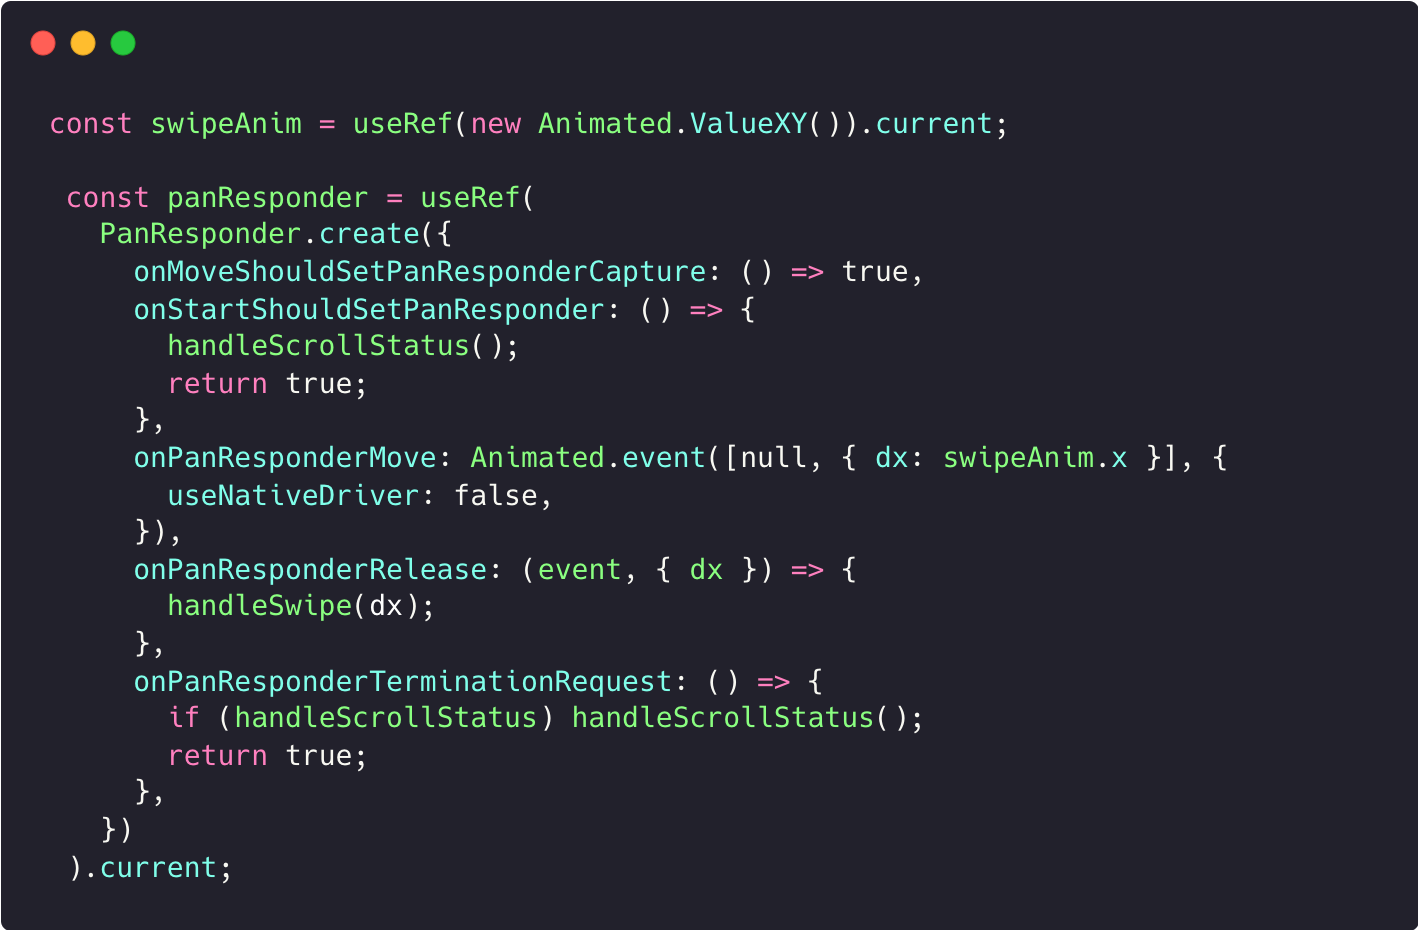
Animation Control and Handle Functions
We now have the ref objects swipeAnim and panResponder, but we need a way to interact with these refs. This includes triggering the animation, checking if it should complete the swipe (avoiding missed triggers), and completing the swipe.
To help with these interactions, we will create two functions:
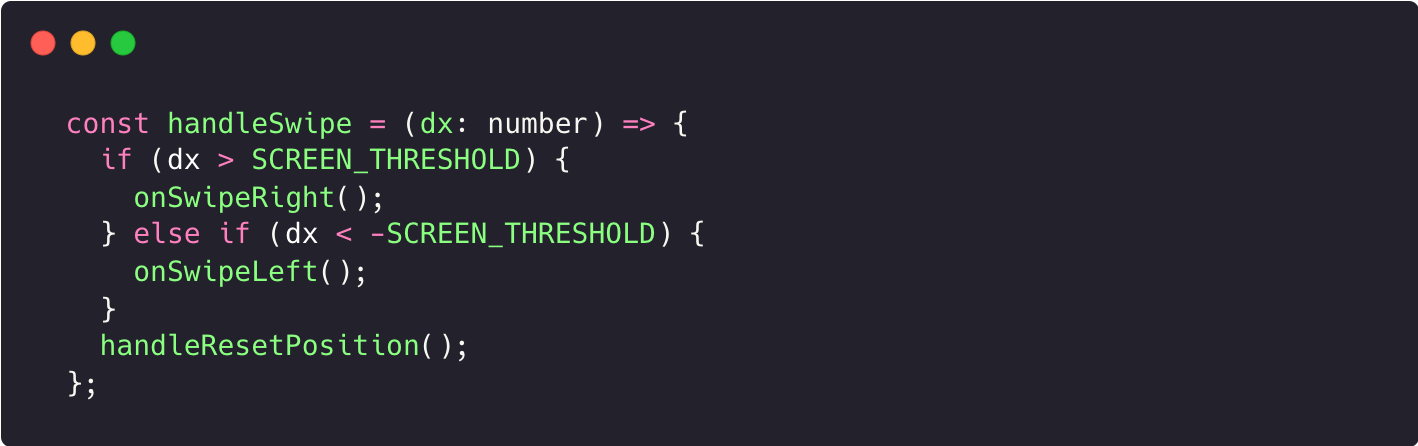
- handleResetPosition(): This function resets the component to its original position using Animated.spring().

- handleSwipe(dx: number): This function receives a prop called dx, representing the difference on the X axis from the swipe gesture. It checks if the gesture was to the left or right. Accordingly, it calls the respective prop function, onSwipeLeft() or onSwipeRight(), and then resets the position by calling the handleResetPosition() function.
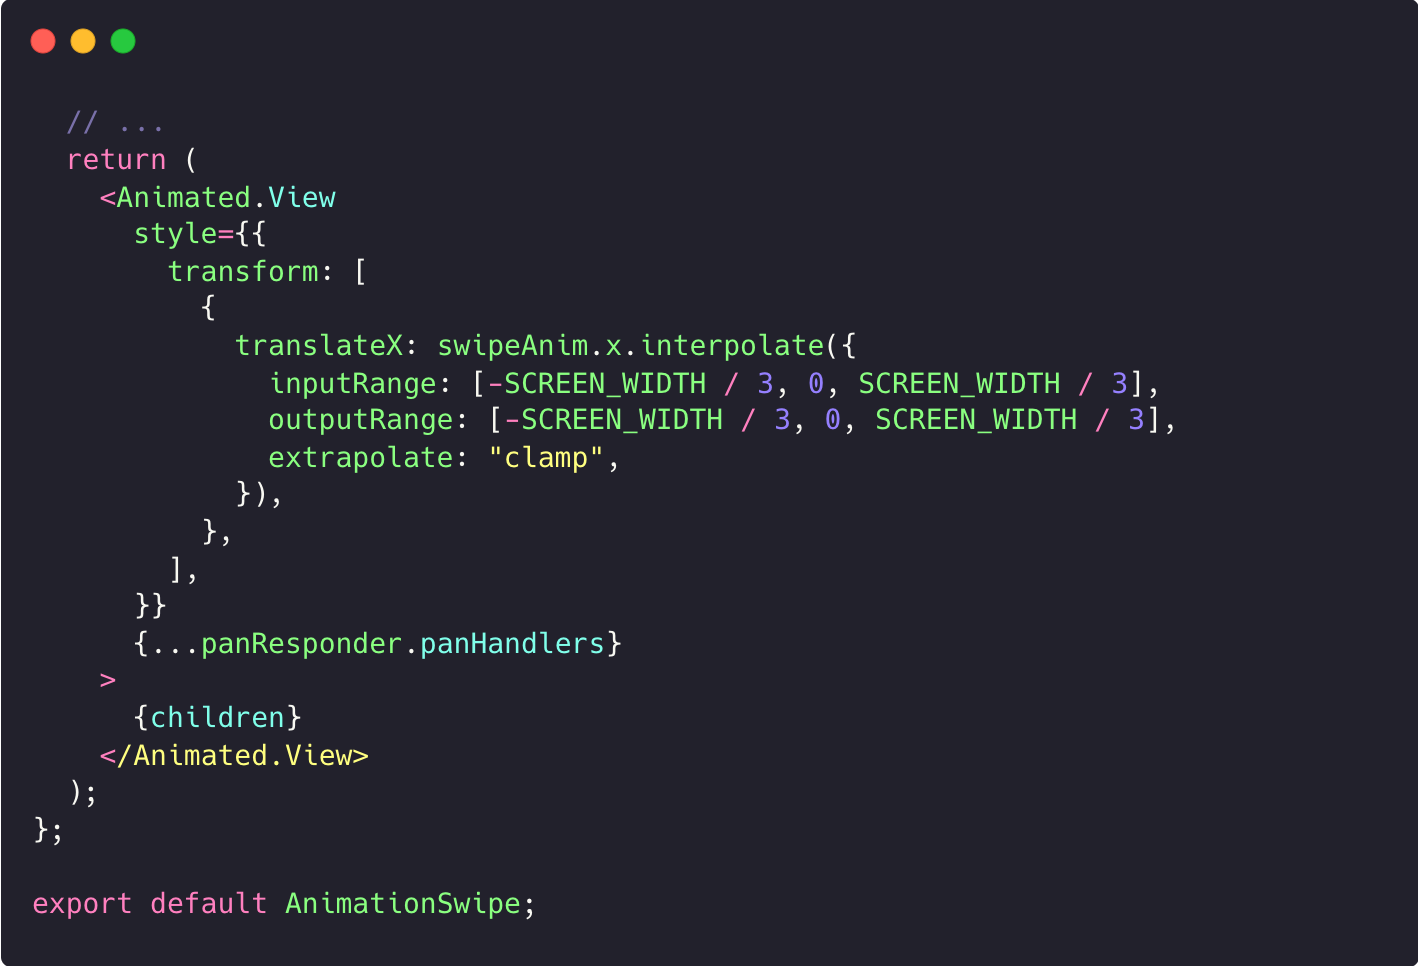
Rendering the component
As it's an Animated component, we should use an Animated.View instead of a simple View tag. Wrap the children in Animated.View and spread the panResponder.panHandlers as props to enable gesture recognition and response.
Note: This style was applied only to create a limited range for the swipes.
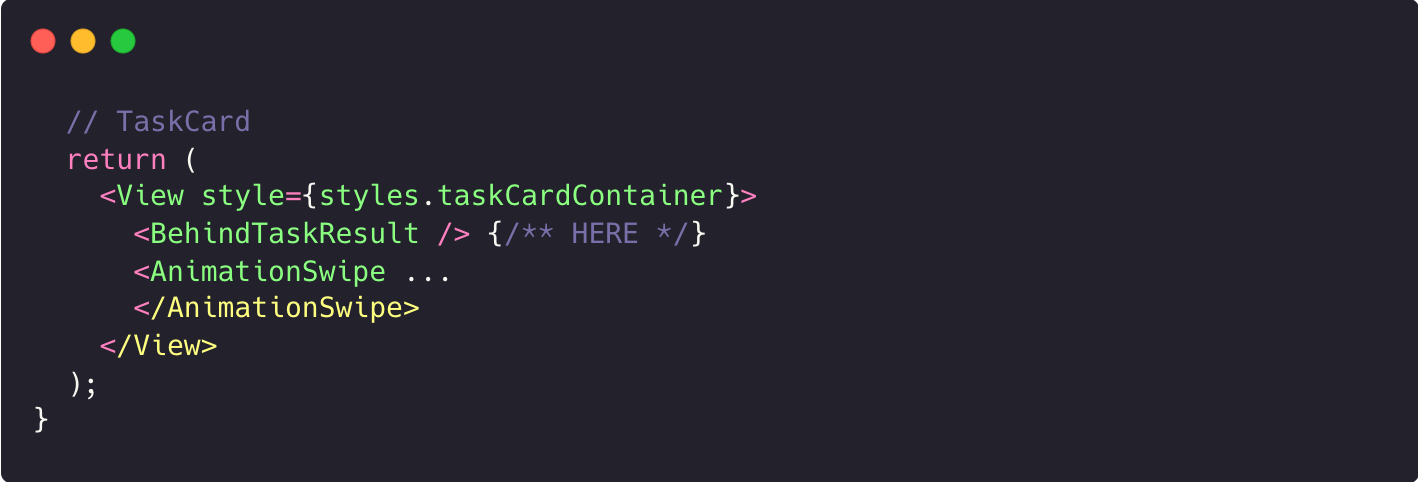
Updating the TaskCard component to improve usability
To enhance user experience and guide them in choosing the final result, add an example behind the animation showing the outcome after a swipe.
Create a component to represent this result, with a CheckBox on the left side checked as true, and another on the right side checked as false.
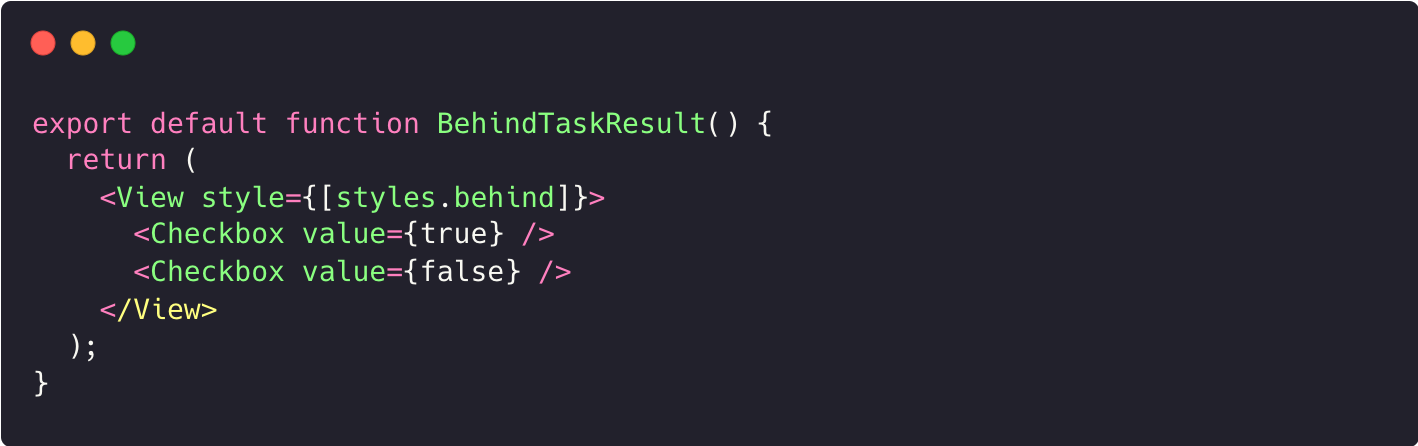
It will have an absolute position and will be placed before the task content in TaskCard, as shown in the code below:
Conclusion
Working with animations isn't too complicated and can improve user interaction with our apps. Whether guiding the user or enhancing presentation, animations can make our app feel better.
References:
https://blog.sklambert.com/using-time-based-animation-implement/#frame-based-animation
https://reactnative.dev/docs/animated
Repository:
https://github.com/totabraz/todo-list-with-atomic-design-and-animated-library
Licenses:
Image 01 - Animation. 3 May 2024. Image. Available on: https://www.freepik.com/free-vector/colorful-tropical-parrots-flying-cartoon-illustration-set_24644198.htm#uuid=95b7af5f-98fb-42c0-9d21-a5b5aea55f5d.


