
Should I learn Angular 2+? You may have asked yourself this question several times, but you've probably stayed on the safe side, and most likely stuck to your preferred framework or plain vanilla javascript and ES6. Now that the frameworks you’ve been hearing about have finally been released and are heavily used by the community, you may be seriously debating whether you should switch over to MEA(2+)N, React + Relay + GraphQL, or Vue.js.
Choosing Your Path
If you're looking for reasons to learn Angular 2+, this is the article for you. Although Angular may have its flaws, it can also be pretty flexible, which means you shouldn’t be afraid to take that leap towards new technology.
If you’re new to Angular, there are three concepts you should be aware of before jumping into the rest of this article:
- One-way/Two-way data-binding
- Providers
- Declarations
- I've created a repository with the code that's going to be explained throughout this article, feel free to take a look at it: https://github.com/mauriciotasca/angular-demo
If you're already familiar with these sections, you can go ahead and jump to Section 2.
Section 1
One-way and two-way data-binding:
This relates to how your class (controller in Angular 1.x) communicates with your view (HTML template).
If you want to monitor changes made to a given input field, you're probably going to use the ngModel attribute.
The ngModel attribute is a directive that will track the value, user interaction, and validation status of the input control and keep the view in sync with the model.
HTML Template and Typescript Class: Whenever the user types something into the input field, the value inside the ES6 Class will also be changed. This will only happen because we’re using the banana-in-a-box syntax [()], which will ship the change event in the input field alongside the value that has been typed.
Providers:
The typical way to traverse data between the Angular application and some external resource is by using providers - you’re going to be using something called service.
First, you need to make it injectable since most classes need to be injected when programming using Angular 2, whether through the App module, or by using the regular ES6 module import. You might also want to use Angular’s implementation of XMLHttpRequests, the Http module, since it provides you with an ES6 Observable - but make sure you declare it in your constructor as well. This will return an Observable object to your class, which you can then subscribe to and manipulate in order to display proper information for the user.
Declarations:
Instead of creating controllers and element directives as you previously would have in Angular 1.x, you’re now going to use Components, along with directives and pipes (previously known as filters).
In order to use a component, you must first decorate your class with a Typescript decorator. By decorating your ES6 class with a Typescript decorator, you’re telling it that it should have a selector, a template, and when applicable, a set of services.
We can now use the service we’ve previously created to get user data:
We’ve injected the PresidentService into the PresidentComponent by importing it into the file and then adding it to the decorator key array called providers. Next, all you need to do is create an instance of that service inside the class's constructor and then use the method that has been created.
This method will return a response, that can be parsed as a json object through the .json() method. In this example, we assume our API is returning a json object with a key named 'users', which contains an array of user strings.
Section 2
Now that you know how to handle Angular 2+, it's time to get to know some of the advantages and disadvantages of the framework.
ES6 and Typescript:
Angular 2+ takes advantage of ES6 and Typescript, which helps to increase the potential of writing clean and well-organized code.
Typescript offers the option to assign types to your variables and functions. This allows coders to avoid mistakes while coding, especially when using a code linter that prevents the code from being compiled, or a powerful IDE that warns you of code errors prior to saving the file and triggering the compilation.
This makes you more aware of what's going to be sent and injected to each function or class. You can also create your own Types and add their own constructors to them. This will prevent errors, such as a variable being undefined once the page has been loaded, since the constructor is executed first. You'll also know exactly what property your object will have once you use it inside your code.
It's not mandatory to use Typed variables all the time, or even type every single identifier in your code, but typing methods and variables will certainly make the lives of other developers easier. They let developers know at the first glance exactly what a method will return when executed.
No More Digest Cycles:
The digest cycle has been replaced, which means checking fields for changes doesn't work the same way as it did with Angular 1.x. Angular 2+ has introduced a module called ChangeDetector which uses reactive programming to monitor changes when application state changes are perceived by Angular ChangeDetector.
Each component has its own ChangeDetector, which makes the process of checking DOM elements for changes less resource-consuming. The change detection is performed from top to bottom - the same way the data flows - and all components are linked through the use of a tree. Changes can be marked so that change verification occurs only when it has to be executed by using the ChangeDetector ref, thus making the Change Detection process look something like this:

Image Source: Thoughtram
Angular CLI Generator:
The one tool that makes it all easier to develop using Angular2+ is the Angular CLI generator. It's an ember.js fork and is made to automate the generation of Angular 2 Components, Services, Directives, and Pipes. Angular CLI directs the programmer towards a more gradual learning curve, especially when it comes to transpiling code and creating dynamic stylesheets, since it does not force the programmer to learn how to work with Webpack's loaders.
Another great advantage of using Angular CLI is the possibility of creating an automated, streamlined folder structure when dealing with angular modules. Code stubs will already be created with a single command, thus making code easier to work with without the need to know Angular2+/Typescript syntax by heart.
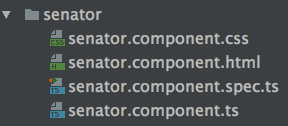
You can create an angular component simply by typing:
ng g c senator
ng is the keyword used to execute any Angular CLI related command
g is shorthand for generate
c is shorthand for component
Angular CLI will take care of creating the folder with the necessary files and link the component to the App module, the Angular 2 main module file where all direct dependencies are declared, alongside the spec file for unit testing, which can be run via command line through Karma.
Unit tests are automatically configured, and their initial stubs can also be found inside the aforementioned folder.
This spec file can then be augmented and tests can also be run with Angular CLI:
ng test
Isolated Component Scope
Angular components have an isolated scope, and data inside its classes are enclosed and visible only to its template. In order to access data from other components, you'll need to define an Input Output flow or inherit properties and methods through class inheritance.
The example above shows both the PoliticianComponent and Politician model being inherited by the SenatorComponent and Senator model.
Derived classes have access to default and protected methods of their super classes, and if methods and properties aren't overidden, they will be passed along to the derived class.
Creating specific CSS rules for components is going to be much less verbose since the generated CSS gets transformed into a code block, and gets inserted into the head section of your rendered HTML once the page loads.
The component CSS will then be scoped through the use of dynamically generated attributes whenever the page loads. This is done automatically whenever a class is decorated with Component, but can also be disabled if you think the generated HTML is too cluttered.
Communication Through @Input @Output:
The main method for sharing reactive data between components in Angular 2+ is through the use of the @Input and @Output modules. They provide a mechanism that allows any form of data to be passed around components. In order to pass data to child components, you must use the @Input module and declare the object both on the child component tag inside the parent component template, and inside the component.ts of the child component.
In the example above, we can see that the property "hobbies" that is being passed to the child component via @Input, is of Array<string> type. It will then be passed along to the child components, and any changes made to it inside the parent component will also be reflected in the child component.
On the other hand, in order to propagate changes from the child component property to its parent component, it is necessary to import the @Output module, which is usually used to create an EventEmitter that will notify the parent component of any changes made to that specific listener.
The parent component must then have a handler attached to that EventEmitter in order to be able to update corresponding values inside the parent component. This can be especially useful for sending onChange events to the parent components. As mentioned earlier in Section 1, the banana-in-a-box syntax will deliver both the value and the corresponding generated event of a given HTML element when used.
When using an input, the ngModel will bind the value that has been typed to the property, but not the change event itself. This means that data will only be sent from the data source to the view target once, and typing into the input field will not yield changes to the model.
In this case, aside from updating the model, we want the model change event to be emitted back to its parent component. In order to do this, we need to use the ngModelChange event property. Whenever something is typed into the input field, the ngModelChange event will be triggered and emit the NewHobbyType. Then, all that has to be done is use the previously created newHobbyTyped @Output property to emit the change event into the input field and parent component.
Easy Filtering With Pipes:
Filtering in Angular 2+ is just as easy as it was in Angular 1.x. Since you will mostly be using them on your template to format data, filters are now called pipes. You can always build your own filters easily, but Angular 2 core comes with built in filters such as json i18nPlural.
The json pipe will convert values using JSON.stringify. This is useful for debugging while developing, and allows you to make requests to a certain endpoint while displaying data the way it is delivered from the response object.
Content rendered after adding the json pipe:
[ { "name": "George Washington", "age": 57, "hobbies": [] }, { "name": "Thomas Jefferson", "age": 58, "hobbies": [] }, { "name": "Theodore Roosevelt", "age": 61, "hobbies": [] }, { "name": "John F. Kennedy", "age": 44, "hobbies": [] } ]
In order to build your own filter, you need to create a pipe. Angular CLI provides an easy way of creating Pipes inside your project folder structure:
ng g p "pipe-name"
This will generate a .pipe.ts file in which you can then modify its transform method into something you might want to present in the HTML template. You can then use the recently created Pipe on a given expression. In this case, we've bound the return value of the Pipe to the innerHTML attribute since .bold() generates an HTML element. Using double curly braces to transclude data into the markup would result in rendering the string itself.
Debugging:
Debugging an Angular 2+ application has been made easy through the use of Angular CLI. It automatically generates source maps for the ts files, which means a folder with the source code will be available when using it in development mode. That way, it's possible to add breakpoints and inspect code without having to fiddle with transpiled javascript files.
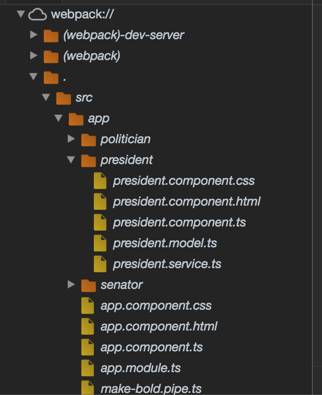 Folder structure created by webpack showing source code for the entire application.
As shown in the picture above, Angular CLI uses webpack under the hood to create the appropriate loaders in order to provide source maps for the source files.
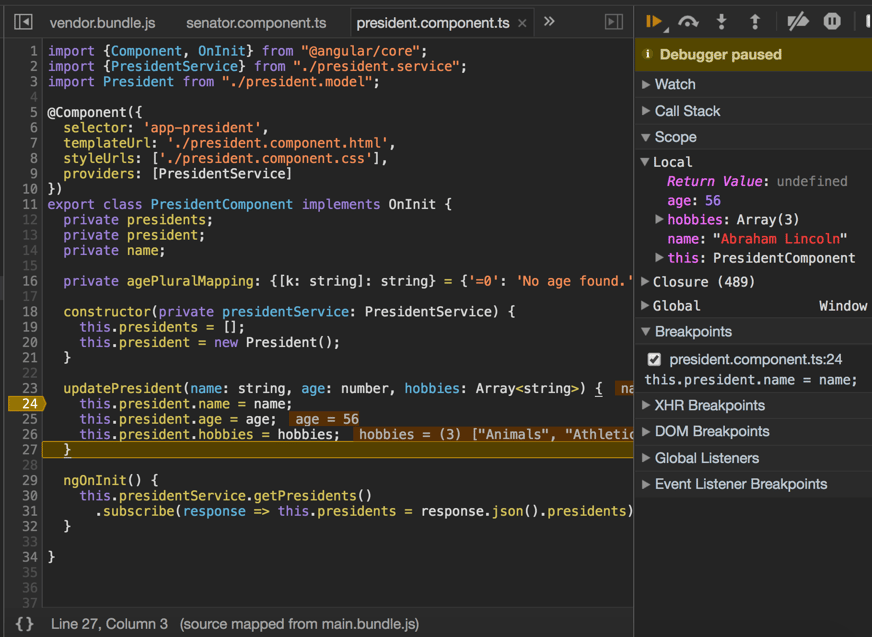
When debugging, it's possible to watch typed variables and interact with class instances to inspect property values, as with plain javascript.
Bonus - Augury, A Useful Tool For Real-Time Debugging:
Augury is a really useful tool that comes in handy when programming an Angular 2+ application. It's a Chrome Extension that allows components and values to be inspected and modified on the fly. It also verifies useful information, such as the ChangeDetection methods, for each component and the module injections that are handled through the app.
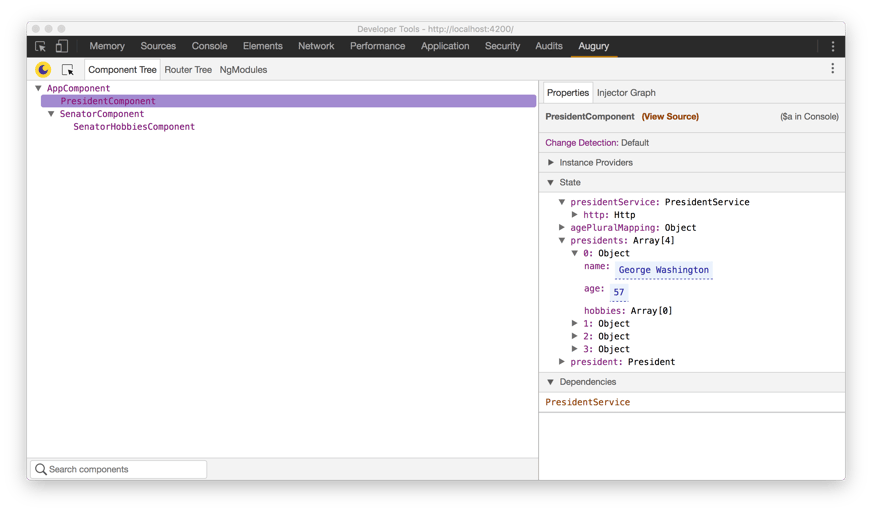 In the picture above, it's possible to see how we've examined the current values of all properties of a given component as well as its dependencies.
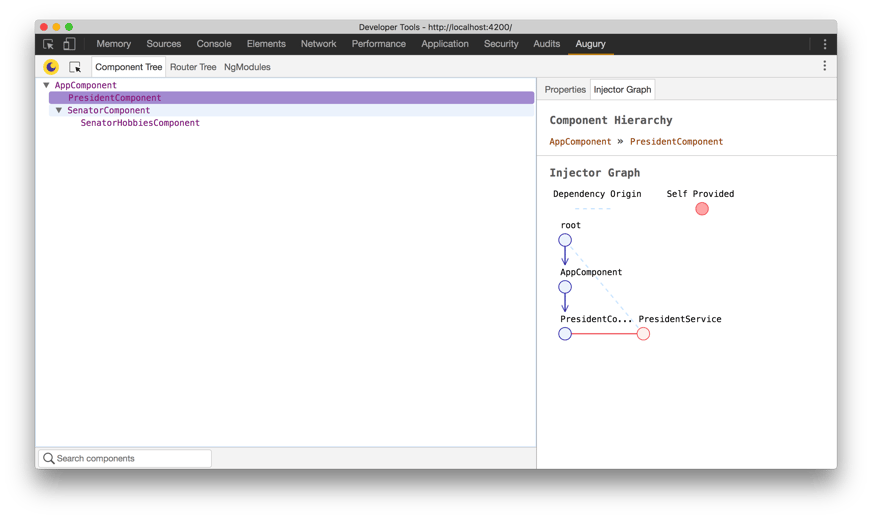 In the picture above, we can see the Injector Graph, how the component tree has been generated, and its providers. In this case, the PresidentComponent needs the PresidentService to be injected into it in order for it to have access to its methods and properties.
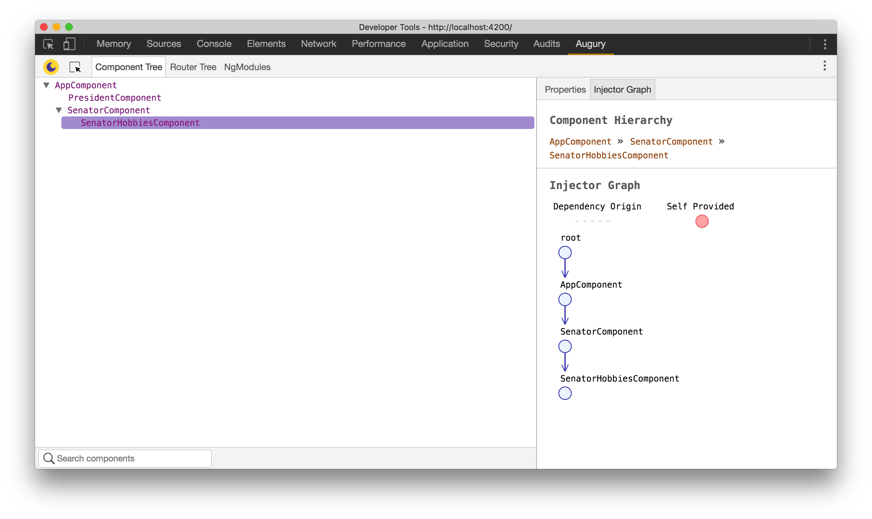 In this case, we can see that the SenatorHobbiesComponent is a child component of the SenatorComponent, and its creation is triggered by the SenatorComponent.
Also, if we're using Angular Router, we'd also be able to inspect the Router Tree to check all available routes.
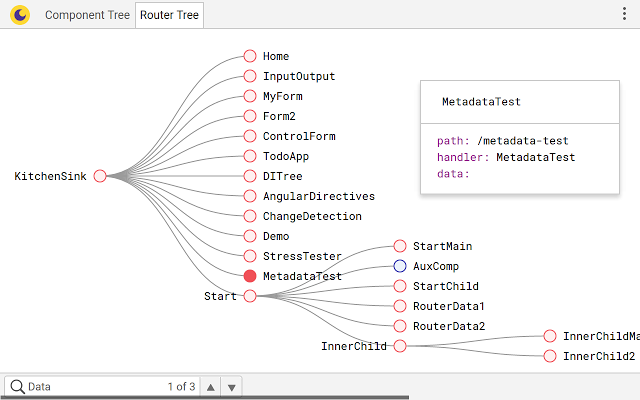
In this case, we have a root outlet for first level routes and two more levels of child routes. As you can see, even the route object can be checked. If you want to fiddle with the extension right away and get real inputs, you can follow this link: https://augury.angular.io/demo/
Conclusion
That's about it! If after reading this article, you feel that you've learned something about Angular 2+, then it's served its purpose. If you'd like to improve your Angular 2+ skills, the Official Style Guide is a great way to start - link below. It contains very detailed, instructive tutorials as well as very thorough documentation.
Here are some other links for you to delve into:
Angular Official Style GuideTodd motto's guide to building a component structure using Reactive Forms
Barbarian meets coding - First component tutorial
Don't hesitate to try new things and keep exploring. The best way to learn is by putting your hands on actual code.
Good Luck!


