
Oracle Commerce Cloud has gained popularity as an optimal platform solution because it provides all the features needed to build a world-class e-commerce website while also allowing for a high level of customization. Today, we’ll discuss how to customize and enhance functionality in your OCC implementation through extensions.Before we begin our tutorial, let’s review the subcomponents of extensions. Extensions are composed of:
Widgets
A widget provides a unit of UI functionality that can be deployed on one or more pages of your web store. Widgets are able to display content to visitors or execute specific functions. They provide custom HTML and/or JavaScript code, as well as, optionally, several other types of auxiliary data for styling, localization, and component re-use.
- Elements
- To provide more control over their constituent parts, widgets can be broken up into elements. Each element represents one part of the overall structure of the widget and can be configured as a drag-and-drop sub-component, allowing for finer control over its location in a page layout. For example, the Header widget contains the following elements: Cart Link, Language, Links, Login/Registration, Logo, Rich Text and Search. An element can be defined as part of a specific widget or as a stand-alone element that may be used by multiple widgets.
- Stacks
- Page layouts are made up of regions, into which widgets are placed. All widgets placed within a region are rendered vertically, one after the other. Stacks allow further control over the placement of widgets within a given region, making it possible to create a stepped progression through the widgets contained in the region.
- Payment Gateways
- Oracle Commerce Cloud provides support for a number of payment gateways as built-in integrations. In addition, you can use extensions to create custom integrations with other payment gateways. The integrations you create appear as options on the Payment Gateways tab of the Payment Processing page in the administrative console. See Using Oracle Commerce Cloud for more information.
- Site Settings
- Site settings allow you to define a set of global configuration parameters. These parameters are made available to page layout designers in the administration interface. Site settings allow you to define a single setting that controls a feature across multiple widgets.
JavaScript Modules
- JavaScript modules are loaded as part of the main module before any endpoints have been fired and before any widgets have been loaded. As such, they can be referenced as a dependency in any widget, allowing you to build reusable modules that can be shared among widgets and elements.
Before we discuss how to create and customize widgets in OCC, we’ll first explain how to create and integrate extensions.
Creating an Extension ID
In order to upload an extension into Commerce Cloud, you must generate an ID for the extension and then use that ID when you define the extension’s metadata. To generate the extension ID:
Go to “Settings”- Click on the “Extension” tab
- Click on the “Developer” tab
- Click on the “Generate ID” button, which will allow you to define a name for your widget, as shown below:
Extension Structure
Once you’ve created a unique ID for your extension, you can start to develop it by creating the folder structure. Make sure your extension uses a name that is unique within your Commerce Cloud environment. In other words, do not give your extension the same name as a default widget. Each extension provides metadata describing the author/developer of the extension, as well as other information related to its creation, and this metadata is contained in a manifest file called ext.json, as seen below:
<extension-name> : The root folder of your extension, must be unique
ext.json
<additional directories to define widgets, elements, payment gateways, site settings>/
Without the manifest file, the extension cannot be loaded. (See more details at ext.json file rules.)
An example of ext.json is below:
{
  "extensionID": "79f39268-e814-4a2a-9e04-16fd6dc390c2",
  "developerID": "987654",
  "createdBy": "Henrique Elias",
  "version": 1,
  "timeCreated": "2018-03-17",
  "translations" : [
    {
      "language" : "en_US",
      "name":"WIDGET POC - English",
      "description":"Extension description in English"
    },
    {
      "language" : "fr_CA",
       "name":"WIDGET POC - French",
      "description":" Extension description in French"
    }
  ]
}
Uploading Your Extension to Oracle Commerce Cloud
When you have finished developing or changing your extension contents, zip up all the files within your <extension-name> directory. This then becomes the file you upload to Commerce Cloud to make the extension available for use:
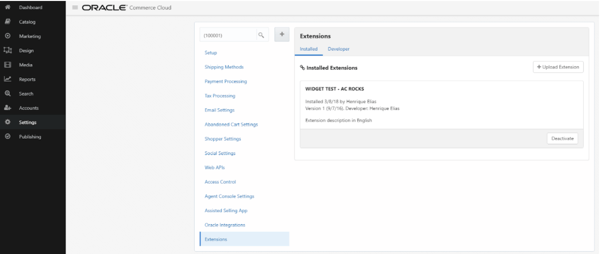
Click the “Menu” icon, then click “Settings”
Click “Extensions”
- Click the “Upload Extension” button and select the extension zip file from your local file system
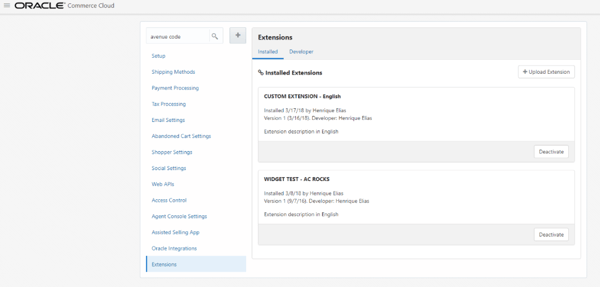
This tells the system to begin the upload and validation process. Any problems identified during the validation checks are displayed in a warning message. Once uploaded, the file will appear as below. (You may use this file, which already includes a widget definition, but remember to update the extension ID in the ext.json file based on the ID generated for you.)
Widget Components
Now that we’ve shown how easy it is to create and upload extensions into OCC, let’s discuss extension subcomponents: widgets. Widgets may be composed of a set of source files and resources, such as:
Templates: display templates for showing content using knockout.js data bindings.
- JavaScript: view model per widget (optional).
- CSS: styles for the widget, which can be pure CSS or Less.
- Locale resources: translation resources per locale for the widget.
- Images: images used for the widget, which are referenced via the widget asset mappings.
- Metadata: the metadata that describes the widget.
- Elements: small pieces or fragments of functionality for a widget, including a display template snippet and a view model.
- Configurable widget settings: a mechanism for providing configurable widget settings that the page layout designer can use to customize the widget’s behavior on the Design page; for example, a designer might limit the number of products displayed on a “Related Products” widget.
- Configuration: a default configuration may be delivered with the widget.
Widget Structure
Widgets are added to an extension’s structure in a /widget directory that is at the same level as the extension’s ext.json file. Each widget should have its own child directory in the /widget directory. The following example shows the directories and files that may be included for a widget:
<extension-name> : the root folder of your extension
ext.json
widget/
<widget-name>/
widget.json
templates/
display.template
js/
<widget-name>.js
less
widget.less
locales/
<locale code, for example, en or en_US>/
ns.<widget-name>.json
<other locale codes>/
ns.<widget-name>.json
images/
The basic structure required for a widget to pass validation in an upload is:
<extension-name>
ext.json
widget/
<widget-name>/
widget.json
With the exception of global widgets, which we describe in more detail below, all widgets require a template file, titled “display.template,” in the /widget/<widget-type>/templates directory. The template is rendered within the context of the widget and should be written as straight HTML with no surrounding script tag. All knockout bindings and behavior are available in the HTML template code:
<extension-name> : the root folder of your extension
ext.json
widget/
<widget-name>/
widget.json
templates/
display.template
Widget.json Metadata File
Much like the ext.json file defines metadata for an extension, a widget.json file defines metadata for a widget. (More details on this are available at widget.json file rules.) An example of a widget.json file is provided below:
{
"version": 1,
"global": false,
"javascript": "widget-name-js",
"i18nresources": "widget-name",
"availableToAllPages": true,
"jsEditable": true,
"config": {
},
"translations" : [
{
"language": "en",
"name": "Name in English"
},
{
"language": "de",
"name": "Name in German"
}
]
}
Global Widgets and Local Widgets
You may create both global and local widgets. Global widgets are loaded within each page and only need a JS file rather than a template file, whereas local properties apply only to specific instances of widgets. To define a widget as global, set “‘global’ : true” in the widget.json file.
Widget Page Types
Widgets may be placed in all page types or just specific page types. To make a widget available in all pages, set “‘availableToAllPages’: true” in the widget.json file; otherwise, omit this property and set the “pageTypes” property in the widget file. The available page types are:
- product
- category
- home
- cart
- checkout
- confirmation
- article
- error
- searchResults
- noSearchResults
Note that if the widget is global, you must define the page type and omit the “availableToAllPages” property.
Global Widgets to Multiple Sites - REST API
By default, global widgets apply to all sites in your Commerce Cloud instance. You may override this default and assign a global widget to be used on only specified sites. To do this, you must issue a POST request using the ‘updateSiteAssociations’ custom action of the widgetDescriptors resource and provide a list of sites in a sites property.
For example, the following request updates myGlobalWidget to execute on siteA and siteB only:
POST /ccadmin/v1/widgetDescriptors/<widget-name>/updateSiteAssociations
{
"sites": ["siteA", "siteB"] // to remove site associations, define as []
}
Javascript Code in Widgets
To add JavaScript code to a widget, you must create a JavaScript file under the <extension-name>/widget/<widget-type>/js directory. The name of the JavaScript file must match the value of the javascript property in the widget.json file, minus the .js extension. The convention is to use the “widget-type” as the JavaScript file name without the .js suffix.
The Javascript file will perform some logic and return an object with extensions to the widget’s view model. The JavaScript file should be in the following format using RequireJS. The module must be defined anonymously. In other words, as shown below, it must not have a package name defined in the module:
define(
// Dependencies
['jquery', 'knockout'],
// Module Implementation
function($,ko) {
'use strict';
var SOME_CONSTANT = 1024;
var privateMethod = function () {
// ...
};
return {
// Widget JS available
// Some member variables...
textInput: ko.observable(),
// Some public methods...
doSomethingWithInput: function () {
//...
}
}
});
Widgets Versioning
Oracle Commerce Cloud allows for multiple versions of a widget. The first version should have the following structure:
<extension-name>
ext.json
widget/
<widget-name>/
widget.json
Subsequent versions should have the following structure:
<extension-name>
ext.json
widget/
v2
widget.json
Conclusion
In today’s article, we provided a brief introduction to the structures of extensions and widgets and showed how to create and customize them in Oracle Commerce Cloud. OCC makes it easy for e-commerce companies to quickly design a highly stable, functional, and customizable platform for enhanced business operation. At Avenue Code, we’ve built several specialized platforms from scratch, but we’re also adept at helping you quickly adopt the stable infrastructure and preexisting capabilities of Oracle Commerce Cloud while customizing your implementation to accurately represent your brand.
Appendix A: Site Settings
An extension can contain site settings, which are configurable parameters that are globally accessible to the storefront code. Site settings are added to the site view model and are available for use by all widgets. Site settings allow you to create a single setting that controls a feature across multiple widgets. Site Settings files
A site settings extension creates a custom settings panel in the administration interface after it has been uploaded. This panel allows merchandisers to configure the settings. (To see a site settings panel, go to the “Settings” page and click the name of the site settings extension under “Extension Settings.”)
Site settings are defined using a JSON-based schema. To add site settings to your storefront, add the following files to your directory structure:
<extension-name> : extension root directory
ext.json
config/
<settingsID>/ : site settings root directory
config.json
locales/
en_US.json
fr_FR.json
The resource bundles for site settings are stored in locale files under the /config/locales directory and look similar to the following:
{
"resources" : {
"enabledHelpText": "Enable the cart message.",
"enabledLabel": "Cart Message",
"couponHelpText": "Define the coupon name.",
"couponLabel": "Coupon",
"minSpendHelpText": "Define the minimum spend amount for the coupon.",
"minSpendLabel": "Minimum Spend",
"sizeHelpText": "The size of the banner.",
"sizeLabel": "Banner Size",
"sizeSmallLabel": "Small",
"sizeMediumLabel": "Medium",
"sizeLargeLabel": "Large",
"passwordHelpText": "Set the value for API key.",
"passwordLabel": "API Key",
"title": "Sample Site Settings",
"description":"Examples of site settings."
}
}
The structure of a config.json file looks similar to the following:
{
"widgetDescriptorName": "multisiteconfigdemo",
"titleResourceId": "title",
"descriptionResourceId": "description",
"properties": [
{
"id": "enabled",
"type": "booleanType",
"name": "enabled",
"helpTextResourceId": "enabledHelpText",
"labelResourceId": "enabledLabel",
"defaultValue": true
},
{
"id": "coupon",
"type": "stringType",
"name": "coupon",
"helpTextResourceId": "couponHelpText",
"labelResourceId": "couponLabel",
"defaultValue": "SHIP100",
"minLength": 6,
"maxLength": 10,
"required": true
},
{
"id": "minSpend",
"type": "stringType",
"name": "minSpend",
"helpTextResourceId": "minSpendHelpText",
"labelResourceId": "minSpendLabel",
"defaultValue": "100",
"required": true
},
{
"id": "password",
"type": "passwordType",
"name": "password",
"helpTextResourceId": "passwordHelpText",
"labelResourceId": "passwordLabel",
"required": true
},
{
"id": "bannerSize",
"type": "optionType",
"name": "bannerSize",
"required": true,
"helpTextResourceId": "sizeHelpText",
"labelResourceId": "sizeLabel",
"defaultValue": "s",
"options": [
{
"id": "sizeSmall",
"value": "s",
"labelResourceId": "sizeSmallLabel"
},
{
"id": "sizeMedium",
"value": "m",
"labelResourceId": "sizeMediumLabel"
},
{
"id": "sizeLarge",
"value": "l",
"labelResourceId": "sizeLargeLabel"
}
]
}
]
}
Once you add a site setting, you will have access to a new section in “Settings,” as shown below:
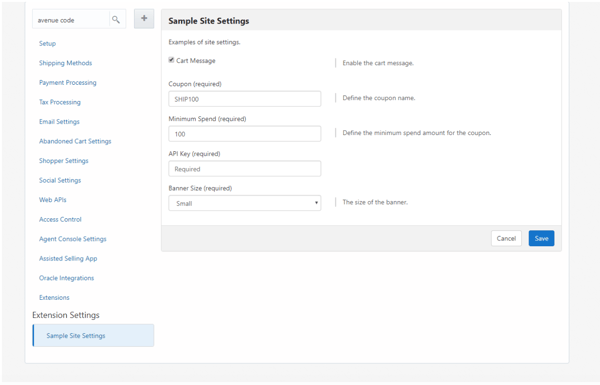
The titleResourceId property specifies a key in the resource bundles that is used to retrieve the title for the panel in the administration interface, e.g. “Sample Site Settings” in the illustration above. The descriptionResourceId property specifies a key for the descriptive text that appears below the title. In the illustration above, this appears as “Examples of site settings.”
The remainder of the config.json file consists of a properties array that defines individual site settings and their key/value pairs. Site settings use the same standard keys as configurable widget settings: id, name, type, helpTextResourceId, labelResourceId, defaultValue, and required. Site settings can also use the same data types that are available to configurable widget settings, e.g. stringType, multiSelectOptionType, and so on.
Site settings can be configured on a site-by-site basis. If your Commerce Cloud instance is running multiple sites, the values a merchandiser specifies in a settings panel apply only to the currently selected site. The merchandiser can then select another site and supply it with different values.
In some cases, a site settings panel may have settings that make sense for certain sites but not for others. In this situation, you can give merchandisers the option of disabling a site settings panel completely for individual sites. To do this, include the following in the config.json file of the extension that creates the panel:
"enableSiteSpecific": true
Appendix B: Reducing the Size of Page Responses
The first time a page loads in Commerce Cloud, the server returns all of the data associated with the specified page layout, including the widget template source, element source, and so on. On subsequent page loads, it is possible to limit the returned data to only those widgets that have not been previously rendered. This feature is not enabled out of the box because you should understand the trade-offs involved before using it.
When this feature is disabled, all of the data for the page is returned and cached for every page call, giving you the performance improvements associated with caching. When the feature is enabled, the system tracks the URLs that have been visited to determine which widgets have not been previously rendered and then limits the returned data to those widgets. Caching all of these URLs is not feasible, however, so caching is turned off when this feature is enabled. Instead, the performance improvements that are gained are driven by the drastically reduced amount of data that is returned from the server. This approach is especially beneficial on mobile devices.
To enable this feature, you must create an extension that uploads an application-level JavaScript module that depends on the cc-store-configuration-1.0.js library and sets the enableLayoutsRenderedForLayout flag to “true.”
In addition to enabling the feature, you may also choose to override the storeLayoutIdsRendered() and getLayoutIdsRendered() methods:
The storeLayoutIdsRendered() method stores IDs for the layouts visited by the shopper until the page is refreshed or the browser is closed. The stored layout IDs let the server know which pages have been cached so it can limit the returned data to new widgets. The number of IDs that the storeLayoutIdsRendered() method stores is determined by the size of the layoutsRenderedArraySize object and is set to 15 out of the box.
You can also choose to override the storeLayoutIdsRendered() method for other purposes, e.g. so that layout IDs are only stored when the store is accessed on a mobile device.
- The getLayoutIdsRendered() method returns the stored layout IDs to the server. You can modify this method so that it ignores certain layouts, effectively disabling the feature for those pages:
define(
//-------------------------------------------------------------------
// DEPENDENCIES //-------------------------------------------------------------------
['ccStoreConfiguration'],
//-------------------------------------------------------------------
// Module definition
//-------------------------------------------------------------------
function(CCStoreConfiguration) {
"use strict";
return {
storeConfiguration: CCStoreConfiguration.getInstance(),
enableLayoutsRenderedFeature: function() {
storeConfiguration.prototype.enableLayoutsRenderedForLayout = true;
}
};
});


