
Ever thought about creating your own Instagram or image filtering application but don't know exactly how to approach it? Have some old C++ code but don’t want to go through all the wrappers? This guide is meant to show some of the basics of image processing in Swift using only UIkit.
Computers use pixels to display images. In general, a pixel (the smallest controllable element in an image) is composed of 3 or 4 colors of varying intensities:
Red, Green, and Blue (RGB)
or
Cyan, Magenta, Yellow, and Black
The number of distinct colors that can be represented by a pixel depends on the number of bits per pixel (bpp). A 1 bpp image uses 1-bit for each pixel, so each pixel can be either on or off. Each additional bit doubles the number of colors available, so a 2 bpp image can have 4 colors, and a 3 bpp image can have 8 colors.
The basic contrast and brightness adjustments are transformations of the form:
𝑓(𝑥)=𝛼𝑥+𝛽f(x)=αx+β
(with the result rounded to an integer and clamped to the range [0,255][0,255]). Here 𝑥x is a color component value (R, G, or B). The slope 𝛼α controls contrast (𝛼>1α>1 means more contrast and 0<𝛼<10<α<1 less contrast). For easier separation of “brightness” and “contrast” modifications, the formula can be written like this:
𝑓(𝑥)=𝛼(𝑥−128)+128+𝑏f(x)=α(x−128)+128+b
where 𝑏b controls brightness.
Now that we have our basics covered, we can dive into the Swift portion!
Let’s grab our image, then take the cgImage of it:

guard let image = UIImage(named: “image”),
      let cgImage = image.cgImage
else { return }
We want to redraw this image with a specific Image Core Graphics Context, so let’s generate what we will need for this:
var colorSpace = CGColorSpaceCreateDeviceRGB()var bitmapInfo: UInt32 = CGBitmapInfo.byteOrder32Big.rawValuebitmapInfo |= CGImageAlphaInfo.premultipliedLast.rawValue & CGBitmapInfo.alphaInfoMask.rawValuelet width = Int(image.size.width)
let height = Int(image.size.height)
var bytesPerRow = width * 4let imageData = UnsafeMutablePointer<Pixel>.allocate(capacity: width * height)
By generating an UnsafeMutablePointer with Pixels (we already know that they are composed of RGB values, as well as an Alpha multiplier), we can manipulate CGContext with information about the size and bitmap (32-bit, big endian format).
guard let imageContext = CGContext(
     data: imageData,
     width: width,
     height: height,
     bitsPerComponent: 8,
     bytesPerRow: bytesPerRow,
     space: colorSpace,
     bitmapInfo: bitmapInfo
) else { return nil }
After generating our CGContext struct, we are ready to redraw the image:
imageContext.draw(cgImage, in: CGRect(x: 0, y: 0, width: width, height: height))
Now, given that the pointer is generated and updated, we can continue to our interface of the buffer by starting at that pointer:
let pixels = UnsafeMutableBufferPointer<Pixel>(start: imageData, count: width * height)
Given this buffer pointer, we can iterate through each pixel to calculate the total individual amounts of RGB pixels:
for y in 0..<height {
     for x in 0..<width {
          let index = y * width + x
          let pixel = pixels[index]          totalRed += Int(pixel.red)
          totalGreen += Int(pixel.green)
          totalBlue += Int(pixel.blue)
     }
}
Now calculate the averages by dividing by the pixel area.
let avgRed = totalRed / pixelArea
let avgGreen = totalGreen / pixelArea
let avgBlue = totalBlue / pixelArea
Finally, we’re ready to manipulate the pixels!
for y in 0..<height {
     for x in 0..<width {
          let index = y * width + x
          var pixel = pixels[index]          let redDelta = Int(pixel.red) - avgRed
          let greenDelta = Int(pixel.green) - avgGreen
          let blueDelta = Int(pixel.blue) - avgBlue          pixel.red = UInt8(max(min(255, avgRed + 2 * redDelta), 0))
          pixel.blue = UInt8(max(min(255, avgBlue + 2 * blueDelta), 0)) .     pixel.green = UInt8(max(min(255, avgGreen + 2 * greenDelta), 0))

          pixels[index] = pixel
      }
}
The above code can be done in any way you want to manipulate contrast. In our case, we simply want to increase the contrast. We can do this by adding a delta with a multiplier of 2 to each of the pixels. Remember the max value is 255, and the min is 0.
Now we can create the CGContext (like we did in the beginning) and use the makeImage() function to generate an image:
guard let newCGImage = context.makeImage() else { return nil }
return UIImage(cgImage: newCGImage)
Let’s see how the output image turned out on the simulator!
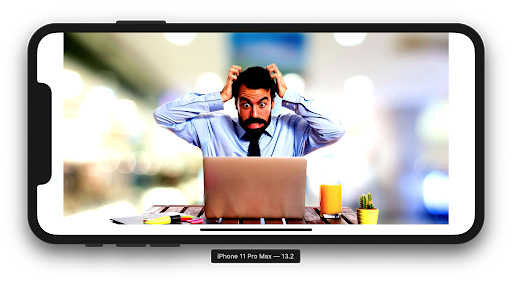 Now that we increased the contrast, we can see darker colors.
Great! Let’s try the reverse by decreasing the contrast by the delta:
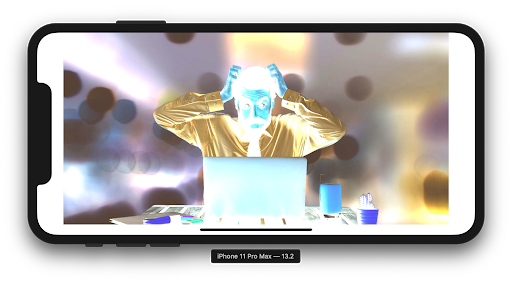 Woah! We created a photo negative!
We decreased the contrast so much that we ended up creating a photo negative.
Let’s try grayscale using this forumla:
𝑦=0.3𝑅+0.6𝐺+0.1𝐵
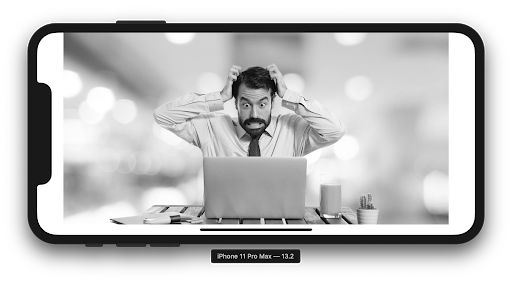 Pretty cool!
With the use of Unsafe pointers and CGContext from Core Graphics, as well as a little bit of tinkering with RGB values, we can achieve anything with image filters in Swift! Congratulations, you now know how to create your very own Instagram image filtering application!
Access to the code is available here.


