
An online catalog organizes your products, SKUs, and collections in a manner reflective of the way users navigate to them in your store. The store contains only one catalog, but that catalog can contain any number of collections, which can contain any number of products and associated SKUs. Does a simple solution exist for creating so many entries?
Today, we'll take a look at how easy Oracle Commerce Cloud makes it to create a product with multiple SKUs. (SKU stands for "stock keeping unit" and represents a purchasable instance of a product in your store.) Our example product is a sneaker that comes in different sizes and colors with prices that vary according to color. We'll also customize the entry so that, when users select the color they want, the proper image will be displayed.
Define the Product Type
Let's begin by defining the product type within our catalog:
- Assuming a collection called "Shoes" exists in the catalog, navigate to "Manage Catalogs" and select "Product Types."
- Write "Sneakers" as the name and click the "Save" button. Two new tabs will appear. Select the "Variant Properties" tab.
- Add the property "Color" (ID color) and add the values "White," "Black," "Yellow," "Green," and "Blue." Check the option, "Allow product images at variant property value level." Save changes.
- Add the property "Size" (ID size) and add the values "8," "8.5," and "9." Don't select any checkboxes. Save changes. Return to your catalog page.
Create the Product and its SKUs
Now that we've added "Sneakers" as a product, let's discuss how to create the product itself with its various SKUs.
- Select the "Shoes" collection and click on "New Product." Select "Sneakers" and a New Product page will open.
- Here we can enter required information and other details, such as a description, the brand, whether the product is active or not, and so on.
- Write "AC Sneaker" as the Name, "ac12345" as the Product ID, and "Avenue Code" as the Brand. Then click the "Active" checkbox. Don't save yet.
- Go to the "Price Groups" tab, click on the "Edit" button of the "Default Price Group" (marked as a required field), and set a $60 list price. Click on "Create."
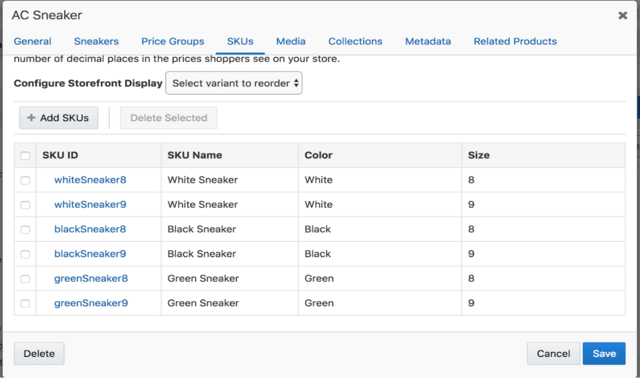
- New tabs now appear in this page. In the SKUs tab, click on "Add SKUs." Here we can select which colors and sizes will be sold. In our case, we have only White, Black, and Green, each in sizes 8 and 9. Select these values and then click "Generate SKUs." This will automatically create all 6 SKU combinations.
- Now, fill in the fields accordingly. For example, type in "whiteSneaker8" for the SKU ID, "White Sneaker" for the SKU Name, "White" for the color, and "8" for the size. Click "Save" and you'll see something like this:
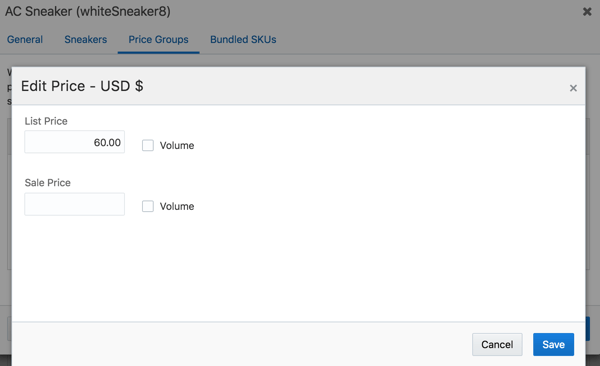
- It's possible to specify different prices for each SKU. We want white sneakers to cost $60.00. Click on "whiteSneaker8" under "SKU ID," then "Price Groups," then "Edit." Finally, set your "List Price" as $60.00.
- Repeat this process for whiteSneaker9.
- Now for the Green sneakers, follow this same process, but set the price as $45.00.
- In the product page, open the "Media" tab. This tab allows you to set specific images for each color. Click on "Always Shown," select "White" as the color, then click "Add Images," then "Upload New," and select an image for that color. Do the same for the other colors. Click "Save Changes" to return to the collection page.
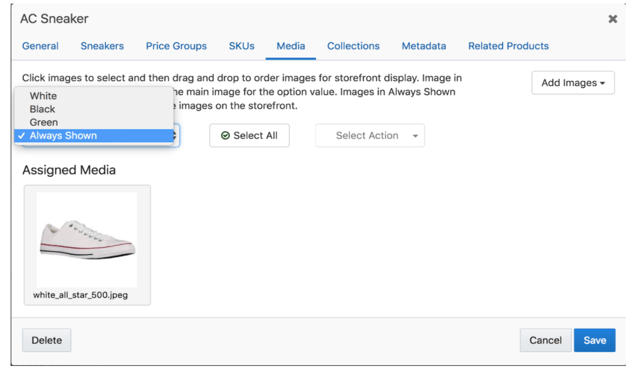
- The images set above will be displayed when the user selects a color. To set a cover image for your product and images that can always be available to the user, add an image to the "Always Shown" option.
Update Inventory
- Now we have our product created with its SKUs, but we still need to set how many of each we have to be sold. To do this, go to "Manage Catalogs" and click on "Inventory." Expand the "AC Sneaker" row and you'll see a page like this:
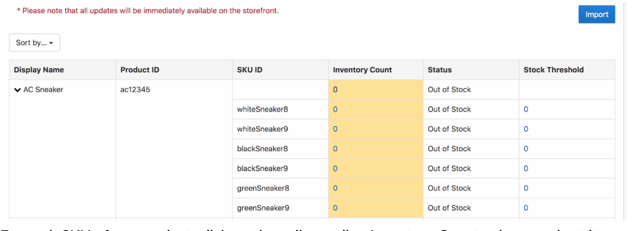
- For each product SKU, click on the yellow cell in the "Inventory Count" column and set the number as "10." The "v" key will save your entries. The "Total Inventory Count" is then updated with the sum of all the SKUs. If you keep these numbers as "0," the SKU will be displayed as "Out of Stock" for a buyer. Changes to the Inventory are reflected in the storefront immediately. (Note that OCC can handle spreadsheet imports to make inventory count updates and other operations easier.)
Shopping Site
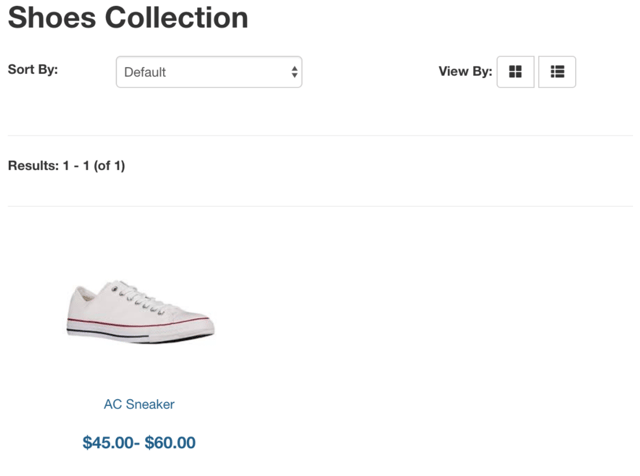
The product we created will be displayed on our site as shown below. Notice that the price range of the SKUs is displayed ($45.00- $60.00).
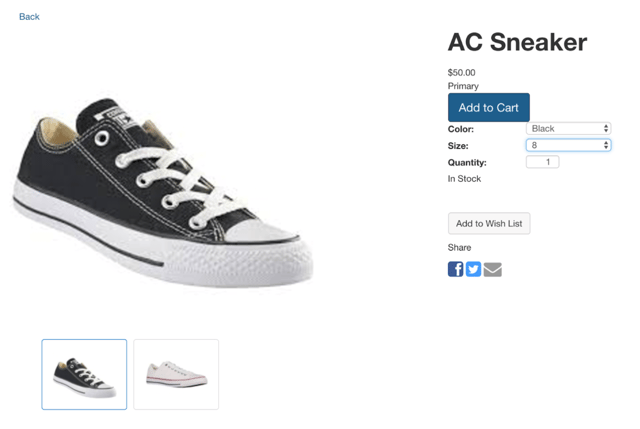
 In the product page, when a buyer selects a color option, the corresponding image will appear. Only when the buyer selects a color and size will the "Add to Cart" option become available.
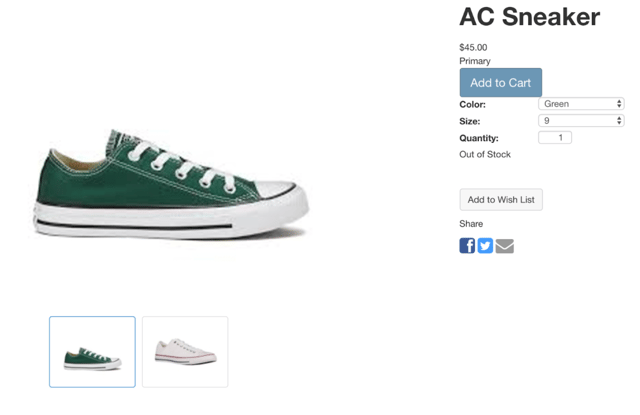
Note too that when the "Inventory Count" of a product is zero, an "Out of Stock" message is displayed and the "Add to Cart" button becomes unavailable.
Conclusion
This is a simple, manual way of creating products with different properties using Oracle Commerce Cloud. It's important to note that the platform offers several functionalities to automate the process of creating products and updating inventory, especially through spreadsheet imports. As this article evinces, OCC is a solution that’s highly-functional out of the box while simultaneously enabling a high level of customization. As many e-commerce companies continue to transform to remain competitive within an ever-evolving technological landscape, Avenue Code has become a preferred systems integrator for premier platforms like Oracle Commerce Cloud due to our expertise with complex, large-scale omnichannel systems. We believe in educating our clients on the unique functionalities that have given them their world-class reputation.


