
Essentially, Visual Regression is a tool for image comparison. It compares the actual page image by loading the page in real time, with a baseline saved image. If there are any pixel differences, the tool shows the result as a failure. These tools allow you to set ignored areas to work with dynamic components, thus, avoiding false negatives.
This is useful when you need to check layout changes that should only impact one spot, such as when you need to do cross browser testing and validate the application across many devices/screen resolutions. Since it's an image comparison, one important thing to keep in mind is to clearly define your screen resolutions on each test. Why? Some responsive sites will have different element arrangements and selectors.
How Does It Work?
Applitools is one of the tools for Visual Regression Testing. It's a paid app, but if you have less than 25 runs a week, it’s free.
Here’s how it works: You code the steps to get to the page you need, using Selenium for example, and do a quick “checkWindow” command to compare the baseline image with the new application version. The first time you run the test, it takes the screenshots and saves them as baselines. From the second time on, it loads the site, takes a new screenshot of it, and compares it to the saved baselines. Now, let’s take a look at an example:
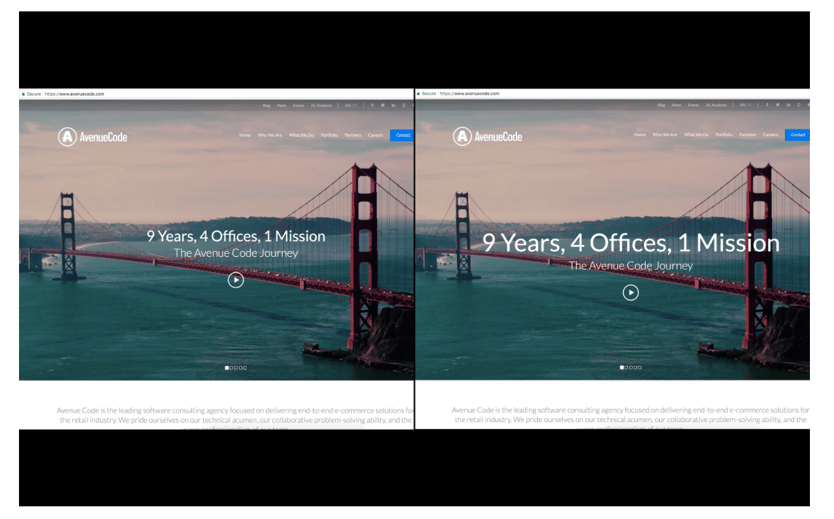
Your team makes a CSS change that should impact only the font-size of the Home Page's title. However, the font-size was accidentally changed on another page as well. You run the visual regression tests to compare the version before the change to the version after the change.
Expected change ("9 Years, 4 Offices, 1 Mission" font-size increased on Home Page):
Unexpected change ("Wish You Were Here" font-size increased on Careers Page):
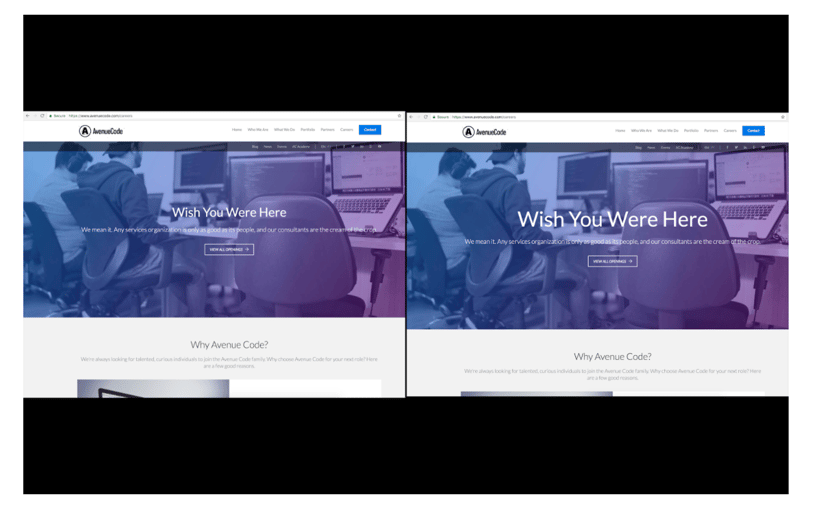
The test will fail for the Home Page, which is expected since you intentionally changed it; however, you can easily update the baseline image to fix that for future runs. The test will also fail for other pages, which is unexpected, and means you caught a bug! The next time you run the test, the Home Page will be fine since you updated the baseline, and the other pages will fail until the team fixes the issue.
We can see that you don't need to test every single page after the change. You also have a one-click action that helps get your tests up to date. Let's see how that works with this tool.
How Do I Set It Up?
We are going to use Node.js + Selenium Javascript for this example. You might want to check here to make sure you have Node.js set.
1. Create a brand new project, or go to an existing one.
To create a new one:
Create a folder: npm init (answer the questions and hit enter)
2. Create an account on https://applitools.com/users/register
3. After logging in, you need to “Run your first test” by choosing the environment of your tests and run the given command (We are using “Selenium Javascript”). Alternatively, you can go here: Applitools Tutorial Page
4. Install Applitools: npm install eyes.selenium --save
5. You'll also want to install selenium webdriver: npm install selenium-webdriver --save
6. Double check your package.json. Here is an example:
{
 "name": "applitools_demo",
 "version": "1.0.0",
 "description": "",
 "main": "index.js",
 "scripts": {
   "test": "node first-test.js"
 },
 "author": "",
 "license": "ISC",
 "dependencies": {
   "eyes.selenium": "0.0.71",
   "selenium-webdriver": "^3.5.0"
 }
}
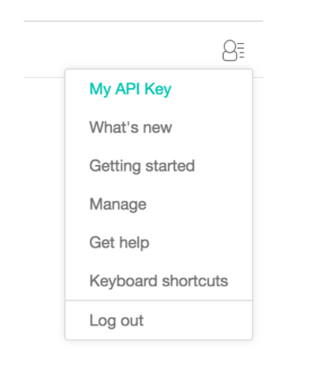
7. Grab your Applitools key by going to My account - My API Key menu on Applitools Test Manager:
 8. Create the file first-test.js (You can take a look on Step 3 from the Applitools Tutorial Page for a better understanding):
function main() {

       var webdriver = require('selenium-webdriver');
       //var path = require('chromedriver').path;

       // Open a Chrome browser.
       var driver = new webdriver.Builder()
           .withCapabilities(webdriver.Capabilities.chrome())
           .build();

       // Initialize the eyes SDK and set your private API key.
       var Eyes = require('eyes.selenium').Eyes;
       var eyes = new Eyes();
       //replace your API Key here:
       eyes.setApiKey('YOUR API KEY');

       // Start the test and set the browser's viewport size to 360x640 - mobile size.
       eyes.open(driver, 'Avenue Code', 'Title check', {width: 1600, height: 900});

       // Navigate the browser to the "hello world!" web-site.
       driver.get('http://localhost:3000/');

       // Visual checkpoint #1.
       eyes.checkWindow('Home Page');

       // Click the "Carrers" icon.
       driver.findElement(webdriver.By.linkText('Careers')).click();

       // Visual checkpoint #2.
       eyes.checkWindow('Carrers');

       // End the test.
       eyes.close();

       // Close the browser.
       driver.quit();

       // If the test was aborted before eyes.close was called ends the test as aborted.
       eyes.abortIfNotClosed();

   }

 main();
9. Download the latest Chromedriver from http://chromedriver.storage.googleapis.com/index.html and include the ChromeDriver location in your PATH environment variable or your project folder.
You’re all set! Now, let's run the first test:
- On a terminal, run webdriver-manager start.
- On another terminal, window run npm run test.
- Go to Applitools Test Manager, and check the results.
- You can check step 4 on the Applitools Tutorial Page for a better understanding.
What Just Happened?
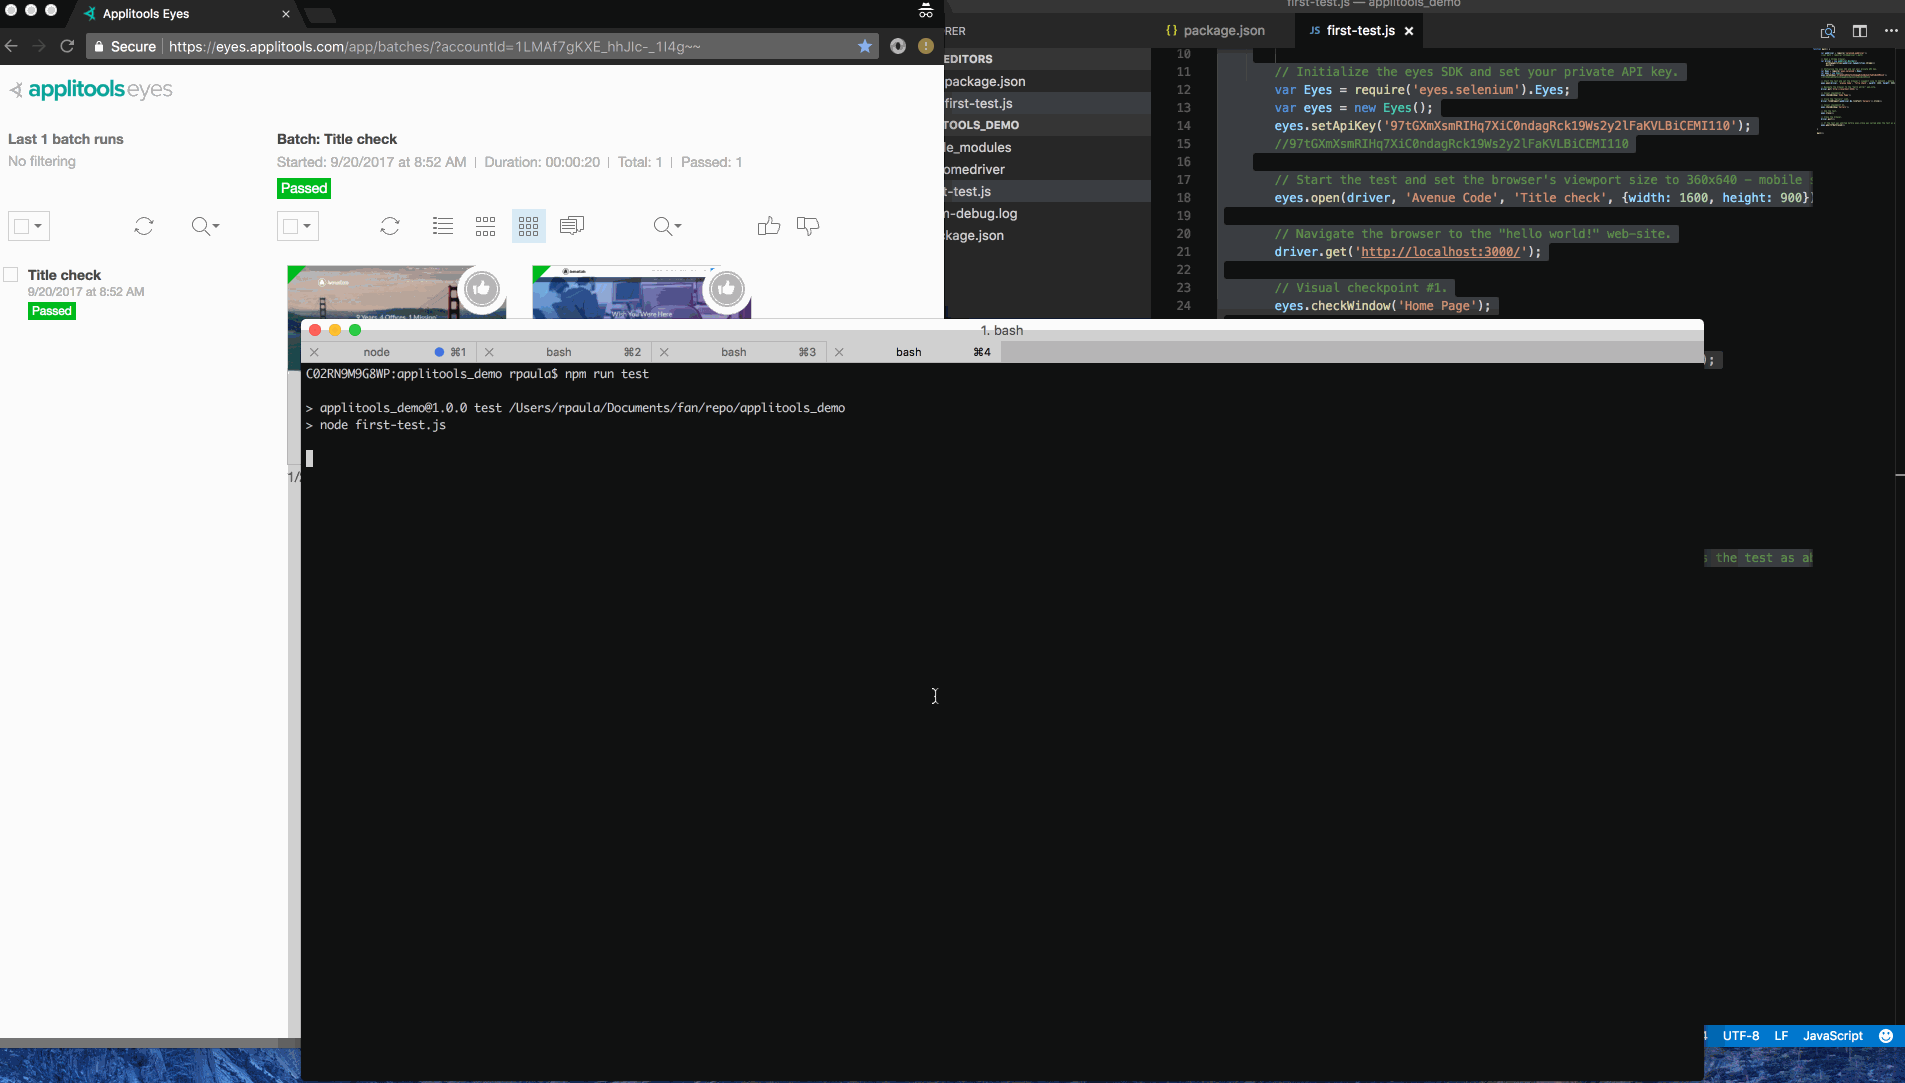
You should have seen the browser loading, the page opening, and all the steps we developed being executed. Go to your Applitools Test Manager to see the results. This first time didn’t really yield any comparisons because there were no baseline images saved, therefore the tool didn't have anything to compare to.
Let's run it one more time: npm run test.
This time, you got passes. That means the baseline images from the first test you ran were successfully saved, and by the time we load the page during the second test, there will be no differences, resulting in the test passing.
I made a change to my local environment, increasing the Home Page title font-size. I ran it again, and here’s what I got as a result:

You can go back to the Applitools Tutorial Page and take a look at step 4 for a better understanding. Great! Now that you have your first test running on Chrome, play with other browsers/devices and see the results.
What Are Some Other Tools?
https://github.com/xebia/VisualReview (seems to have a poor user interface and is more complicated)
http://screenster.io/ (only supported on a few browsers)
https://github.com/webdriverio/webdrivercss (based on webdriverio, but sadly is no longer maintained)
https://percy.io/ (selenium + python)
http://webdriver.io/guide/services/visual-regression.html (an interesting option)
Conclusion
Visual Regression is a great alternative for keeping your application stable from a UI perspective, if you often deal with non-expected layout issues, or, when you have high demand for cross browser testing. Applitools has a great image manager that allows you to quickly and easily maintain the images and see the results. Just keep in mind that it's a paid tool if you need to run it more than 25 times a week. In my next post, we'll go deeper in Applitools and compare results across different browsers. Now, I would love to hear from you! What are your results? What other tools do you guys use for Visual Testing?


