Imagine this scenario: you're responsible for integrating your company’s system with an old system from one of your clients. Every day, just when you think you've achieved it, the client’s system crashes and you have no idea why. You are so disappointed that you don’t even want to get a drink with your friends anymore, you just want to stay home thinking of ways to solve the problem. Well, that was my story - until I found Apache Camel and Apache Wicket.
Apache Camel is a lightweight integration framework. Sometimes, the facing problem is not just about integration, but about showing the user results as well.
Apache Wicket is a web component-based framework on which you can write web pages very easily using only java and html.
In this article I will show you how I used these two amazing tools to solve my problem, get my life back on track and start drinking beer again. Really. They're that good.
Getting started
To start, I'll use Maven to manage the dependencies.
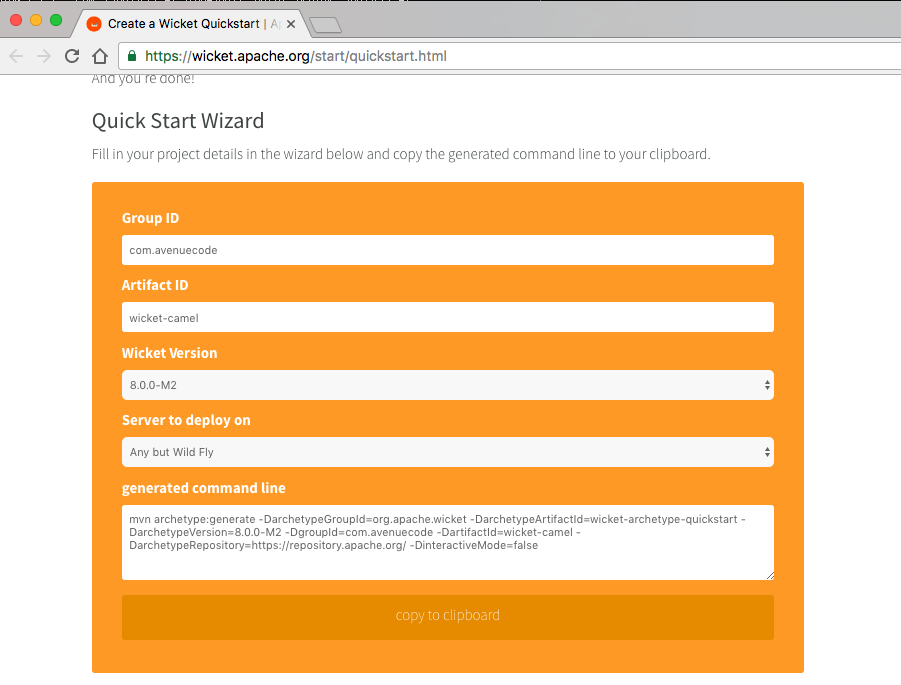
Creating an application in Wicket using Maven is pretty easy. I just needed to find the correct archetype (this page helps a lot), and I’m ready. Running this command will create a new project for me, and I can import it into my favorite IDE as a Maven project:
mvn archetype:generate -DarchetypeGroupId=org.apache.wicket -DarchetypeArtifactId=wicket-archetype-quickstart -DarchetypeVersion=8.0.0-M2 -DgroupId=com.avenuecode -DartifactId=wicket-camel -DarchetypeRepository=https://repository.apache.org/ -DinteractiveMode=false
I selected the options following this picture:
 This step could take a while, since it will download some dependencies.
To test the recently created application, I ran the com.avenuecode.Start class as a Java application and access http://localhost:8080 in my browser. The result was:
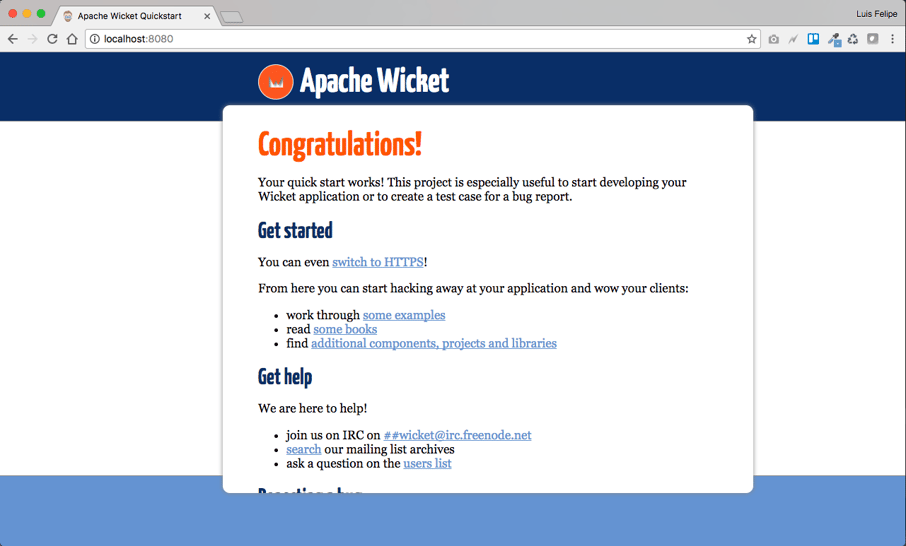
Ok, I have a web application working! Now it’s time to integrate it with Camel.
Integrating Wicket and Camel
To use the best of the two frameworks, I’ll need a third and well-known framework: Spring. Wicket came with its own Spring version, but I faced some compatibility issues here, so I just excluded this dependencies and used a compatible version. In this example, using Wicket version 8.0.0-M2 and Camel version 2.16.0, I’ll use Spring version 4.3.3.RELEASE.
Adding Spring dependency and removing the Spring itself in pom.xml (I need this dependency because Wicket contains specific code for Spring, we just need another version):
<dependencies>
...
        <!-- Integrate Wicket with Spring -->
        <dependency>
            <groupId>org.apache.wicket</groupId>
            <artifactId>wicket-spring</artifactId>
            <version>${wicket.version}</version>
            <exclusions>
                <exclusion>
                    <groupId>org.springframework</groupId>
                    <artifactId>spring</artifactId>
                </exclusion>
            </exclusions>
        </dependency>
...
</dependencies>
To add the dependencies for Spring:
<dependencies>
...
        <!-- Spring framework -->
        <dependency>
            <groupId>org.springframework</groupId>
            <artifactId>spring-core</artifactId>
            <version>${spring.version}</version>
        </dependency>
        <dependency>
            <groupId>org.springframework</groupId>
            <artifactId>spring-context</artifactId>
            <version>${spring.version}</version>
        </dependency>
        <dependency>
            <groupId>org.springframework</groupId>
            <artifactId>spring-web</artifactId>
            <version>${spring.version}</version>
        </dependency>
...
</dependencies>
Camel dependencies:
<dependencies>
...
        <!-- Camel -->
        <dependency>
            <groupId>org.apache.camel</groupId>
            <artifactId>camel-core</artifactId>
            <version>${camel.version}</version>
        </dependency>
        <dependency>
            <groupId>org.apache.camel</groupId>
            <artifactId>camel-spring</artifactId>
            <version>${camel.version}</version>
        </dependency>
        <dependency>
            <groupId>org.apache.camel</groupId>
            <artifactId>camel-http</artifactId>
            <version>${camel.version}</version>
        </dependency>
        <dependency>
            <groupId>org.apache.camel</groupId>
            <artifactId>camel-tagsoup</artifactId>
            <version>${camel.version}</version>
        </dependency>
...
</dependencies>
To better organize our pom.xml, we’ll add these properties:
<properties>
...
        <camel.version>2.16.0</camel.version>
        <spring.version>4.3.3.RELEASE</spring.version>
...
</properties>
Saving pom.xml will organize the dependencies in the IDE.
In case this doesn’t happen automatically, you should update the project inside the IDE).
A good way to see if it's working is to run the com.avenuecode.Start class again and access http://localhost:8080. I saw the same page, so I’m good.
Configuring Spring
The dependencies are fine, but I needed to do a few more steps to really use Spring in Wicket.
First, I needed to create the file applicationContext.xml in WEB-INF folder. This is what it looks like:
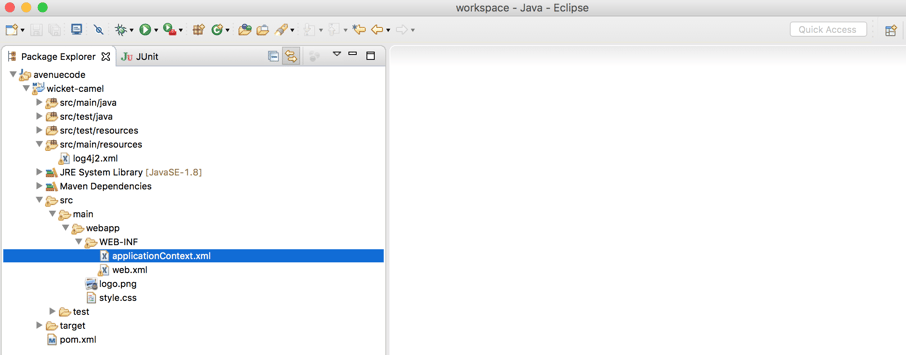
The content for applicationContext.xml is something like this:
<beans xmlns="http://www.springframework.org/schema/beans"
    xmlns:xsi="http://www.w3.org/2001/XMLSchema-instance" xmlns:context="http://www.springframework.org/schema/context"
    xsi:schemaLocation="http://www.springframework.org/schema/beans
http://www.springframework.org/schema/beans/spring-beans-4.3.xsd
http://www.springframework.org/schema/context
http://www.springframework.org/schema/context/spring-context-4.3.xsd">

    <context:component-scan base-package="com.avenuecode.bean" />

</beans>
I needed to add this content to web.xml as well:
<web-app>
...
        <!-- The SpringWebApplicationFactory will need access to a Spring Application
        context, configured like this... -->
    <context-param>
        <param-name>contextConfigLocation</param-name>
        <param-value>/WEB-INF/applicationContext.xml</param-value>
    </context-param>
    <listener>
        <listener-class>org.springframework.web.context.ContextLoaderListener</listener-class>
    </listener>
...
</web-app>
Last step is to “turn on” Spring in our Wicket application, adding this line in init() method in com.avenuecode.WicketApplication:
public void init() {
    super.init();
...

getComponentInstantiationListeners().add(new SpringComponentInjector(this));

...

}
Now, how can I tell if it’s working? As I added com.avenuecode.bean in the component-scan, Spring will search in this package for Spring beans. So I can create one bean to test it:
package com.avenuecode.bean;

import org.springframework.stereotype.Component;

@Component
public class HelloBean {
    public String getHello() {
        return "Hello, Spring!";
    }
}
And then change the com.avenuecode.HomePage to use this bean:
package com.avenuecode;

import org.apache.wicket.markup.html.WebPage;
import org.apache.wicket.markup.html.basic.Label;
import org.apache.wicket.request.mapper.parameter.PageParameters;
import org.apache.wicket.spring.injection.annot.SpringBean;

import com.avenuecode.bean.HelloBean;

public class HomePage extends WebPage {

    private static final long serialVersionUID = 1L;

    @SpringBean
    private HelloBean helloBean;

    public HomePage(final PageParameters parameters) {
        super(parameters);

        add(new Label("version", helloBean.getHello()));

        // TODO Add your page's components here
    }
}
Note that HelloBean is annotated with @SpringBean. This is the annotation that Wicket uses to use the beans in Spring.
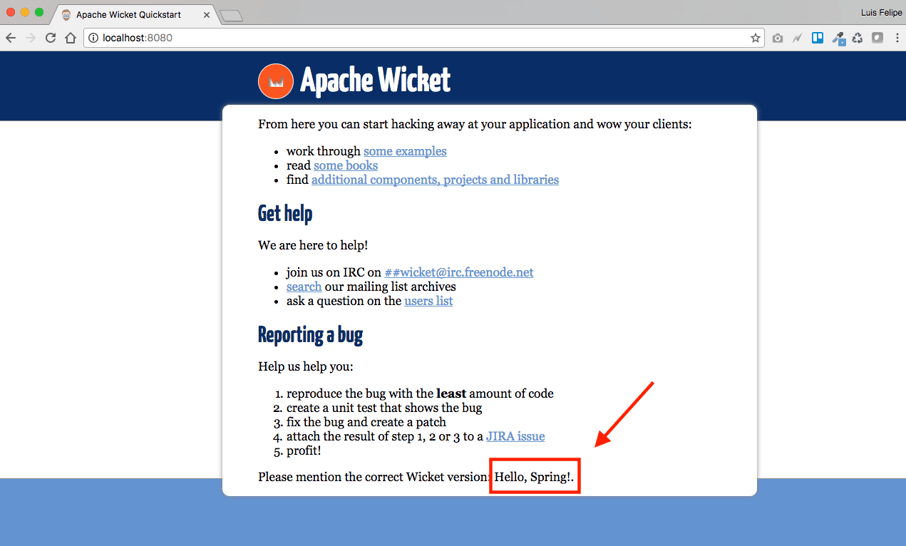
Now let’s check back and see if it’s working. I ran the com.avenuecode.Start, and looked at the bottom of the page. It’s showing "Hello, Spring!" instead of the Wicket version, and Spring and Wicket are working well together!
Ok, Wicket and Spring are running. Now what about Camel?
To setup Camel, I needed to add a camel-context.xml file in the same folder as applicationContext.xml, WEB-INF. In this file, I’ll tell Camel where the folder is to scan that contains the routes to execute. Here is an example:
<?xml version="1.0" encoding="UTF-8"?>
<beans xmlns="http://www.springframework.org/schema/beans"
    xmlns:xsi="http://www.w3.org/2001/XMLSchema-instance"
    xsi:schemaLocation="http://www.springframework.org/schema/beans http://www.springframework.org/schema/beans/spring-beans.xsd
       http://camel.apache.org/schema/spring http://camel.apache.org/schema/spring/camel-spring-2.15.2.xsd">

    <camelContext xmlns="http://camel.apache.org/schema/spring">
        <packageScan>
            <package>com.avenuecode.route</package>
        </packageScan>

    </camelContext>
</beans>
To configure Camel in Spring, I just added <import resource="camel-context.xml" /> into applicationContext.xml.
<beans xmlns="http://www.springframework.org/schema/beans"
    xmlns:xsi="http://www.w3.org/2001/XMLSchema-instance" xmlns:context="http://www.springframework.org/schema/context"
    xsi:schemaLocation="http://www.springframework.org/schema/beans
http://www.springframework.org/schema/beans/spring-beans-4.3.xsd
http://www.springframework.org/schema/context
http://www.springframework.org/schema/context/spring-context-4.3.xsd">

    <import resource="camel-context.xml" />

    <context:component-scan base-package="com.avenuecode.bean" />

</beans>
To see everything working (at least to see it working on the console), I also changed the root level from WARN to INFOinside log4j2.xml, like this:
...
    <Root level="INFO">
      <AppenderRef ref="CONSOLE"/>
    </Root>
...
The last step was to create a Camel route to move from a specific directory to another one.
package com.avenuecode.route;

import org.apache.camel.builder.RouteBuilder;

public class FileRouteBuilder extends RouteBuilder {
    @Override
    public void configure() throws Exception {
        from("file:src/data")
                .log("Message received!")
                .to("file:target/messages");
    }
}
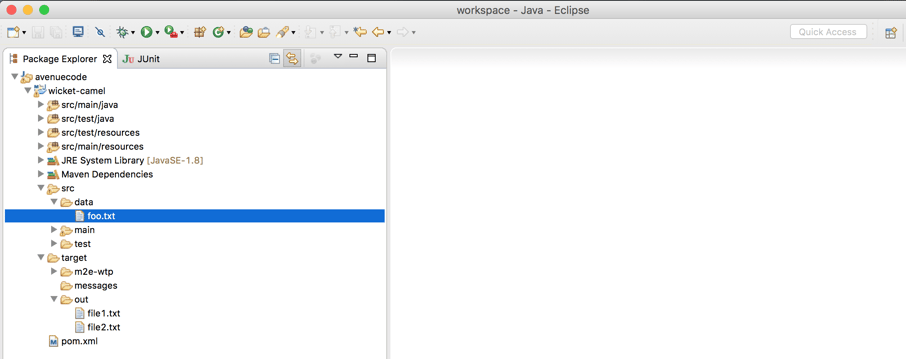
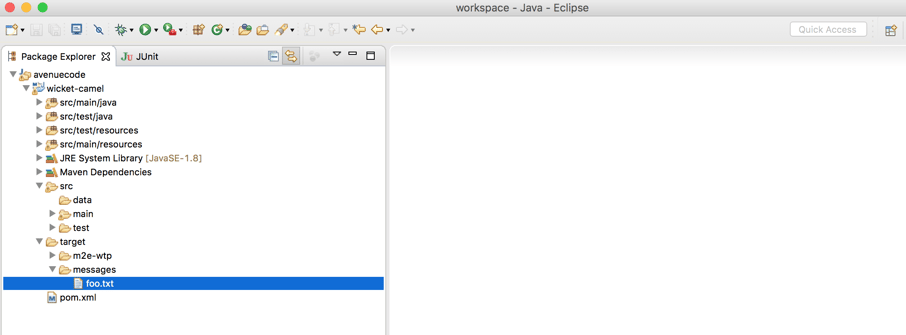
Running com.avenuecode.Start again, I could see Camel in action. Then, I moved a file to the directory src/data. The file was moved to target/messages, and the console displayed the message: Message received!.
File in src/data folder:
 File should be moved to
 target/messages:
 And the console:

Time to solve the problem!
The problem is pretty similar to what I did before now. The system receives a file in an ftp server and needs to move it to a local folder to be processed. But to make it easier to show, I’ll continue working with local folders, using src/in and target/out. I’ll create another route to process this file, and store the status in memory so I can show it.
To store the status, I can simply create a Spring bean:
package com.avenuecode.bean;

import org.springframework.stereotype.Component;

@Component
public class FileStatus {

    private String status = "UNDEFINED";

    public void ok() {
        this.status = "Ok";
    }

    public void error() {
        this.status = "Error";
    }

    public String getStatus() {
        return status;
    }

    public void setStatus(String status) {
        this.status = status;
    }
}
And the route:
package com.avenuecode.route;

import org.apache.camel.Exchange;
import org.apache.camel.Processor;
import org.apache.camel.builder.RouteBuilder;
import org.springframework.beans.factory.annotation.Autowired;

import com.avenuecode.bean.FileStatus;

public class ProcessFileRouteBuilder extends RouteBuilder {

    @Autowired
    private FileStatus fileStatus;

    @Override
    public void configure() throws Exception {
        from("file:src/in").process(new Processor() {

            @Override
            public void process(Exchange exchange) throws Exception {
                String message = exchange.getIn().getBody(String.class);
                if (message.toLowerCase().contains("error")) {
                    fileStatus.error();
                } else {
                    fileStatus.ok();
                }
            }
        }).log("Message processed!").to("file:target/out");
    }

}
Running com.avenuecode.Start showed in the console what’s happened. If I put a file inside data/in, it will show “Message processed!” and the status will be changed in memory. But I can’t show the console to the user, right?
Creating a page to show the status of the route
I used our initial page, just changing some code in com.avenuecode.HomePage:
package com.avenuecode;

import org.apache.wicket.markup.html.WebPage;
import org.apache.wicket.markup.html.basic.Label;
import org.apache.wicket.request.mapper.parameter.PageParameters;
import org.apache.wicket.spring.injection.annot.SpringBean;

import com.avenuecode.bean.FileStatus;

public class HomePage extends WebPage {

    private static final long serialVersionUID = 1L;

    @SpringBean
    private FileStatus fileStatus;

    public HomePage(final PageParameters parameters) {
        super(parameters);

        add(new Label("status", fileStatus.getStatus()));

    }
}
And the HomePage.html file:
<!DOCTYPE html>
<html xmlns:wicket="http://wicket.apache.org">
    <head>
        <title>Integration status</title>
    </head>
    <body>
        <h1>Integration status</h1>
        <table border="1">
            <tr>
                <th>Integration</th>
                <th>Status</th>
            </tr>
            <tr>
                <td>System X in folder "src/in"</td>
                <td><label wicket:id="status"/></td>
            </tr>
        </table>
    </body>
</html>
Showing the results
Running com.avenuecode.Start and accessing http://localhost:8080 showed this page:
 The status UNDEFINED is because the system hasn't processed any files yet. I can create an example file, called
 file1.txt with random content and move to src/in, and access http://localhost:8080 again.
 After moving to
 src/in, I can check the status. The file was received successfully and I didn't have any errors!
 Creating a
 file2.txt with some error content, I could check the whole power of the integration!
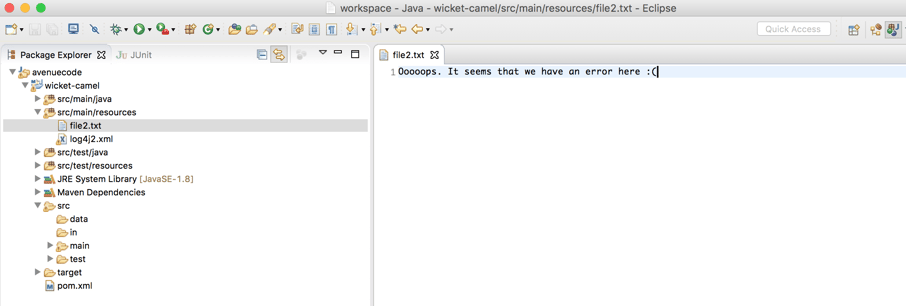
 And now I can check if there are any errors in the integration whenever I want! :D
Conclusion
It didn't take much effort to integrate Camel and Wicket. It’s a simple integration with fantastic results! Try it yourself! This was just one example, but hopefully it conveyed an idea of just how useful these tools can be.
The code used here is available in Github for further reference. Enjoy! :-)
Author
Luis Felipe Volpato Alves
Luis Felipe Volpato Alves is a Senior Software Engineer at Avenue Code. He has 11 years of experience in software engineering and is a Scrum Master wannabe, an entrepreneur, and a musician. He believes in a better world. He does not believe in the impossible.


