
Interested in developing cloud infrastructure and automating repetitive tasks? This blog is for you. Today, we're going to show you how to get Google Cloud Platform and Terraform to work together. Then we'll create a virtual machine in just a few simple steps.
Context
Let’s suppose you need to create many servers, all of which have different memories, disk sizes, and operating systems.
This will take hours to set up, and we might make some mistakes during the process. Fortunately, we have tools like Terraform that allow us to turn a little bit of code into something that can plan, deploy, modify, and destroy all of our systems.
Instead of modifying an existing system using SSH, which is a mutable process, Terraform allows your systems to be rebuilt from a well-reviewed template, validated for correctness, and then deployed if they pass all the required checks.
Now let’s walk through some basic examples, define some important terms, and talk about the benefits of using Terraform.
Here are our basic terms and technologies:
- 1. Terraform: a tool used to turn infrastructure development into code.
- 2. Google Cloud Platform: a cloud-based infrastructure environment.
- 3. Google Compute Engine: a resource that provides virtual systems to Google Cloud Platform customers.
Downloading, Installing, and Configuring Terraform
The first thing you’ll want to do is install Terraform.
If you're working on Linux...
$ wget -q https://releases.hashicorp.com/terraform/0.11.6/terraform_0.11.6_linux_amd64.zip
$ unzip terraform_0.11.6_linux_amd64.zip
$ sudo mv terraform /usr/local/bin/terraform
$ terraform version
If you're working on Mac...
$ brew install terraform
$ terraform version
Downloading Sample GitHub Project
Next, you'll want to download a sample project to create a virtual machine on GCP. Below, we'll explain how to run it.
Clone project locally:
$ git clone https://github.com/thiagofernandocosta/gcp_vm-in-few-steps && cd gcp_vm-in-few-steps
Configuring Our Service Account on Google Cloud Platform
A service account is a way to give granular access to a vendor or someone else. It's really useful when you want to give specific resources to a group or user.
After you create your account on Google Cloud, you should create a service account that will access Google Compute Engine (GCE). This is needed to create and handle a virtual machine.
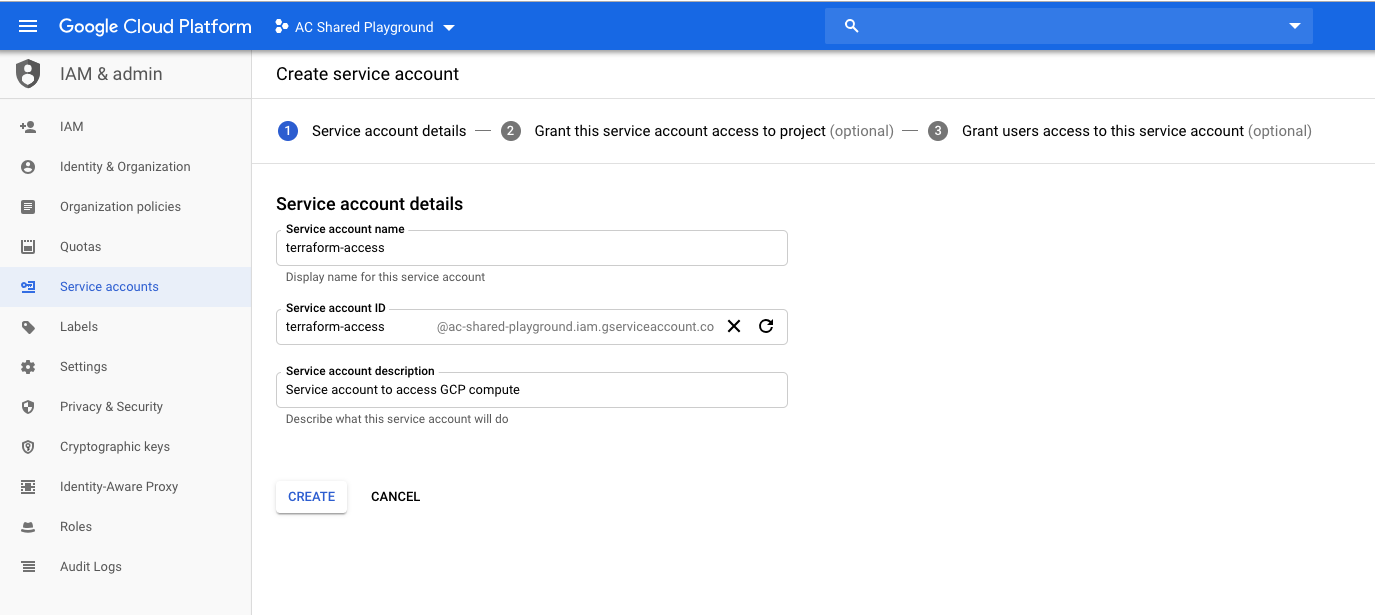
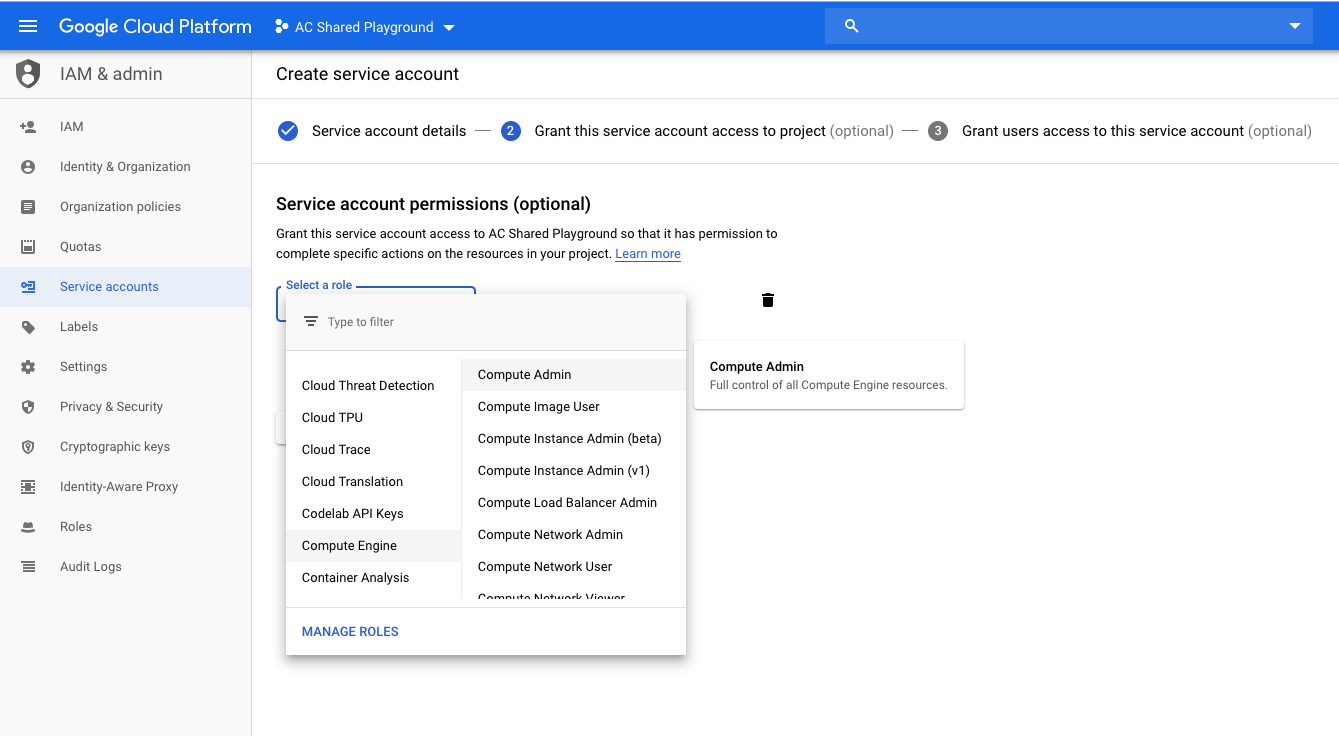
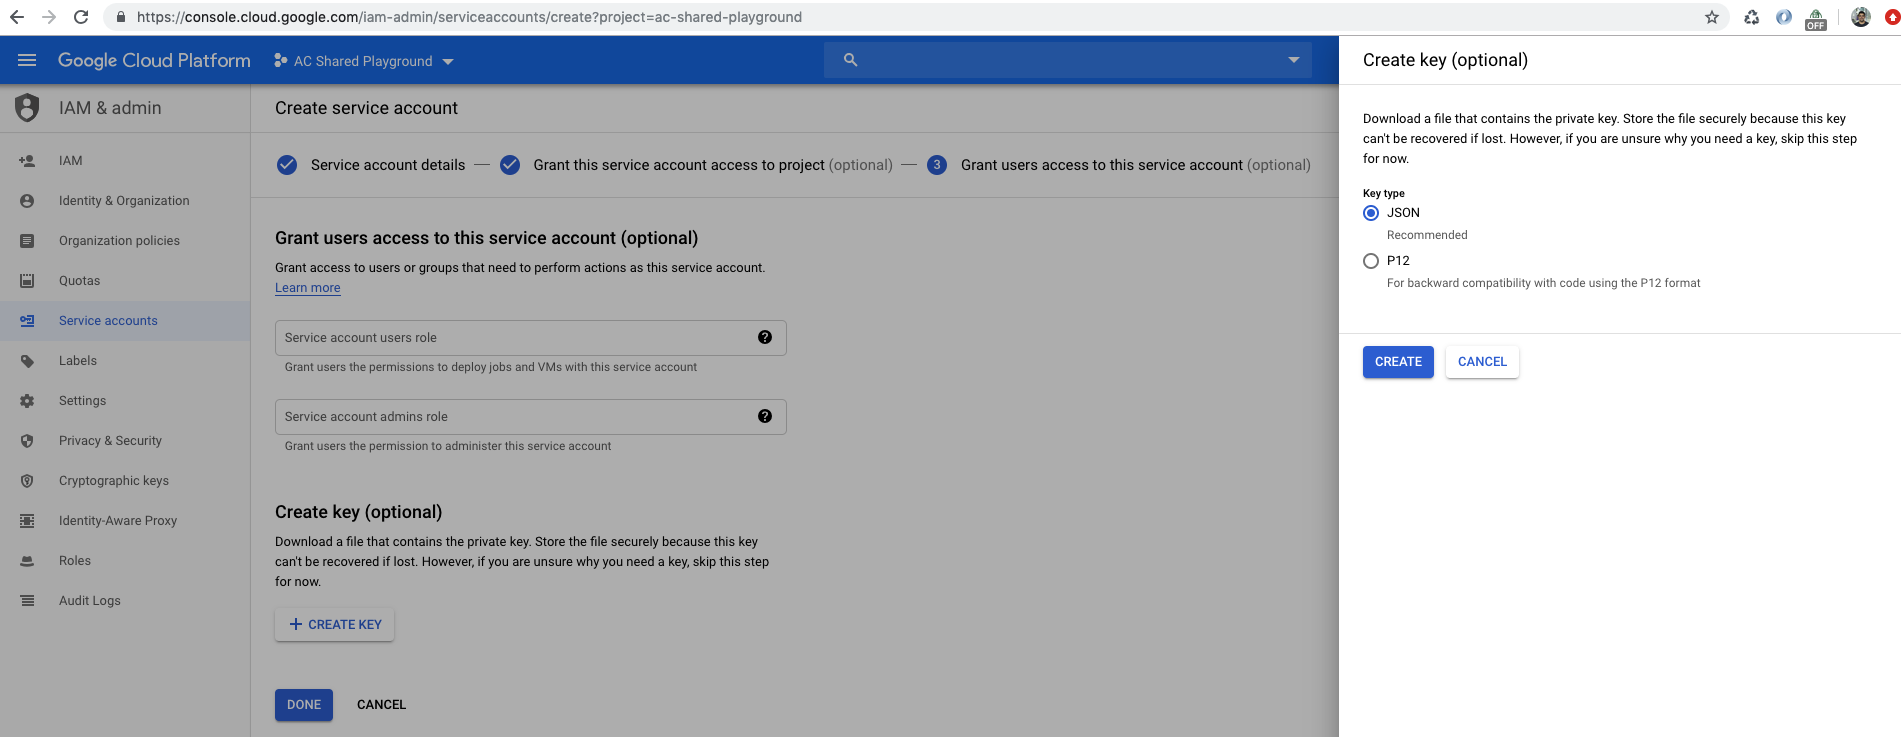
- Create a service account and specify the compute admin role. Then, download the generated JSON file, rename it credentials.json, and save it to your project’s directory (cloned above).
The JSON file you just downloaded should be protected from non-authorized users. This is a private key or password to manage your infrastructure’s resources. For development purposes, we can add a .gitignore file to our project, adding credentials.json so that it’s not versioned to our repository. These steps are shown below:
Creating a Virtual Machine with Terraform
Now we’re almost able to create a virtual machine instance!
Perhaps you noticed that the project cloned above contains files that end in something.tf. These files belongs to Terraform. This name format allows Terraform to know which files to work with when initializing, planning, applying, and destroying.
provider.tf:

This file contains the configurations needed for provisioning a resource on GCP. Notice that credentials.json is not versioned in our project; it was built during previous steps.
create-instance.tf
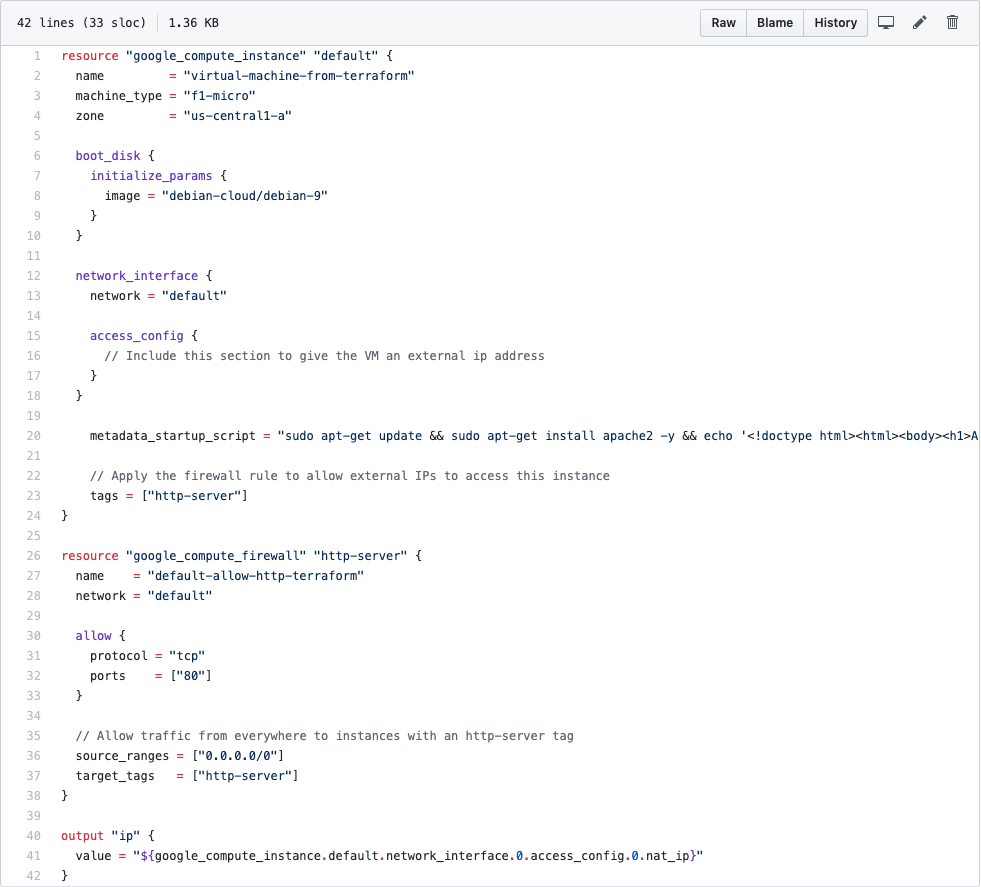 This file contains the resource's configurations on GCP that we want to run.
In the first section
resource "google_compute_instance" "default"
We're describing information about our virtual machine, such as type of image, scripting to execute when bootstrapping, and tags to identity this resource.
In the second section
resource "google_compute_firewall" "http-server"
We're describing information about our firewall and allowing access to a specific port and its protocol. If you noticed, there is information about our target. This target aims all resources that contain this tag. In other words, our virtual machine instance will be accessed through the internet because we allowed this through the firewall configuration.
In the last section
output "ip"
Our output will be an external ip that will print a message configured on metadata_startup_script
You can access further details here.
Let's Get Our Application Up and Running!
- terraform init
This command sets up the environment.
- terraform plan
This command reports which configuration will be applied.
- terraform apply -auto-approve
This command approves the changes automatically and applies the configuration defined on Terraform files.
- terraform destroy -auto-approve
Counteracting the command above, this removes everything created.
Conclusion
Doing things manually is inefficient and can also cause misconfigurations. Terraform provides infrastructure as code in an easier way, has a simple syntax, which helps management, and enables multi-cloud provisioning. I hope this guide has given you a simple example of the principles behind Terraform and how powerful it can be!


