
Working as a programmer you will probably always face doubts about the performance of your applications. Proving that the application you have developed is reliable and has good performance and good memory usage is never an easy task. We do have several tools available from different vendors to help us accomplish this, but the problem is that those tools are never free and they often impact the performance of the application being tested, generating results that are unreliable or downright false.
When developing applications using Java, we can monitor and collect performance indicators with a tool that comes embedded in the official Java Development Kit from Oracle. Oracle’s VM comes with a great tool called Java Flight Recorder, which is responsible for collecting data from the VM running the application and for displaying the data collected in a visually appealing format. We can divide the monitoring of the applications running inside the JVM into a set of two different tools: the Java Mission Control (JMC), and the Java Flight Recorder (JFR).
Java Mission Control - JMC
To understand how the flight recorder works we actually need to start with the Java Mission Control, which is responsible for displaying the data from the current execution of the JVM in real time. The JMC collects the data from the current execution of the JVM through the JMX API, using the default JMX Managed Beans from the JVM.
The Java Management Extensions (JMX) is a default API created to manage and monitor resources inside the JVM. Those resources are exposed through the JMX Managed Beans, which are basically simple java objects registered in a JMX server inside the JVM called MBean Server. Every time that an event monitored by a managed bean occurs, the JVM sends a notification to the respective managed bean which has its attributes changed.
Because the information comes from the JVM and is not obtained in an intrusive way such as intercepting the operations, the impact to the performance caused by monitoring is almost none. By Oracle’s benchmarks, the performance loss caused by the JMX monitoring is less than 1% in the application. Therefore, we can safely ignore the impact when analyzing an application using the JMX beans (for instance, java mission control) to obtain the JVM execution information during the application execution.
The data collected by JMX’s managed beans becomes available when we have a connection to the MBeans server that allows us to retrieve the data collected in real time. To connect to the MBean server, we use MBean agents. The agents are responsible for reading the data from the managed beans and also for setting new parameters for those managed beans. We could use the managed beans to change configurations parameters in real time in the JVM, but this won’t be covered in this post since our focus is the java flight recorder.
The Java Mission Control works as an agent for the managed beans, but instead of just reading the data provided by the JMX, it also gives us a graphical interface to analyze the information about what is happening in the JVM in real time. The JMC is even able to present graphics about the usage of resources in the JVM so we can analyze and take actions in our application.
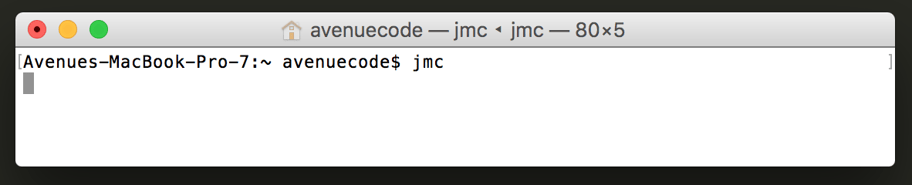
If you have installed the official java development kit from Oracle and you have setted the environment variables in your operating system correctly, then, you can start the java mission control by simply typing the command “jmc” in your terminal.
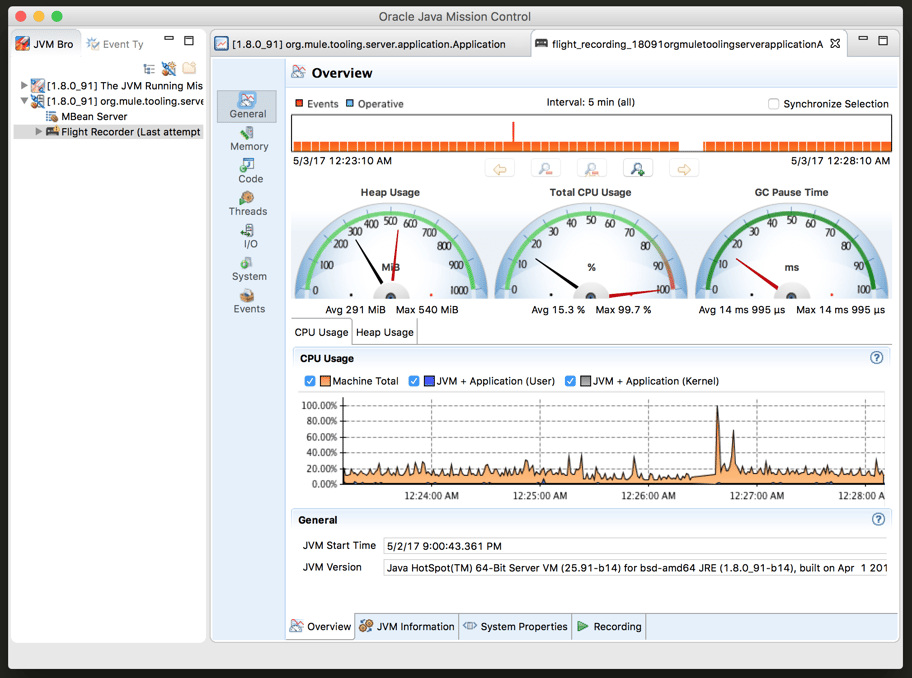
By running the jmc command you will start the JMC interface, and on the left side of the interface you should be able to see all the instances of JVMs running on your machine. Double click the one you want to monitor and double click again on “MBean Server”. This will open the main java mission control page, which should look something like this:
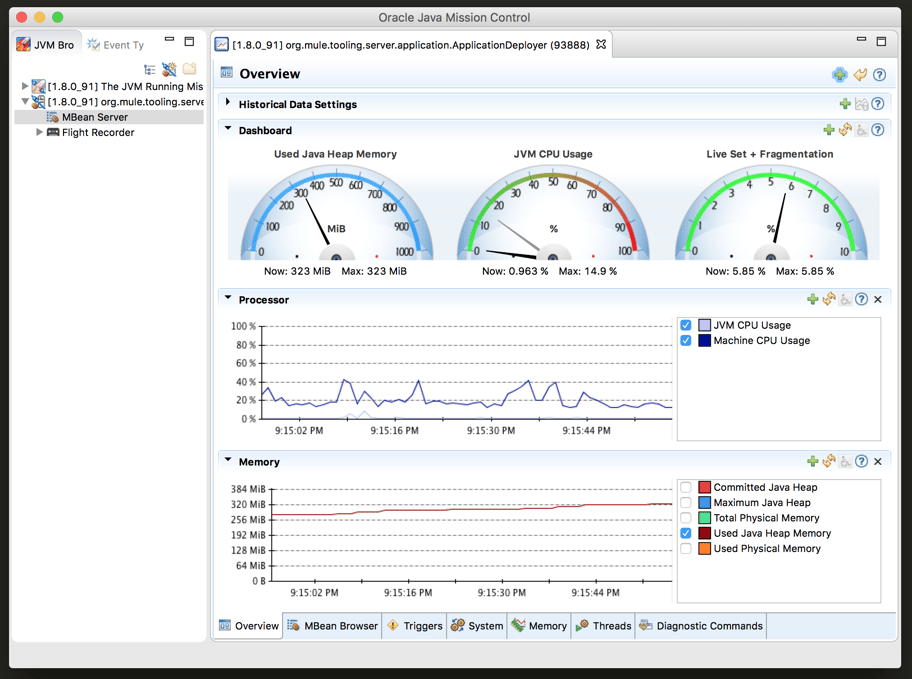
As you can see in the image the JMC generates, it gives us a set of information displayed in a graphical interface and organized by several graphs and gauges, in which all information displayed is really happening in real time inside the JVM.
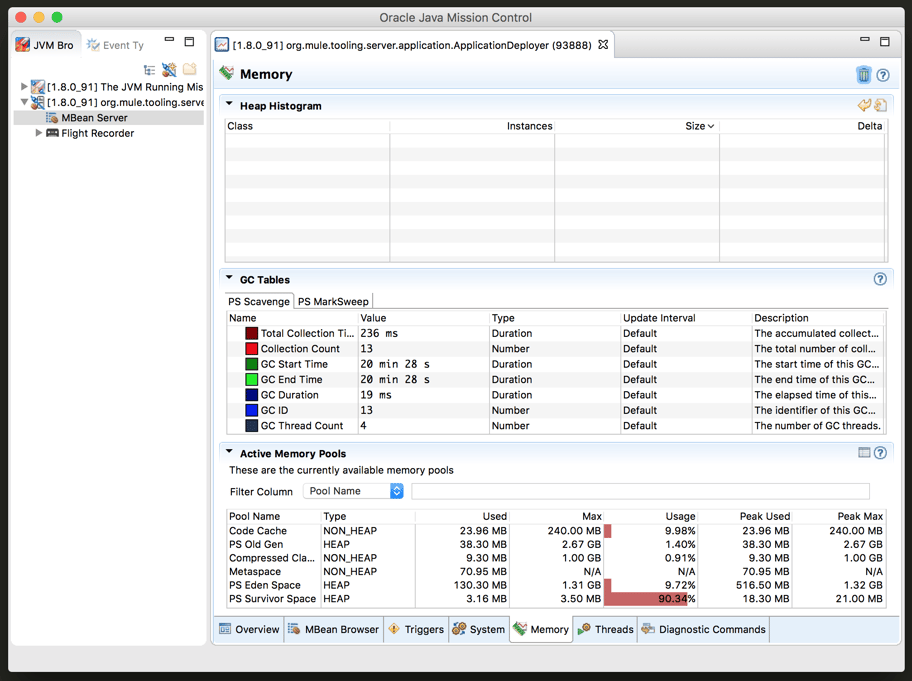
Using the tabs in the bottom of the java mission control you will be able to switch the views to check the most important information that you need. For example, if you are interested in only the memory usage and garbage collections which are currently happening, you can go to the “Memory” tab and it will show you all the information possible regarding the memory consumption and garbage collections happening in the JVM.
Java Flight Recorder - JFR
When we look at all the information that we can get from the Java Mission Control, we attain a vantage point from which we can begin to evaluate what is happening "under the hood" of our applications, and tweak our code accordingly to improve performance and memory usage. The problem with the Java Mission Control by itself is that the data there is being collected in real time and is not saved/archived anywhere. Therefore, we should keep the JMC and the application running to analyze the data from the JMX. We cannot compare two different versions of our code, because once we turn off the application to run our new code we just lose the data collected.
To solve this problem, we can use the Java Flight Recorder to save all the data from the execution inside the JVM. The JFR will save all the fine-grained information that we have in the JMC for a determined period that we can specify. After the execution of the specified window of time, the JFR will generate a simple and self contained file with all the information captured during the execution of the application. In this way, we can analyze the execution saved anytime we want, and conduct comparisons among executions of our application.
To start a java flight recording, we can just right click the “Flight Record” option under the JVM in the Java Mission Control interface and specify the parameters to save the execution the way we want.
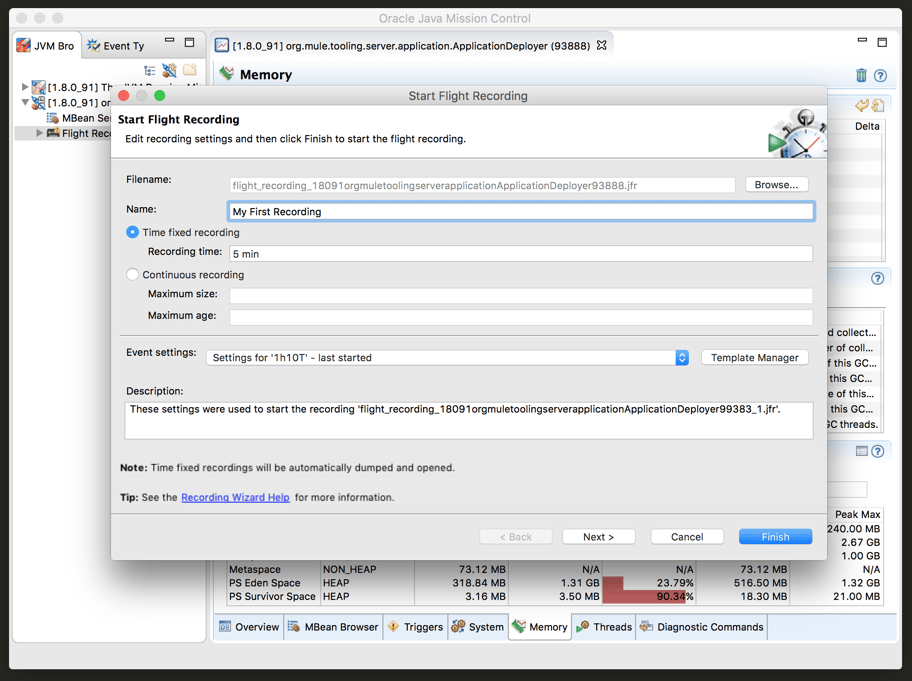
Here, we are simply specifying the name of our flight record and the time that we want to monitor the JVM. If we click the finish button, the flight recorder will monitor everything happening in the JVM for the next 5 minutes and save it to the specified file in the “filename” field.
Afterwards, we can open the file and check everything that happened during the execution of the application by the time we started the flight recorder. Note that the data and gauges from the flight recorder won’t have its values updated like we used to see in the Java Mission Control.
One option when we have a flight record is to analyze is to see what happened during a peak of processing or memory usage. For that we can scroll to the limits in the first panel and reduce the time inside the recording that we want to analyze.
Using the flight recorder we can even check how many threads were running in the application and for how long the threads moved between the possible states. We also could check which java classes have executed to understand where our resources are primarily being consumed. I encourage you to explore by clicking through the tabs of your flight record, and have fun getting to know how your application is using the JVM to process.
Conclusion
The java mission control and the java flight recorder are awesome tools to check how the JVM is handling our code by enabling us to see information about the execution of the applications that we develop in a very fine-grained level of information. Using both tools together, we can improve our code to avoid much bigger problems when we move a production environment.


